Question

Esri Indexed 3D Scene Layer (I3S) - Point Cloud Help


galigis
Enthusiast
Forum|alt.badge.img+16

Hi All,

I’m working on a workbench to help my team to convert E57 point cloud data into SLPK and publish these into a 3D Scene in Portal for GIS. Initially I was converting the E57 into LAS files and then use ArcPro to convert the LAS files into SLPK and upload them into Portal.

Before doing any publishing on Portal I wanted to do a simple test on my machine to makesure the E57 point cloud export fine to my machine,

I have read the slpk can be created in FME by using ‘Esri Indexed 3D Scene Layer (I3S)’ but, for some reason, I can’t get it to work. Below a screenshot of basic workflow that read the E57 and tries to export to slpk….but it doesn’t export anything? there’s no slpk at all, see below:


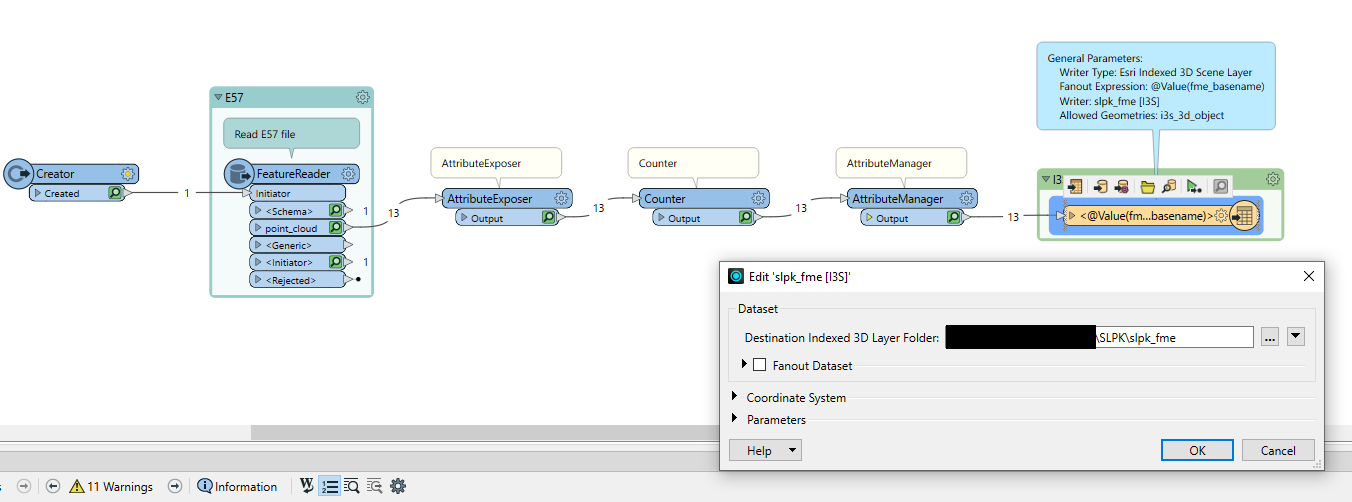
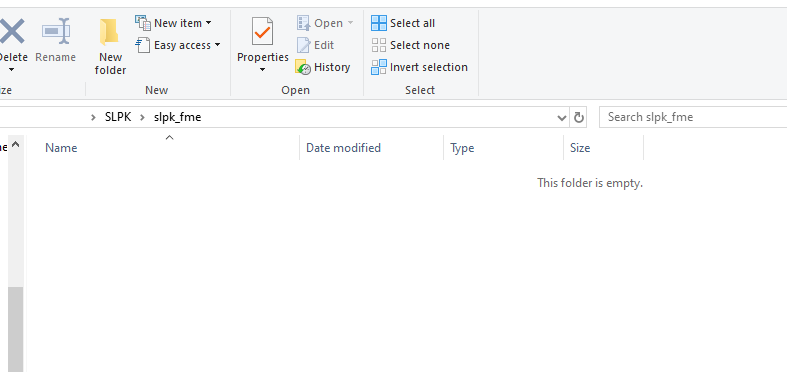
Any ideas if I’m missing something?

Cheers

6 replies

nielsgerrits
VIP

I have had better luck with the ArcGIS Pro workflow. You will need Python, but it is really doable.


galigis
Enthusiast
Forum|alt.badge.img+16
  • Author
  • Enthusiast
  • March 26, 2025

Thanks ​@nielsgerrits  - I assume you mean using a PythonCaller at the end of the workflow?

Would you have any example/guidance/resource to share for creating SLPK with ArcPy & FME? as I have no good experience with ArcPy and FME connectivity.


nielsgerrits
VIP
galigis wrote:

Thanks ​@nielsgerrits  - I assume you mean using a PythonCaller at the end of the workflow?

Would you have any example/guidance/resource to share for creating SLPK with ArcPy & FME? as I have no good experience with ArcPy and FME connectivity.

What I would try:

  • E57 to LAS, FeatureWriter.
  • Add LAS to Scene in ArcGIS Pro Project, PythonCaller.
  • Write LAS to Scene Layer Package, PythonCaller.
  • Upload Scene Layer Package to Portal, PythonCaller.

I do not think I can share anything at this point, but I know a ​@birgit built something similair where scene layers in a webscene are updated based on a AutoDesk Civil3D file.


nielsgerrits
VIP

I did a poc and had something up and running in about an hour. I suspected uploading was the hardest part, so I tried to automate that first but it turned out not to be that difficult. Workbench stopped with an error, but the slpk uploaded to portal no problem. Code needs refinement, but I’m running out of time and will be offline tomorrow. Created parameters for slpk_path, portal_url, portal_username & portal_password.

import fme
import fmeobjects
import arcpy
from arcgis.gis import GIS

class FeatureProcessor(object):

    def __init__(self):
        pass
        
    def has_support_for(self, support_type: int):
        return support_type == fmeobjects.FME_SUPPORT_FEATURE_TABLE_SHIM
  
    def input(self, feature: fmeobjects.FMEFeature):
        
        # Set the path to your SLPK file
        slpk_path = FME_MacroValues['slpk_path']    
        
        # Set your Portal for ArcGIS URL and credentials
        portal_url = FME_MacroValues['portal_url']
        portal_username = FME_MacroValues['portal_username']
        portal_password = FME_MacroValues['portal_password']
        
        # Sign in to Portal for ArcGIS
        gis = GIS(portal_url, portal_username, portal_password)

        # Share the scene layer package (SLPK) to Portal for ArcGIS
        arcpy.management.SharePackage(
        slpk_path,
        '',
        None,
        "Summary",
        "Tags",
        '',
        "MYGROUPS",
        None,
        "MYORGANIZATION",
        "FALSE",
        '')

        print("Scene layer package published successfully to Portal for ArcGIS.")
        
        self.pyoutput(feature)

    def close(self):
        pass

    def process_group(self):
        pass


galigis
Enthusiast
Forum|alt.badge.img+16
  • Author
  • Enthusiast
  • March 28, 2025

Thanks ​@nielsgerrits you gave me a few good tricks. I was able to accomplish the following steps:

  • E57 to LAS, FeatureWriter - DONE
  • --Skipped---Add LAS to Scene in ArcGIS Pro Project, PythonCaller.
  • Write LAS to Scene Layer Package, PythonCaller. - DONE
  • Upload Scene Layer Package to Portal, PythonCaller. 

...I don’t think I need to add the LAS file scene into the Pro project. But I can get the ‘Upload scene layer into Portal’. Thanks for the code but my Portal is a Single Sign On SSO access and don’t need password. I have tried to change the code a few times but the output is empty: there’ no SLPK uploaded or published onto Portal. Here is the code:

import fme
import fmeobjects
import arcpy
import os
import locale
from arcgis.gis import GIS

# Set UTF-8 locale to avoid encoding issues
locale.setlocale(locale.LC_ALL, ".utf8")

class UploadSLPKToPortal(object):
    def __init__(self):
        pass

    def input(self, feature):
        try:
            # Get parameters from FME workspace
            slpk_path = FME_MacroValues['DestDataset_SLPK']  # Path to the SLPK file
            portal_url = FME_MacroValues['PORTAL_URL']  # Portal URL
            portal_folder = FME_MacroValues.get('portal_folder', "")  # Portal folder (empty for root)

            # Debugging Step 1: Print portal URL
            feature.setAttribute("debug_portal_url", portal_url)

            # Sign in to Portal using SSO (no username/password needed)
            arcpy.SignInToPortal(portal_url, "SSO")

            # Debugging Step 2: Verify authentication
            portal_info = arcpy.GetPortalInfo()
            feature.setAttribute("debug_portal_info", str(portal_info))

            # Connect to Portal via ArcGIS API
            gis = GIS(portal_url)

            # Debugging Step 3: Check if GIS connection works
            feature.setAttribute("debug_gis_connected", "YES" if gis else "NO")

            # Upload the SLPK file to Portal
            item_properties = {
                "type": "Scene Package",
                "title": os.path.basename(slpk_path),
                "tags": "SLPK, Scene Layer",
                "description": "Uploaded via FME PythonCaller"
            }
            uploaded_item = gis.content.add(item_properties, data=slpk_path, folder=portal_folder)

            if not uploaded_item:
                feature.setAttribute("status", f"Error: Failed to upload {os.path.basename(slpk_path)}.")
                self.pyoutput(feature)
                return

            # Debugging Step 4: Check if file was uploaded
            feature.setAttribute("debug_uploaded_item_id", uploaded_item.itemid)

            # Publish the uploaded SLPK as a Scene Layer
            feature.setAttribute("status", f"Publishing {os.path.basename(slpk_path)} as Scene Layer...")
            published_service = uploaded_item.publish()

            if not published_service:
                feature.setAttribute("status", f"Error: Failed to publish {os.path.basename(slpk_path)}.")
            else:
                feature.setAttribute("status", f"Success: Published {os.path.basename(slpk_path)} - Service ID: {published_service.serviceid}")

        except Exception as e:
            feature.setAttribute("status", f"Error: {str(e)}")

        self.pyoutput(feature)

    def close(self):
        pass

    def process_group(self):
        pass

...for some reason the code above isn’t able to share or publish the SLPK package onto Portal. Tried multiple times on copilot / chatgpt but couldn’t make it to work.

I’m nearly there to complete the tool...but the upload and publish is still not woking,

Thanks

FYI: I’m using FME(R) 2022.2.5.0 (20230329 - Build 22795 - WIN64)


nielsgerrits
VIP

How I fixed the upload part:

  • Open ArcGIS Pro
  • Analytis tab, open Tools.
  • Look for tool Share Package.
  • Select the slpk created in an earlier step and configure as needed.
  • In the bottom right, click on the arrow next to the Run button and choose Copy Python Command.
  • Implement that snippet in your script.

I created the slpk using the tool Create Point Cloud Scene Layer Content (arcpy.management.CreatePointCloudSceneLayerPackage) and I uploaded and published it using Share Package (arcpy.management.SharePackage). I’m using Pro 2.9.6 at the moment.


Reply


Cookie policy

We use cookies to enhance and personalize your experience. If you accept you agree to our full cookie policy. Learn more about our cookies.

 
Cookie settings