





Happy Friday, and welcome back to Thank Goodness It's FME!
If you've ever found yourself copy-pasting the same chain of transformers across multiple workspaces — or handed off a workspace to a colleague only to hear "wait, what does this section do?" — this week's post is for you. We're diving into custom transformers: FME's built-in way to package up reusable logic, keep your canvas clean, and share your solutions across your organization (or with the whole FME community). Whether you're building something once or running it a hundred times, custom transformers make your workspaces easier to read, easier to maintain, and a whole lot more powerful.
Overview
Complex processes are inevitable in every workplace. Processes grow, people collaborate, and processes need to be run again and again. For everything to run smoothly, workspaces need to be organized and easy to read. For consistent results, workspaces need to be easily repeatable. But no two organizations are the same and processes are often entirely unique to the teams running them. So how do we build workspaces that are both flexible and reliable? Custom transformers give users the freedom to tailor processes to their needs while still offering a no-code solution. Custom transformers are mini workspaces representing some reusable logic that can be shared across your organization, or with other FME users through FME Hub.
In this example, we will create a custom transformer that validates and cleans marker data. You can find the tutorial data used in this scenario at the bottom of this post!
Scenario
A marker dataset contains information such as colour, coordinates, and zone. The Marker column must have a value, the coordinates must be integer values, and the zone must be string. For every colour group, a standard deviation of coordinates needs to be calculated to identify outliers. This needs to be independently calculated for each zone.
The Workspace and Transformers
In FME Form, we can read in the data using the CSV reader. An AttributeValidator transformer can be used to verify the coordinates are integer values and the marker column is populated.
Next, a StatisticsCalculator calculates the mean and standard deviation of the marker coordinates. Two ExpressionEvaluators then use these values to calculate the modified Z-score, which determines whether a point is an outlier. An AttributeManager removes and renames attributes. Finally, a Tester filters out the outliers and writes to a new CSV called CleanData.
Create a Custom Transformer
We are now ready to create a custom transformer. On the canvas, highlight the transformers above -> right click -> select Create Custom Transformer. Name the custom transformer MarkerValidator and select OK.
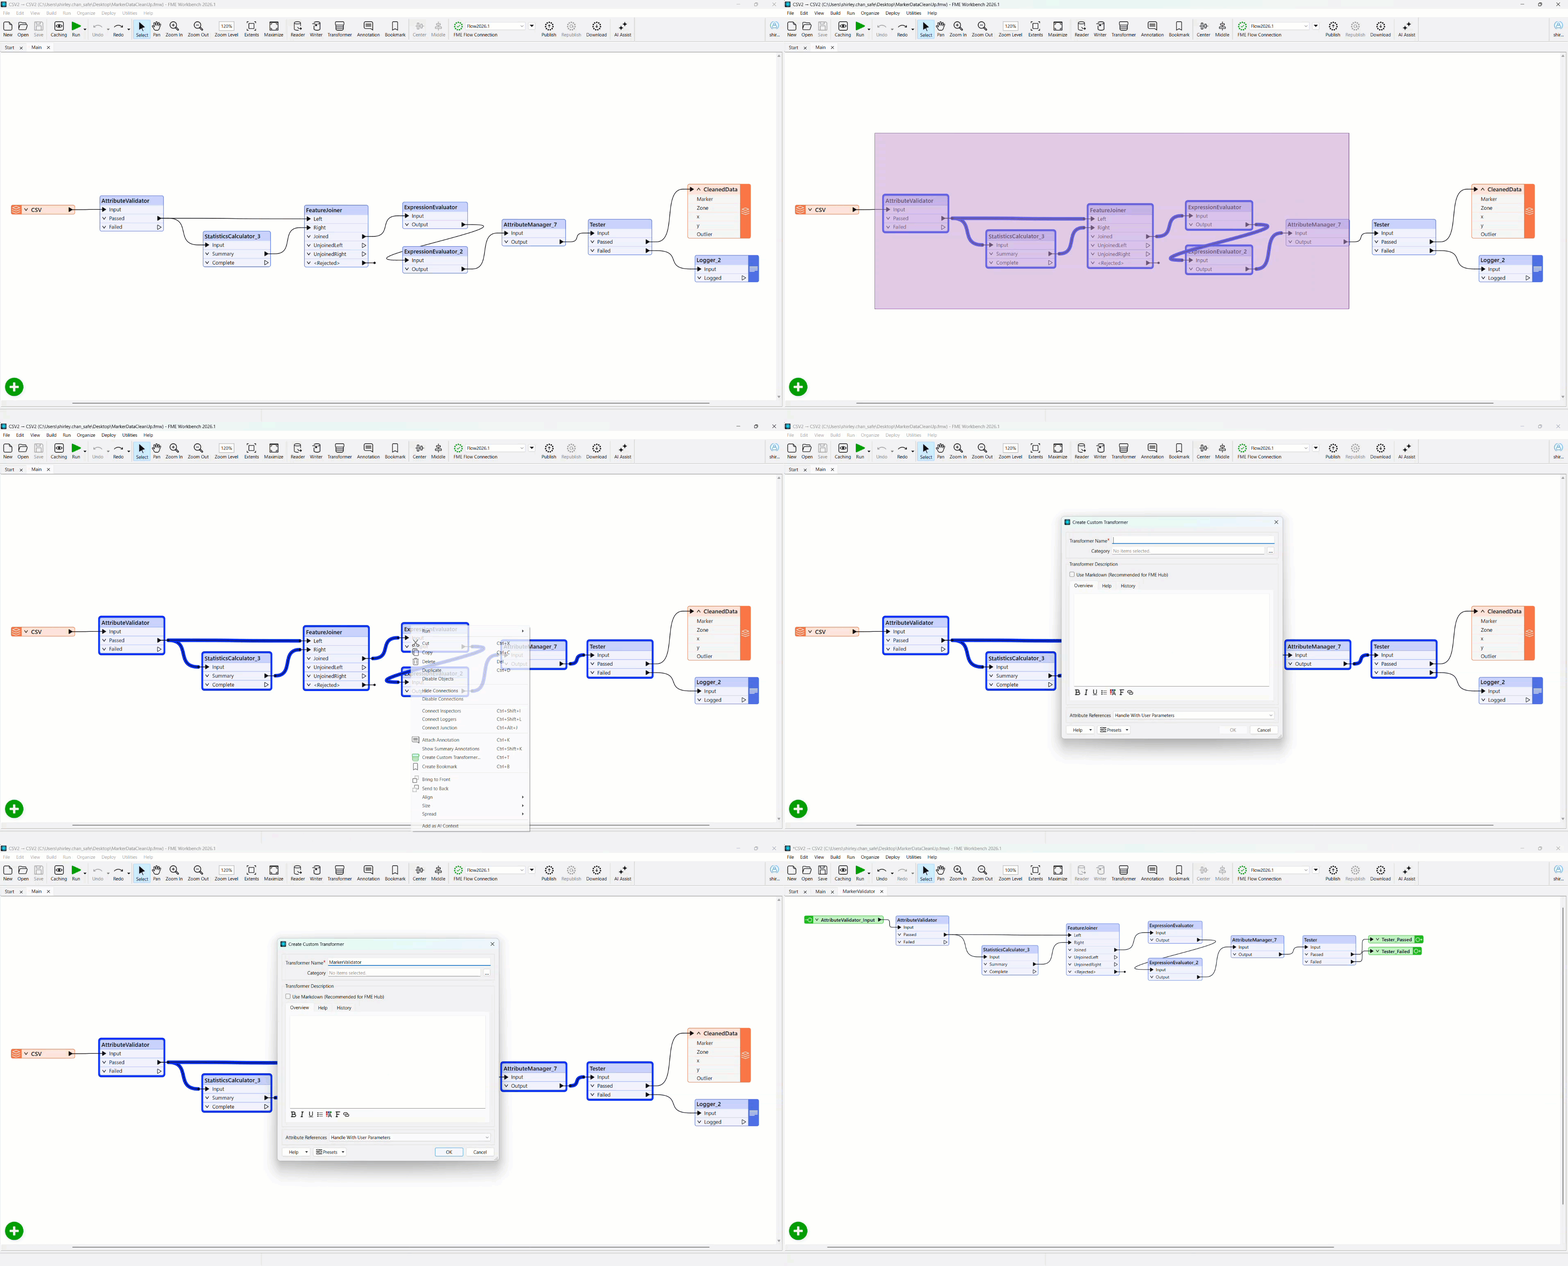
The transformers have now been compressed into a single object in the canvas. To go back and view the transformers, right click the custom transformer and select Edit Embedded Transformer.
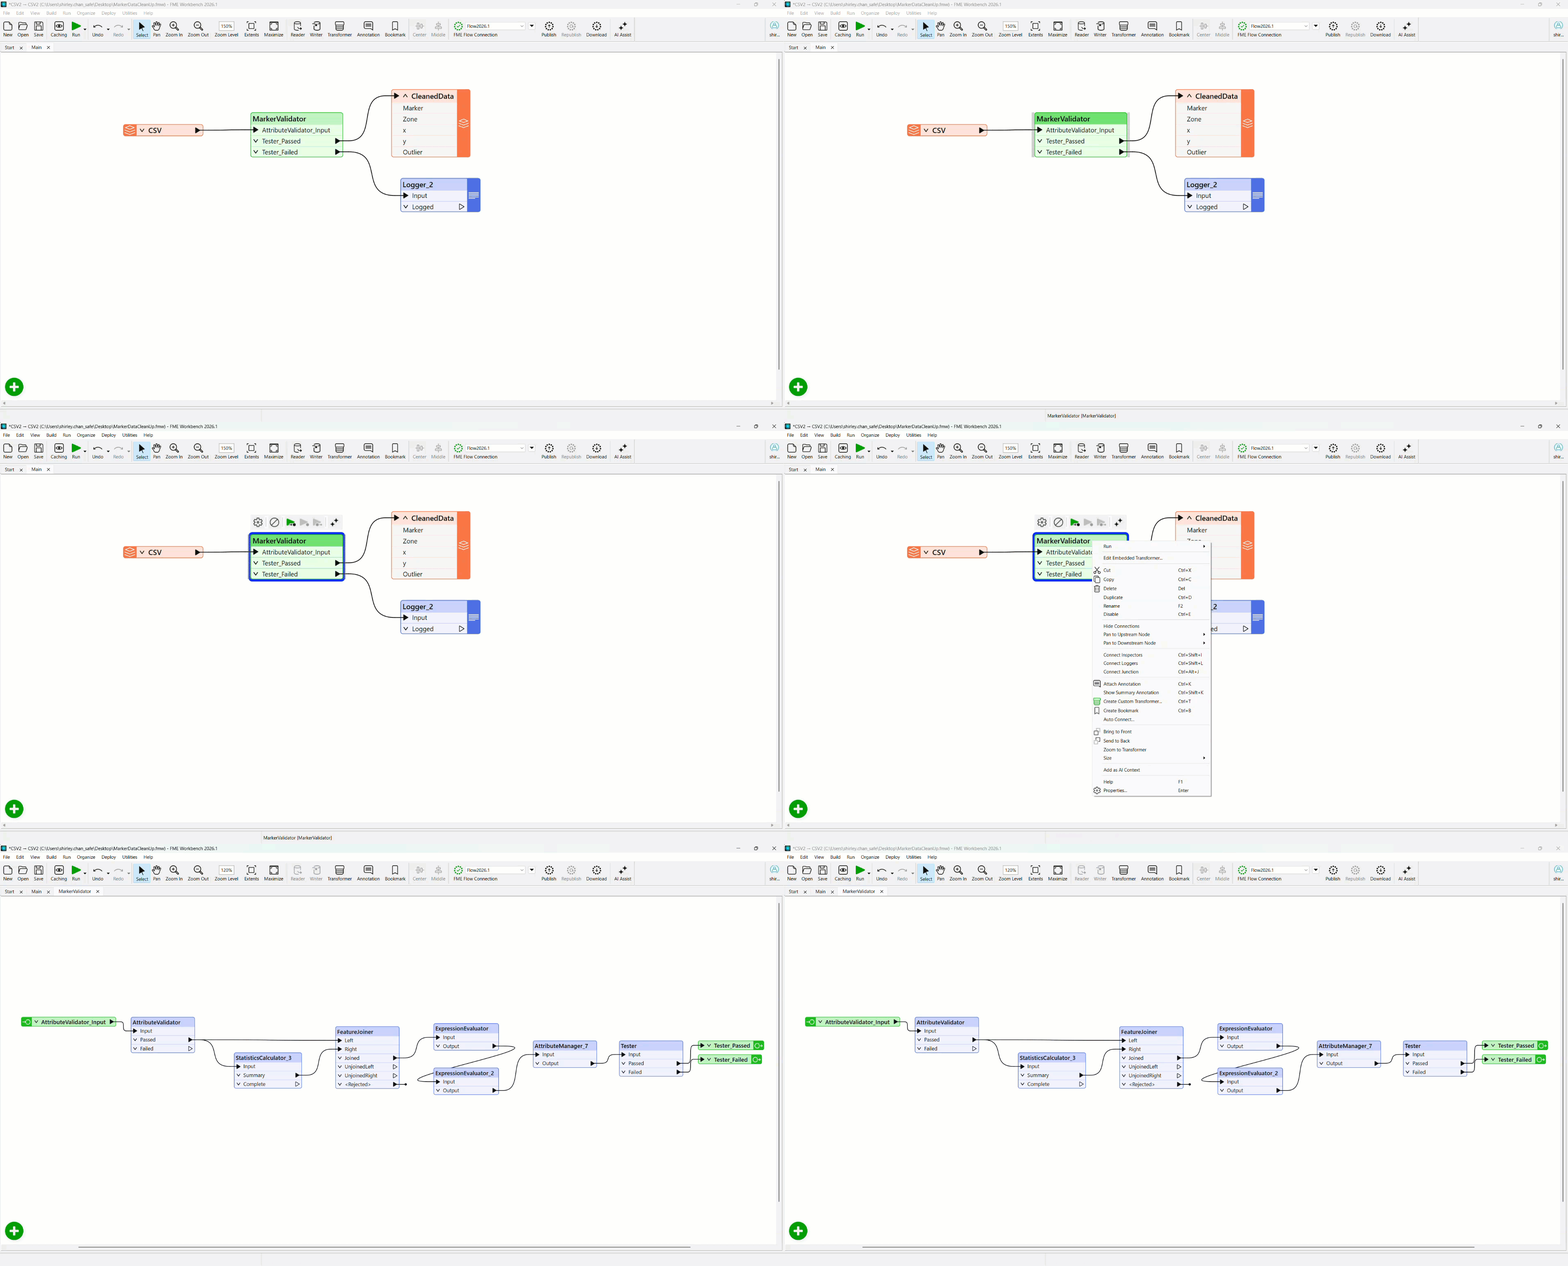
Group By Processing
One of the most powerful features of custom transformers is the ability to use Group By processing. FME transformers can carry out transformations on either one feature at a time, or on a whole set of features at once. In FME, we call this set of features a "group." By default, the group is all features entering the transformer. However, the "Group By" parameter in a transformer can define several groups based on the value of an attribute.
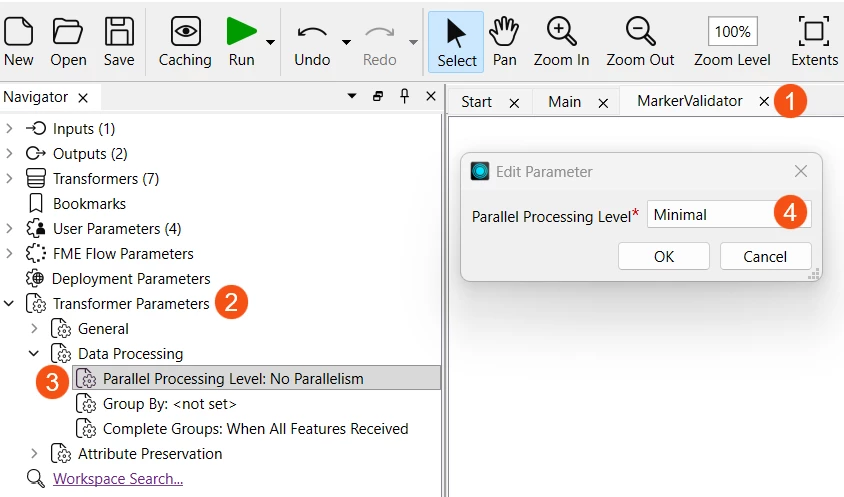
In this example, the MarkerValidator needs to run separately for each Zone, since outlier detection should be relative to the zone a marker belongs to, not the dataset as a whole. To allow for Group By processing, navigate to the MarkerValidator -> Transformer Parameters -> Data Processing -> Parallel Processing Level. In the dropdown list, select Minimal.
Back in the Main tab, right click the MarkerValidator transformer and select Properties. The Parameters window now has a Group By field. Set it to Zone and click OK.
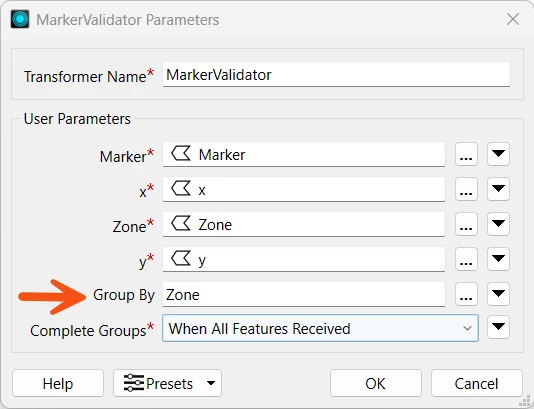
MarkerValidator will now run the validation process in groups instead of individually. Because parallel processing was enabled, large datasets can be divided into multiple worker processes. For more information on this topic, please refer to the Parallel Processing in FME article.
Reuse the Custom Transformer
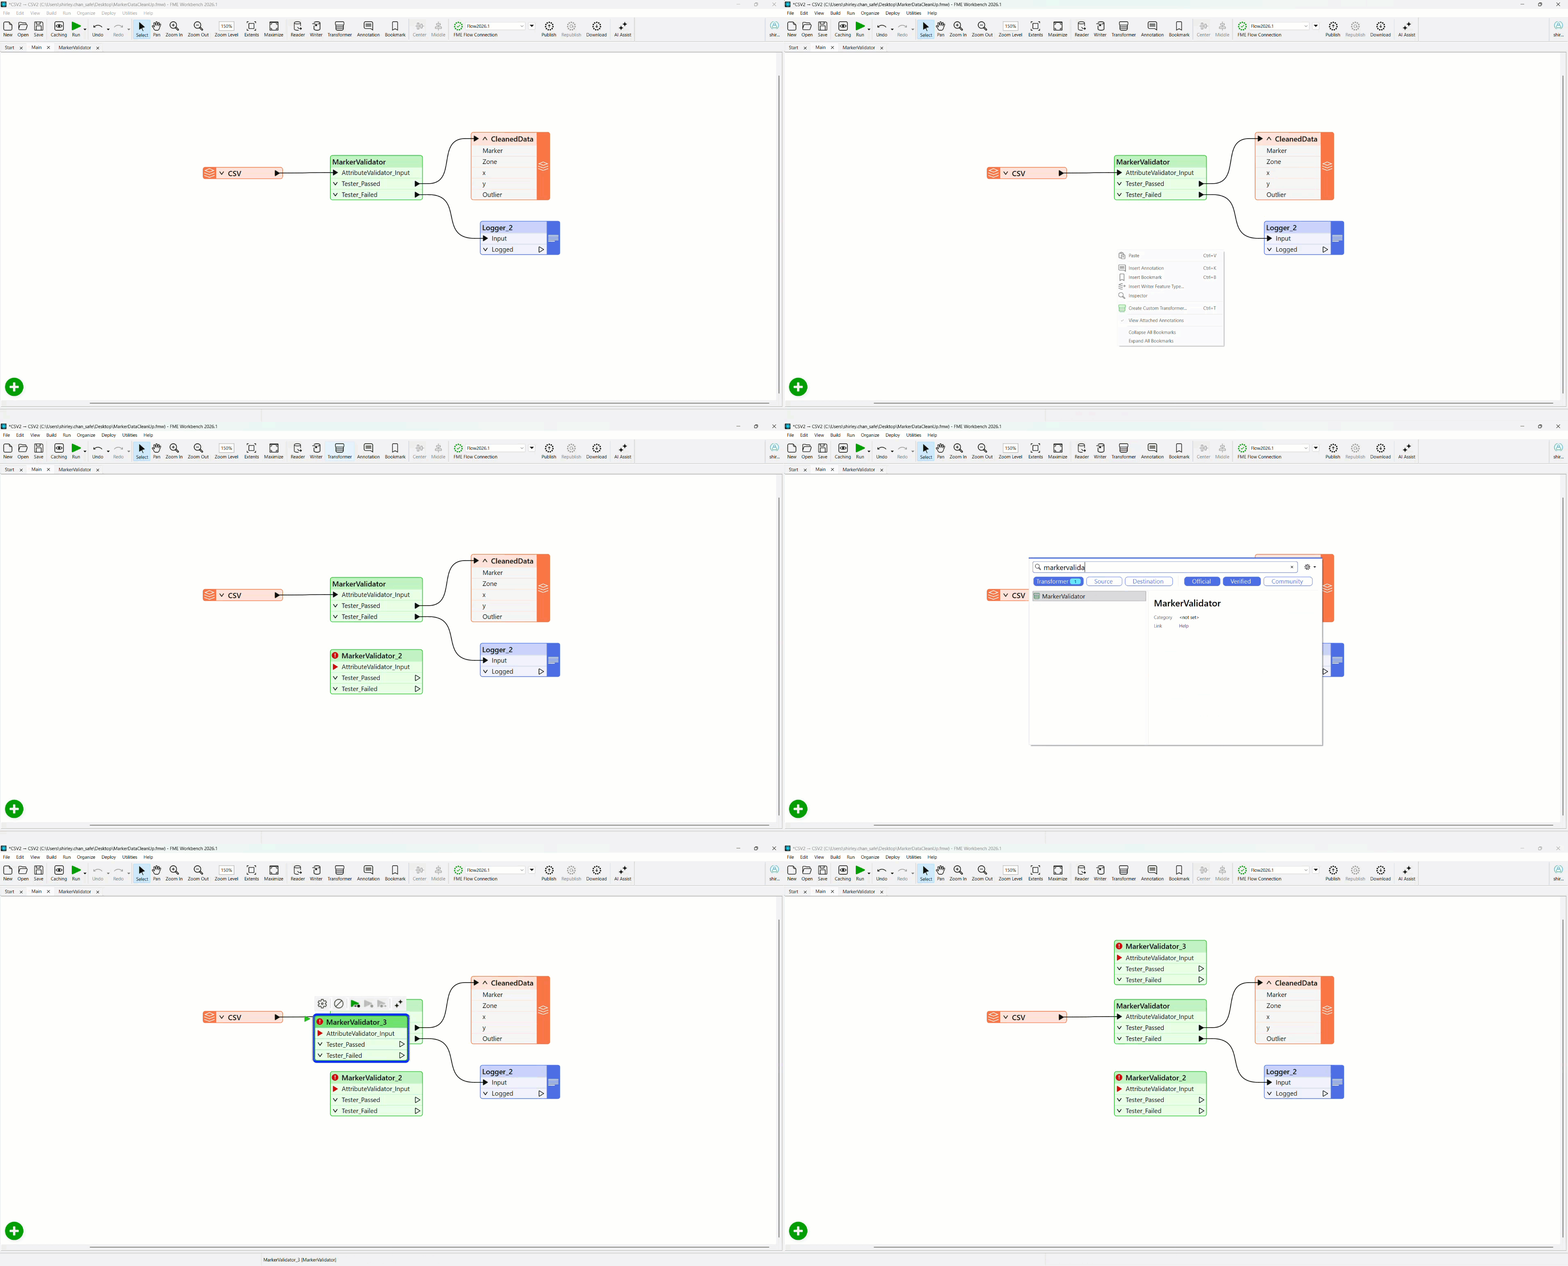
The custom transformer can be reused as many times as you like in the canvas. To add it again, simply copy the custom transformer and paste it in the canvas. You can also add it using the Transformer button in the toolbar. Custom transformers are denoted as green in the transformer gallery.
Linked Custom Transformers
Linked custom transformers allow you to use the custom transformer in other workspaces. The transformer’s definition lives in a separate .fmx file and can be referenced in any workspace.
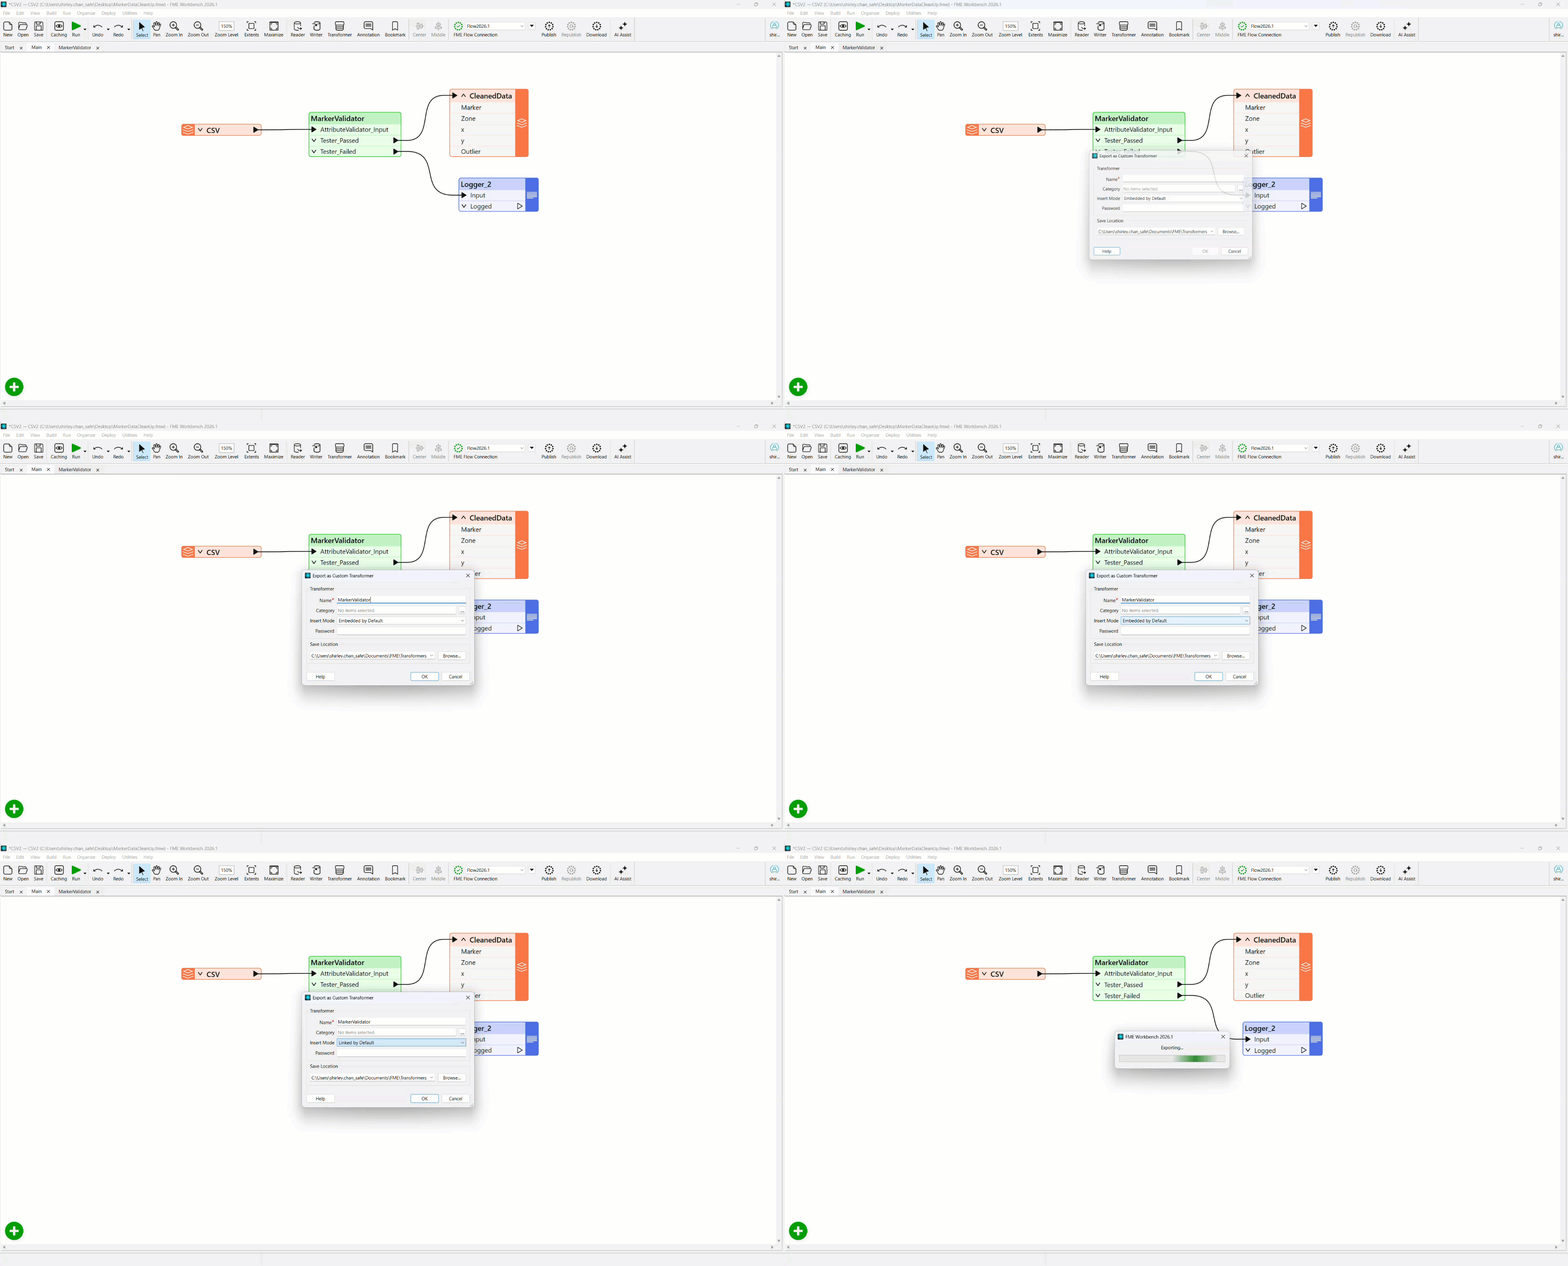
To create a linked transformer, right click the custom transformer tab and select Export as Custom Transformer. In the Export as Custom Transformer dialog, navigate to Insert Mode and select Link by Default. Choose an accessible folder for the Save Location and select OK.
The custom transformer can now be referenced in any workspace.
FME Hub
Think your custom transformer can help others? Feel free to share it with the FME Hub! The FME Hub is a place for FME users to share their custom solutions with others, in the form of custom transformers, custom formats, workspace templates, and web connections. Have a complex process and don’t know where to start? Check out the FME Hub to see how others tackle the same issue!
Final Thoughts
With so many moving parts, keeping workspaces organized will always be a challenge — but custom transformers go a long way toward making it manageable. They allow you to compartmentalize complex logic, eliminate repetitive transformer chains, and keep your canvas clean and readable. Linked custom transformers take this a step further, ensuring that any updates are automatically reflected across every workspace that references them. Give custom transformers a try and see the difference it makes. Happy FMEing everyone!