While browsing through Greenbeard’s journal, a loose sheet of paper falls out.
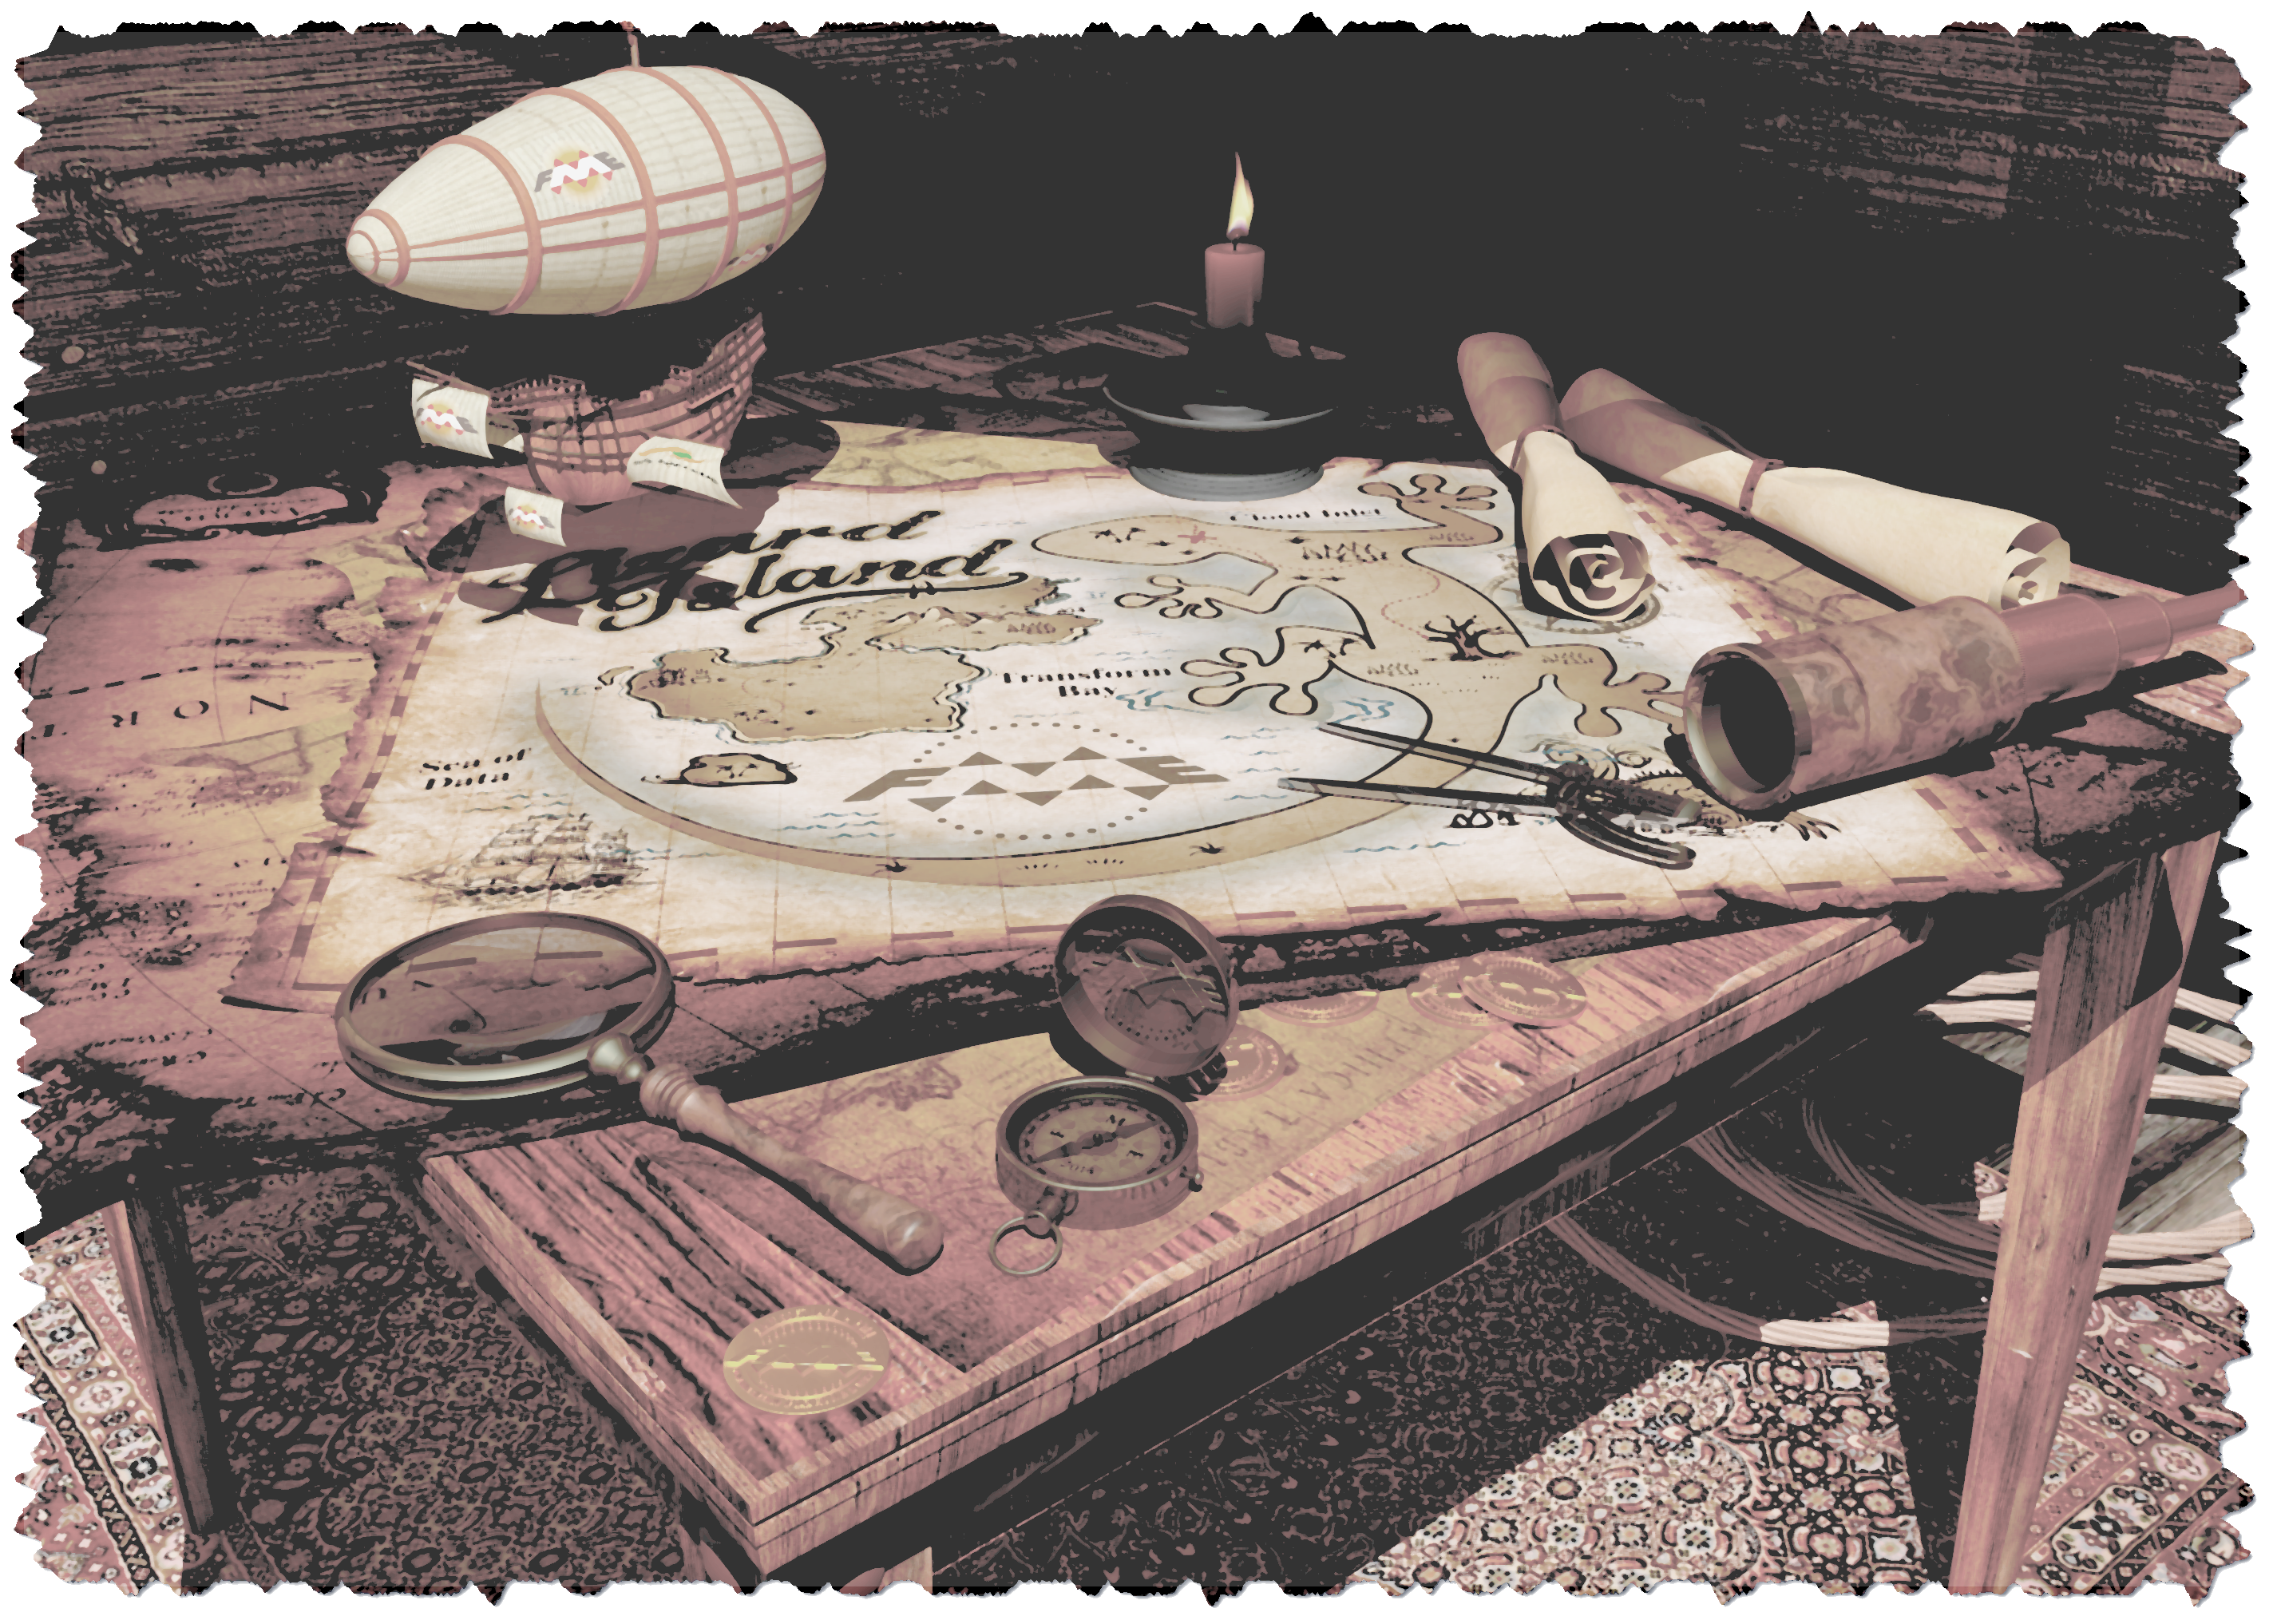
It is a very tattered and faded painting that shows a captain’s table with instruments for navigation.
The style of the signs and emblems tells us that this is a very old painting. But just how old is it?
Somewhere in this image appears a hidden date that tells us in which year it was created. Enter the year into the field below to receive a clue to the treasure.