Solved

How to Integrate Ultralytics YOLO Models with FME — Best Practices Guidance

  • July 8, 2026
  • 2 replies
  • 147 views

abnan0001
Supporter
Forum|alt.badge.img+10

Hi all,

I'm trying to bring object detection capabilities into an FME workflow using YOLO models built with Ultralytics, and I'd love some guidance from anyone who's tackled this before.

What I'm trying to do:

  • Run inference with a trained Ultralytics YOLO model (e.g., detection, segmentation, or OBB) inside an FME workspace
  •   Data (e.g., from PythonCaller ) into the model and get bounding boxes / masks / class labels back as FME features
  • Ideally write the results back out as vector features (polygons/points) with attributes for class, confidence score, etc.

Specific questions:

  1. Has anyone integrated Ultralytics' Python package (pip install ultralytics) directly via FME's PythonCaller transformer? Any gotchas with FME's bundled Python environment vs. installing ultralytics and its dependencies (torch, etc.)?
  2. Is it better to run YOLO inference as an external subprocess/script call from FME, or embed the from ultralytics import YOLO calls directly inside a PythonCaller?

Sample datasets/models for testing (for reference):

For anyone who wants to test a workflow before working with production data, Ultralytics provides several small, ready-to-use datasets and pretrained models:

  • COCO8 (tiny 8-image subset of COCO, great for quick pipeline tests) — 

https://docs.ultralytics.com/datasets/detect/coco8#introduction

  • COCO8-seg (segmentation version) — 

https://docs.ultralytics.com/datasets/segment/coco8-seg#introduction

  • Full dataset catalog (detection, segmentation, pose, classification, OBB) — 

https://docs.ultralytics.com/models#contributing-new-models

  • Pretrained model list (YOLO26, YOLO11, YOLOv8, etc., COCO/ImageNet-pretrained .pt weights) —

https://github.com/ultralytics/ultralytics

Best answer by jamatsafe

Hi ​@abnan0001,

Apologies for the delayed response. I've gone through this process before (object detection only), and I will be drafting an article to cover an example workflow but I hope the following notes help point you in the right direction in the meantime.

Q1) Installing Ultralytics

For packages with large dependency trees, I generally find it easier to pip install them from the command line interface rather than from within a PythonCaller in Workbench. I would start with the guide on installing Python packages to FME Form: Installing Python Packages. You can then refer to Ultralytics installation guide for additional guidance. Installing from a PythonCaller will stage the installation in a temporary translation folder. Because Ultralytics’ dependency tree is quite deep, the resulting file paths will exceed Window's path length limit causing the installation to fail.

Regarding the Python environment, you can either install the package directly into FME's bundled Python environment or into a separate isolated environment. Both approaches works with Ultralytics, so choose the one that best suits how you want to manage your Python environment:

  • FME's bundled interpreter environment. (easiest) Install the packages and their dependencies into FME's bundled Python environment. Packages will be installed into your user directory folder: C:\Users\<you>\Documents\FME\Plugins\Python\python3xx (matching your FME's Python version). This user directory will be added to the sys.path allowing you to import the installed modules directly from a PythonCaller afterwards.
  • Custom interpreter environment. If you prefer to keep the Ultralytics stack isolated in its own environment or want to use a CUDA-enabled environment, FME Form can be configured to point to another interpreter. I've successfully tested this approach using Miniconda. Please note that Ultralytics explicitly lists support up to Python 3.13 which aligns with FME 2025.x. If you're using FME 2026 (Python 3.14), you can setup a Miniconda environment with Python 3.12 or 3.13 to maximize compatibility. Once you've created your environment and installed Ultralytics, refer to this guide on setting a custom Python Interpreter within FME: Choosing a different Python Interpreter in FME (Installation) to ensure the the correct interpreter is used when running Python scripts within your Workbench.

One thing to be aware of for duplicate packages such as FME bundled numpy (also included with Ultralytics), the bundled copy sits earlier in sys.path so they take priority on import even with a custom interpreter. Fortunately this should not be an issue with Ultralytics, since the latest FME bundled versions already satisfy the minimum version requirements. If you ever do wish to prioritize loading specific package paths first, I would refer to this post to modify the sys.path import order: https://community.safe.com/general-10/fme-desktop-2020-2-installing-scipy-library-numpy-version-error-24723?postid=119148#post119148


Q2) PythonCaller vs external subprocess

I would recommend the embedded PythonCaller route here. The main advantage is that detections can come back as features with geometry and attributes, avoiding extra round trips through intermediate files.

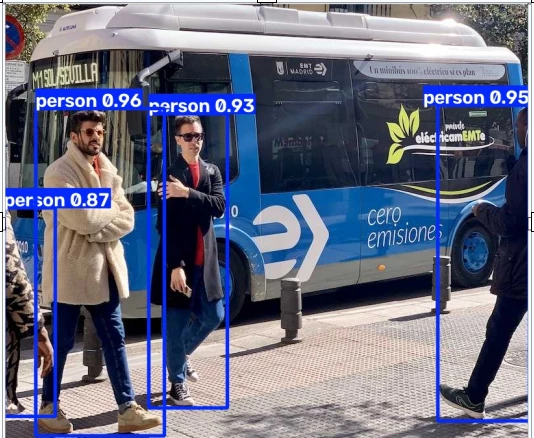
Below is an example of a simple object detection workflow overview using a sample image and examples provided from Ultralytics documentation :
1. Choose your image source:

2. Use the code template provided from Ultralytics documentation as a starting point reference:

from ultralytics import YOLO

# Load or download a model from your working directory
model = YOLO("model name")

# Run detection on image
results = model("path/to/image.jpg")

# Display results
results[0].show()

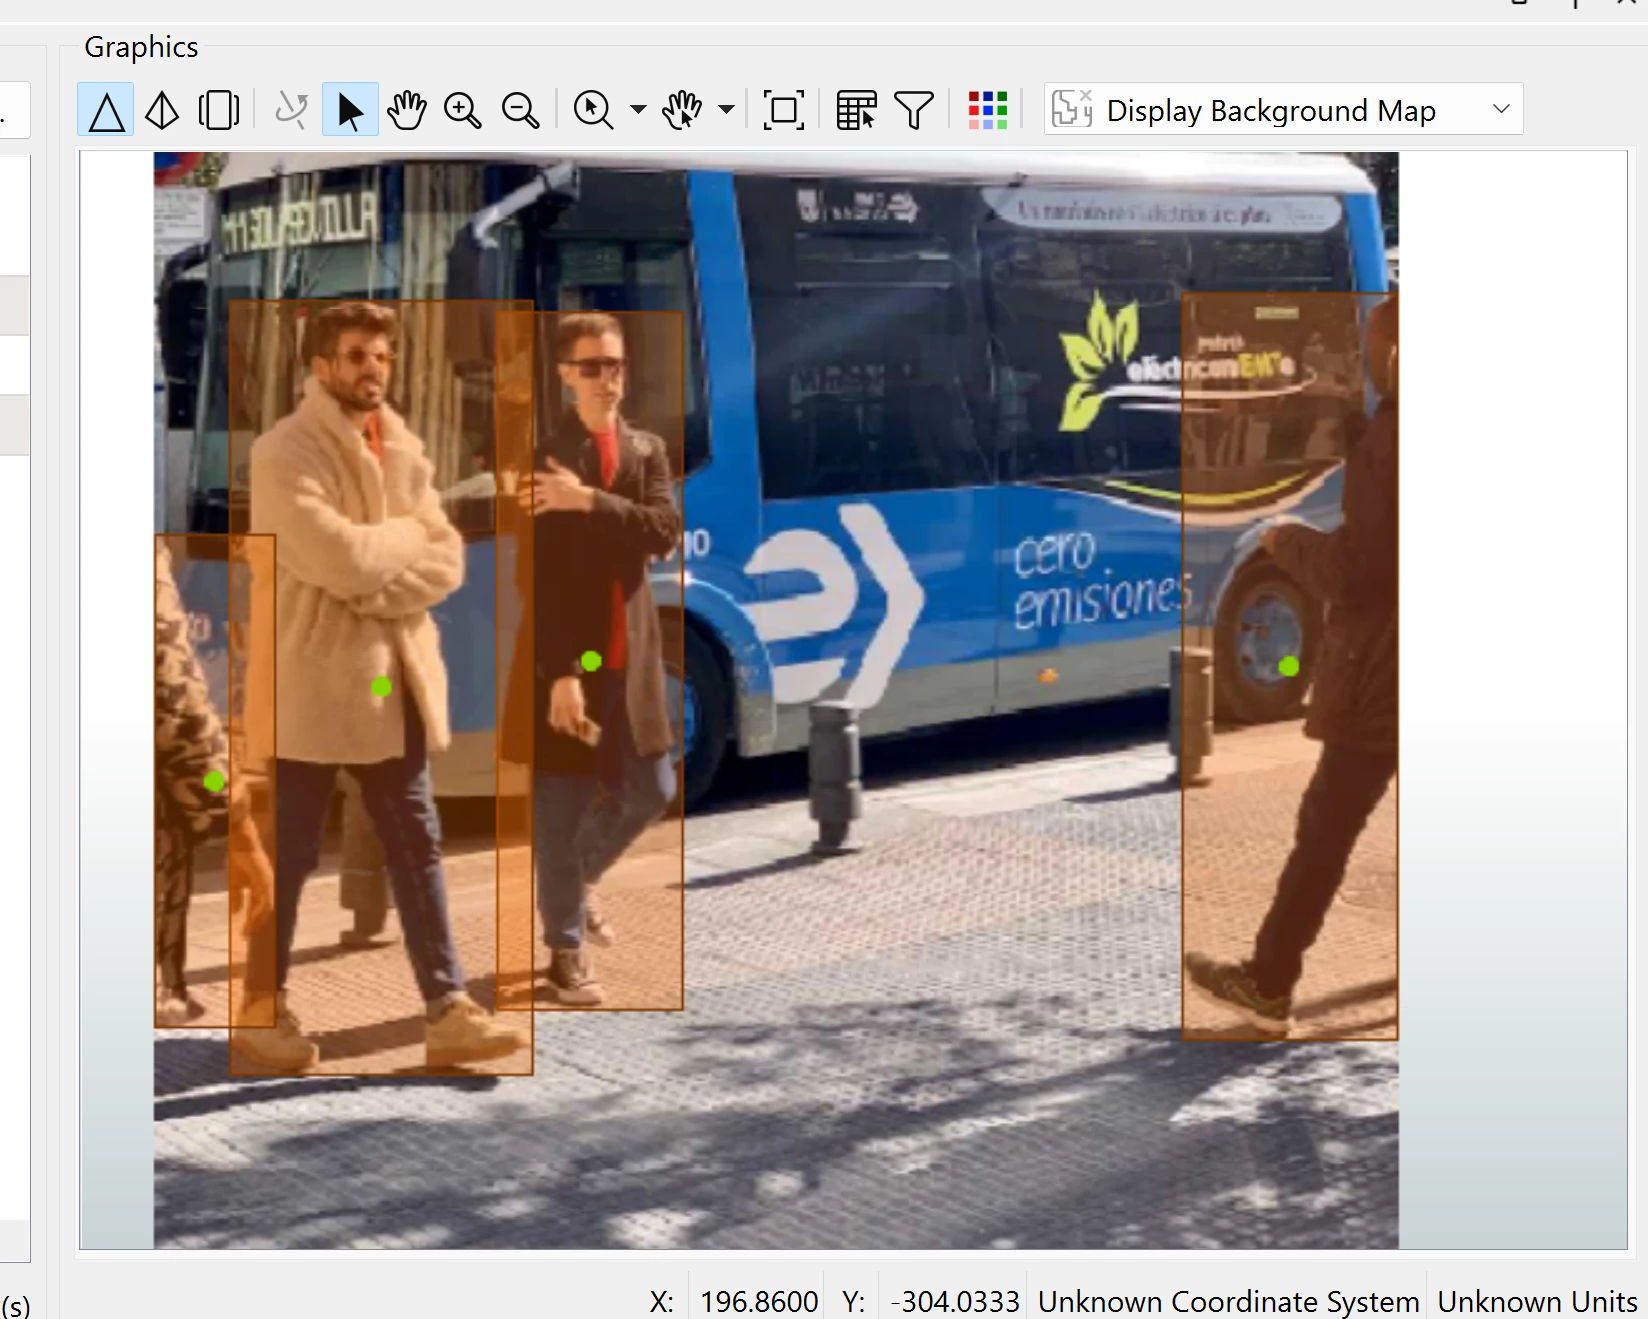
3. Using the Results object, you can access detection model outputs such as bounding box coordinates, class labels, object counts, confidence scores and also export results as a labelled image or a JSON attribute.

4. Parse down the JSON attribute output to extract individual detection information and build geometry (bounding boxes and points) with the 2DBoxReplacer and CenterPointReplacer transformers.


I've attached a sample FME 2025.2 workspace for reference to use as a starting point. If you have any questions about the FME side of the setup, feel free to open a support ticket!

2 replies

abnan0001
Supporter
Forum|alt.badge.img+10
  • Author
  • Supporter
  • August 6, 2026

Hello Experts..

Any suggestion/Guidance/Experience -How can we pull yolo models in FME and do the rest using FME by using Python caller..

Please suggest.

Thank you


jamatsafe
Safer
Forum|alt.badge.img+24
  • Safer
  • Best Answer
  • August 7, 2026

Hi ​@abnan0001,

Apologies for the delayed response. I've gone through this process before (object detection only), and I will be drafting an article to cover an example workflow but I hope the following notes help point you in the right direction in the meantime.

Q1) Installing Ultralytics

For packages with large dependency trees, I generally find it easier to pip install them from the command line interface rather than from within a PythonCaller in Workbench. I would start with the guide on installing Python packages to FME Form: Installing Python Packages. You can then refer to Ultralytics installation guide for additional guidance. Installing from a PythonCaller will stage the installation in a temporary translation folder. Because Ultralytics’ dependency tree is quite deep, the resulting file paths will exceed Window's path length limit causing the installation to fail.

Regarding the Python environment, you can either install the package directly into FME's bundled Python environment or into a separate isolated environment. Both approaches works with Ultralytics, so choose the one that best suits how you want to manage your Python environment:

  • FME's bundled interpreter environment. (easiest) Install the packages and their dependencies into FME's bundled Python environment. Packages will be installed into your user directory folder: C:\Users\<you>\Documents\FME\Plugins\Python\python3xx (matching your FME's Python version). This user directory will be added to the sys.path allowing you to import the installed modules directly from a PythonCaller afterwards.
  • Custom interpreter environment. If you prefer to keep the Ultralytics stack isolated in its own environment or want to use a CUDA-enabled environment, FME Form can be configured to point to another interpreter. I've successfully tested this approach using Miniconda. Please note that Ultralytics explicitly lists support up to Python 3.13 which aligns with FME 2025.x. If you're using FME 2026 (Python 3.14), you can setup a Miniconda environment with Python 3.12 or 3.13 to maximize compatibility. Once you've created your environment and installed Ultralytics, refer to this guide on setting a custom Python Interpreter within FME: Choosing a different Python Interpreter in FME (Installation) to ensure the the correct interpreter is used when running Python scripts within your Workbench.

One thing to be aware of for duplicate packages such as FME bundled numpy (also included with Ultralytics), the bundled copy sits earlier in sys.path so they take priority on import even with a custom interpreter. Fortunately this should not be an issue with Ultralytics, since the latest FME bundled versions already satisfy the minimum version requirements. If you ever do wish to prioritize loading specific package paths first, I would refer to this post to modify the sys.path import order: https://community.safe.com/general-10/fme-desktop-2020-2-installing-scipy-library-numpy-version-error-24723?postid=119148#post119148


Q2) PythonCaller vs external subprocess

I would recommend the embedded PythonCaller route here. The main advantage is that detections can come back as features with geometry and attributes, avoiding extra round trips through intermediate files.

Below is an example of a simple object detection workflow overview using a sample image and examples provided from Ultralytics documentation :
1. Choose your image source:

2. Use the code template provided from Ultralytics documentation as a starting point reference:

from ultralytics import YOLO

# Load or download a model from your working directory
model = YOLO("model name")

# Run detection on image
results = model("path/to/image.jpg")

# Display results
results[0].show()

3. Using the Results object, you can access detection model outputs such as bounding box coordinates, class labels, object counts, confidence scores and also export results as a labelled image or a JSON attribute.

4. Parse down the JSON attribute output to extract individual detection information and build geometry (bounding boxes and points) with the 2DBoxReplacer and CenterPointReplacer transformers.


I've attached a sample FME 2025.2 workspace for reference to use as a starting point. If you have any questions about the FME side of the setup, feel free to open a support ticket!