

Puzzle 1
The first puzzle requires the user to find a date (year) hidden in the image:
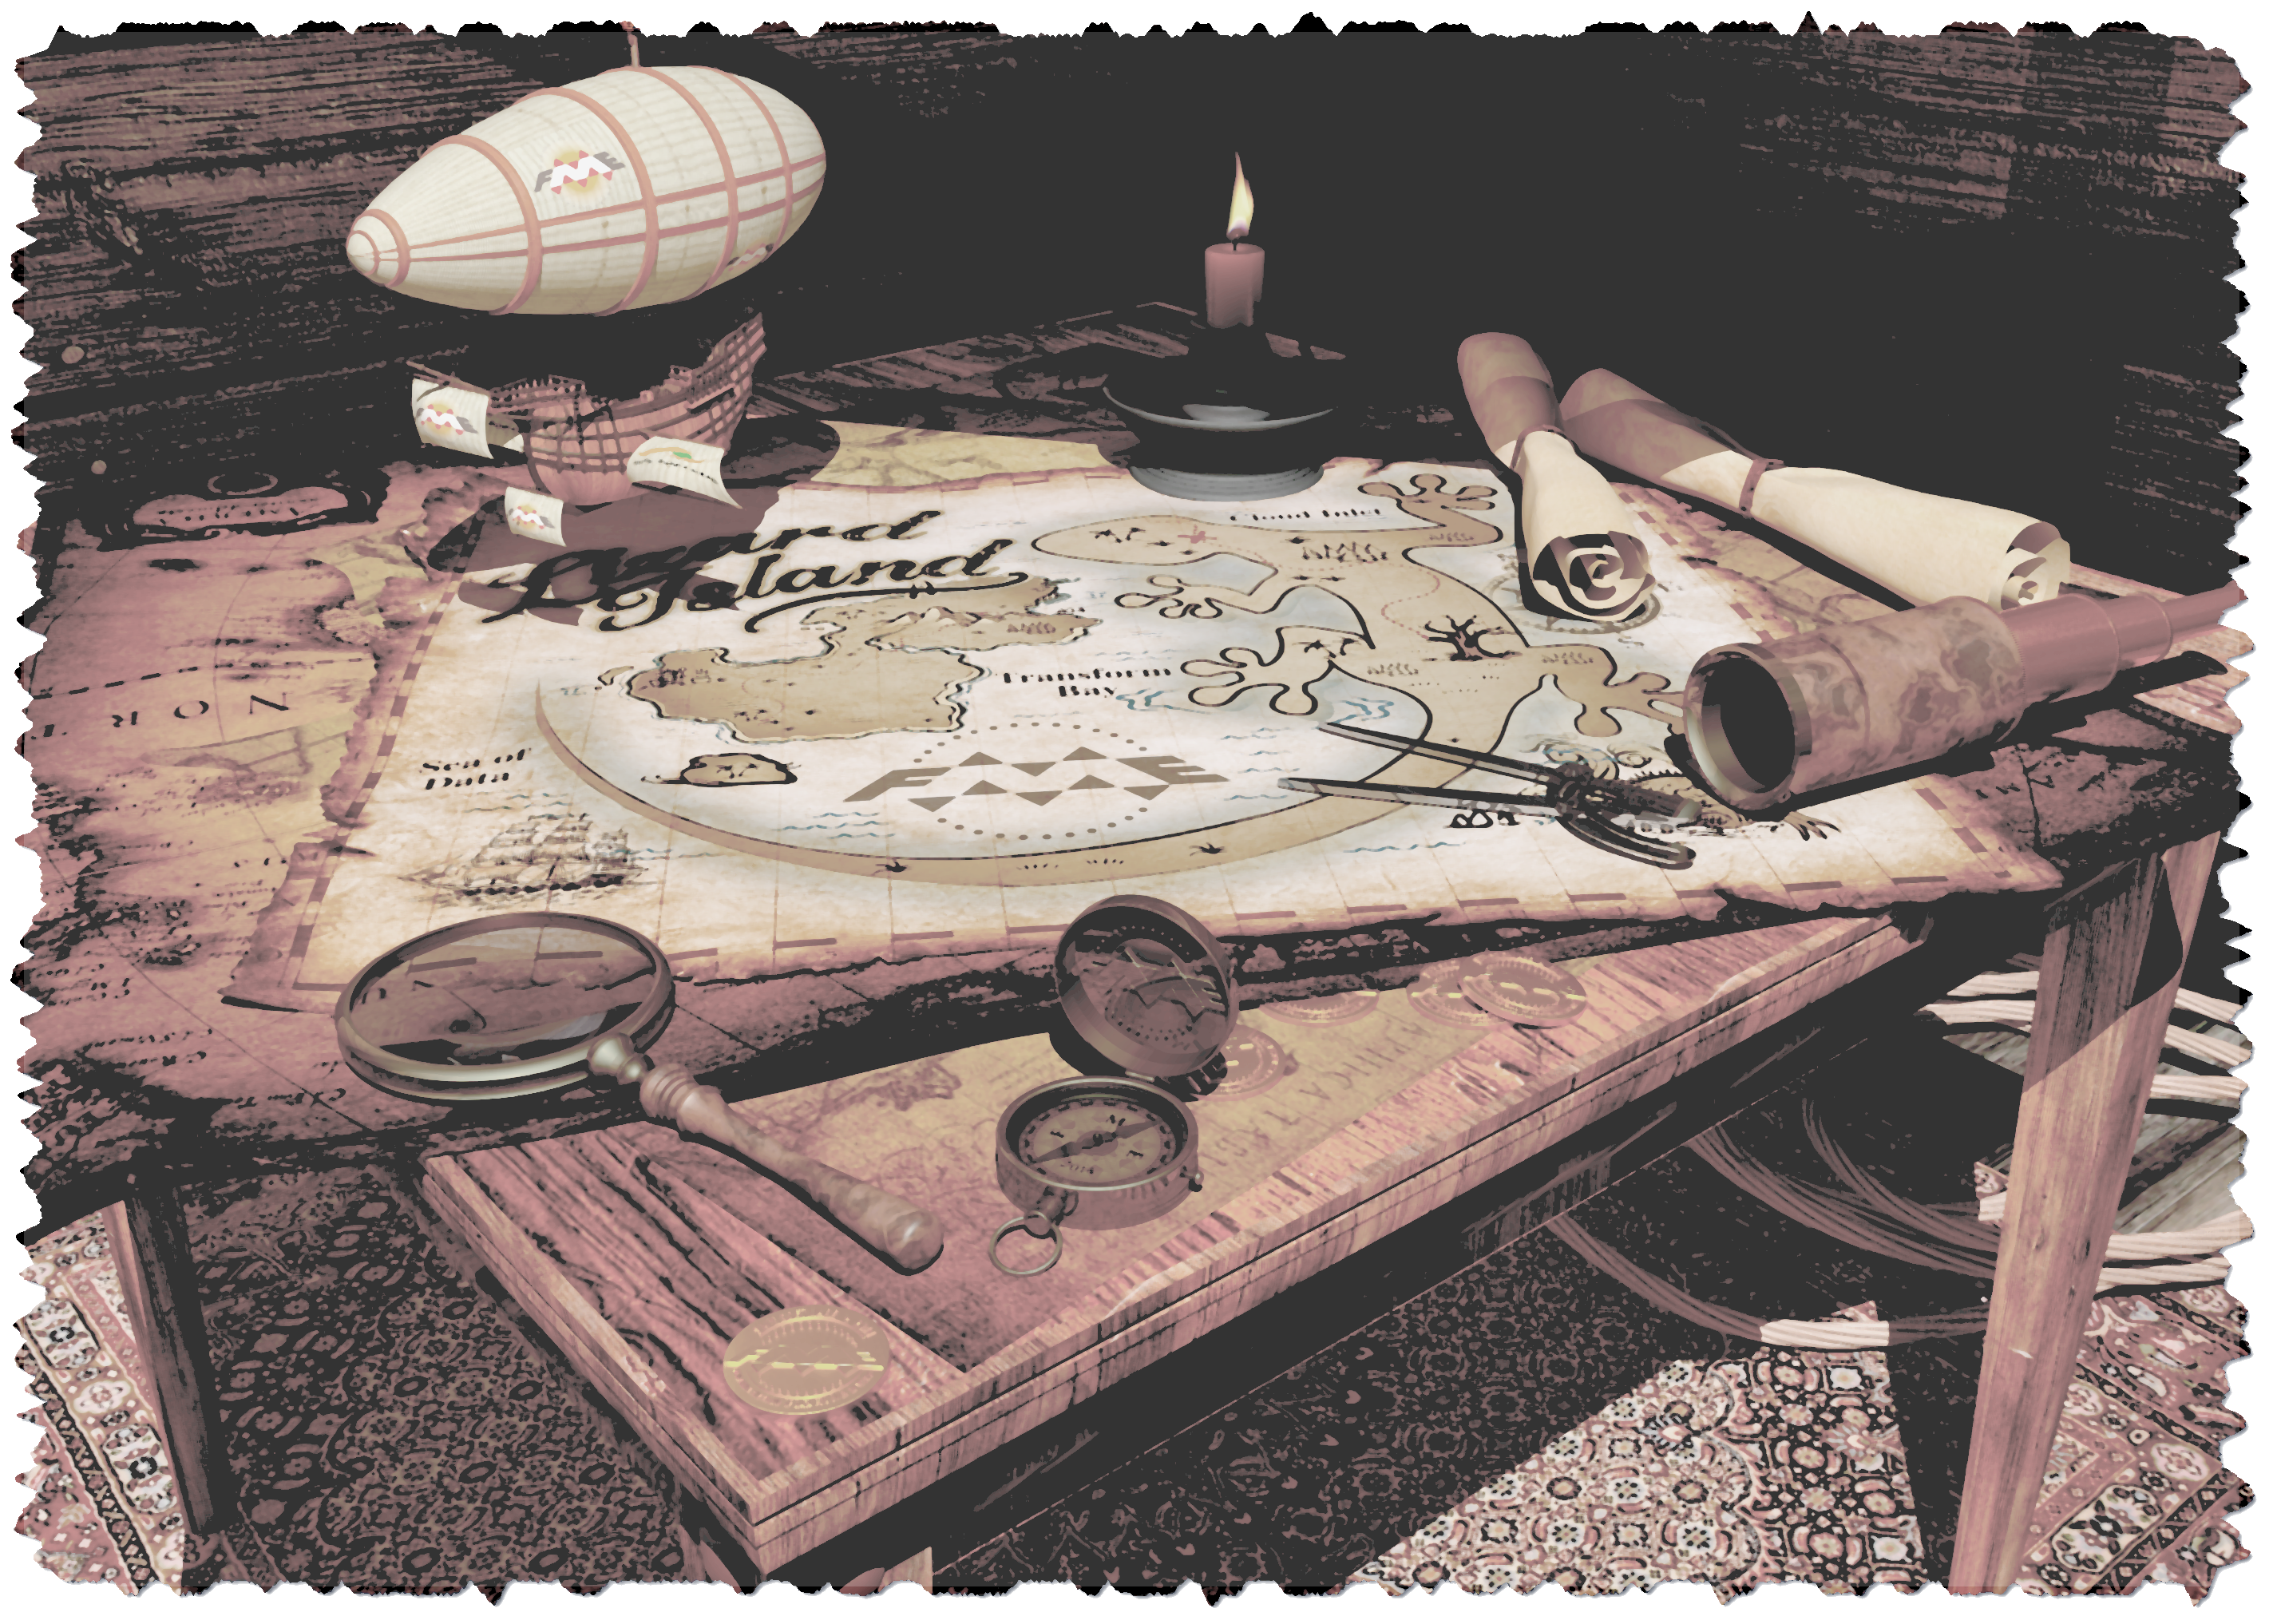
The image is, of course, a faded and tattered version of promotional material for a prior FME release.
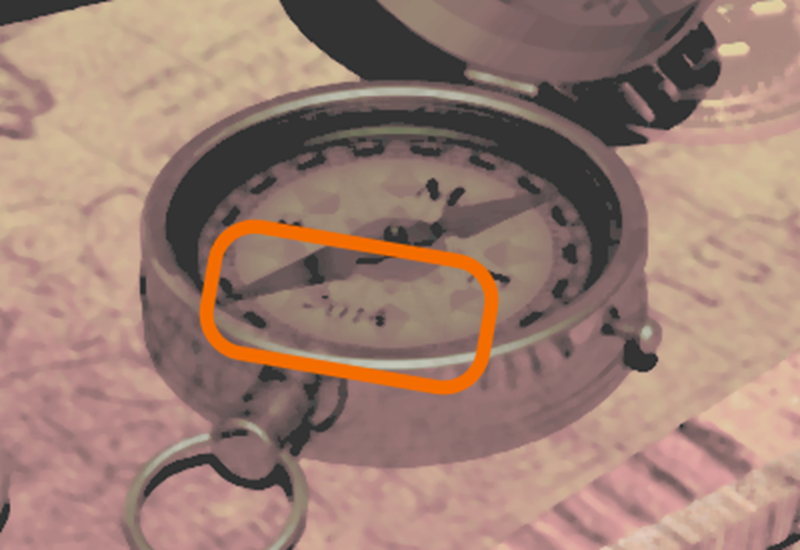
If you know your FME history, you might have automatically realized it was from 2014. Otherwise, you needed to open the full image and zoom in on the compass:
So, enter 2014 into the text field to receive the first clue.
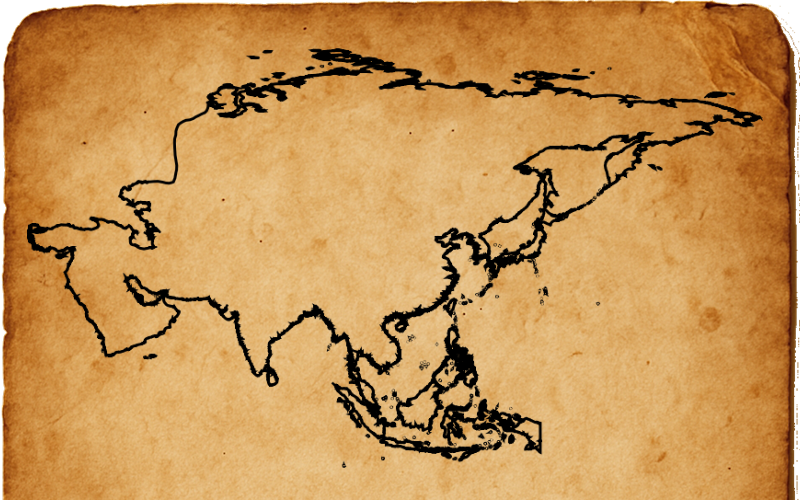
Clue
- The actual clue is an outline map of the continent of Asia (continent).
- The wide area covered is meant to show that this location is the most basic for this set of puzzles.
Bonus Clue
- The bonus clue for this puzzle states: Harder puzzles provide better clues. Earlier (level 1) clues may not be very helpful by themselves.
- This tells the player that each puzzle in turn gives a better quality (precision) of clue.
Notes
- The image is a little blurry, but it should be easy enough to find and read the date in the compass.
Puzzle 2
The second puzzle requires the user to find a secret codeword inside the image:
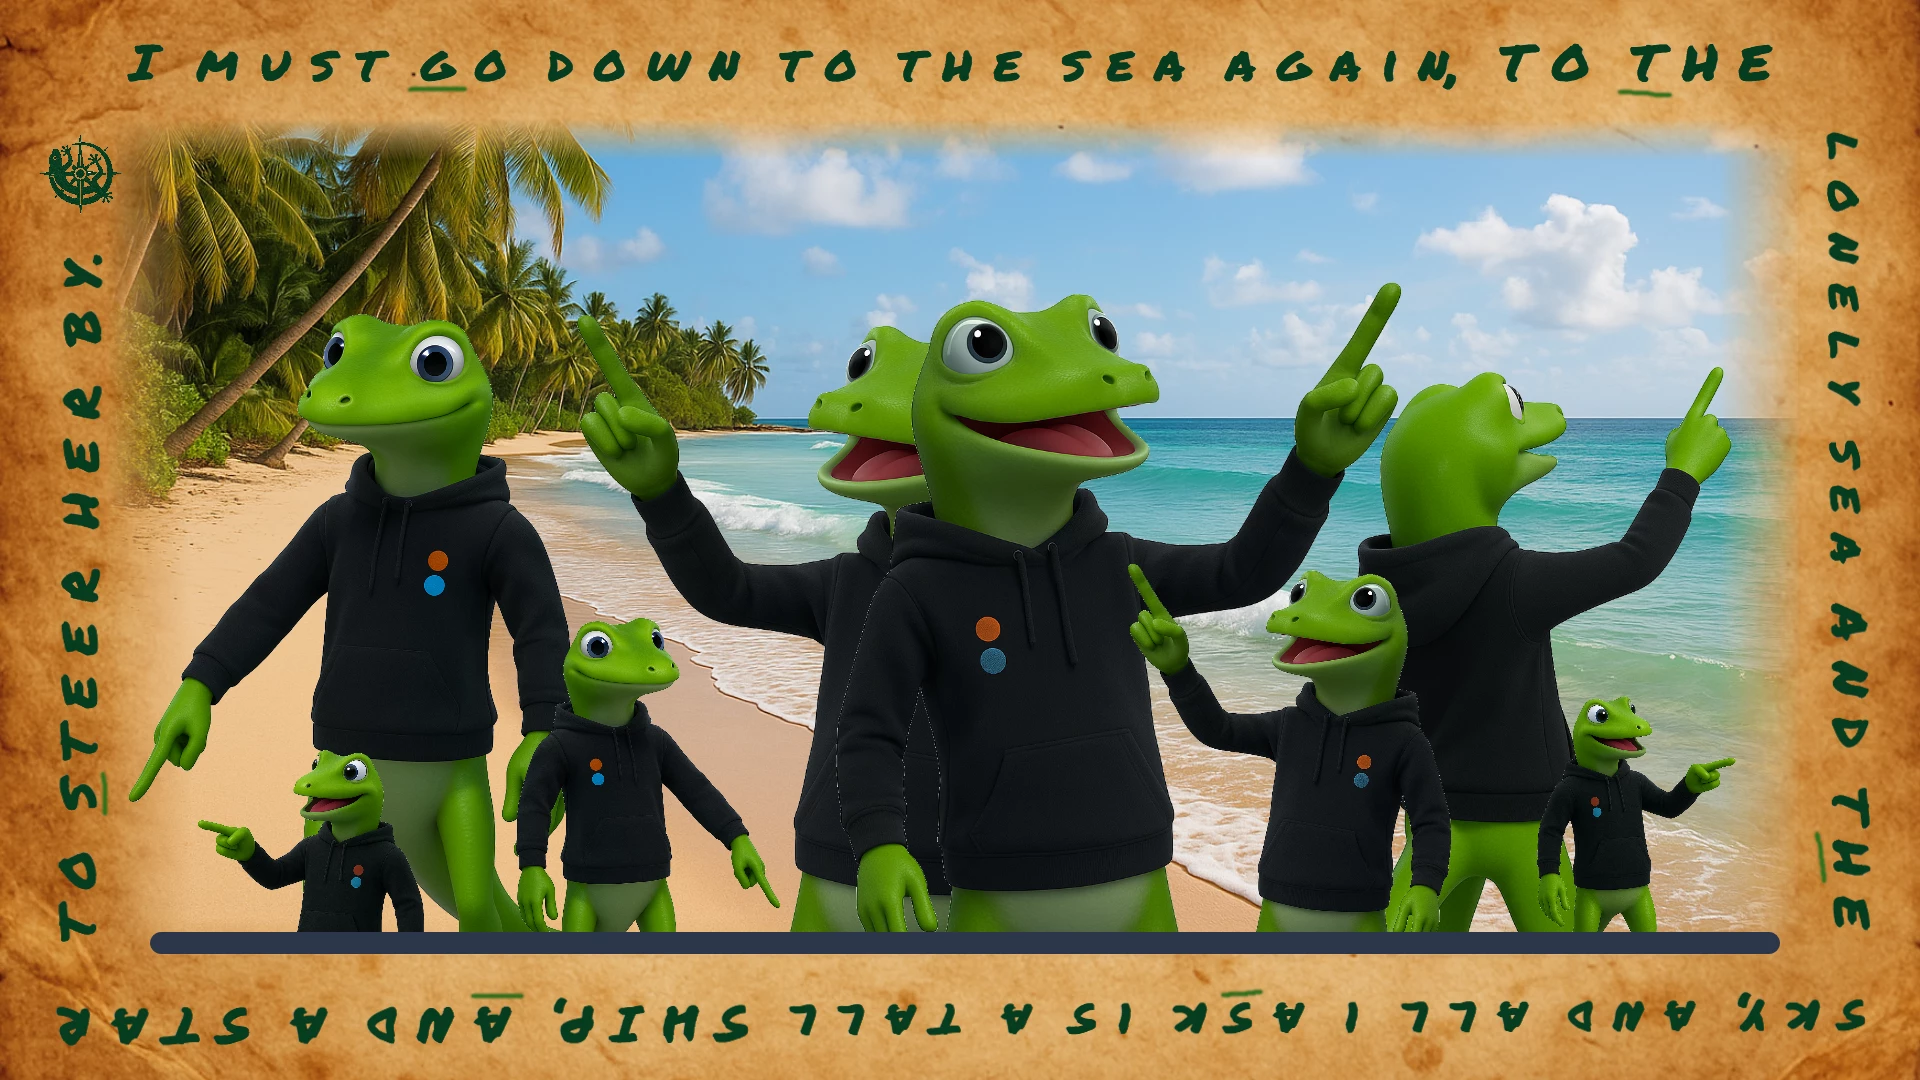
The image shows a lot of lizards pointing to fun things on a beach. There is also a text sentence around the edge of the image.
If you follow each lizard's finger, up to the text, you will find a series of letters. The order in which to use the lizards is included in the puzzle description.
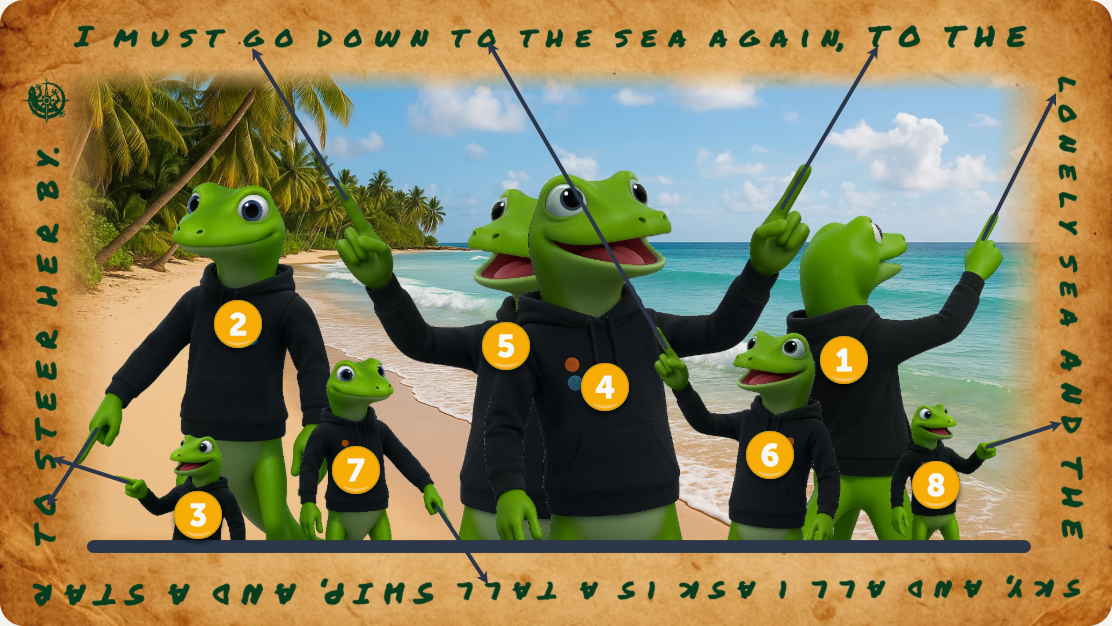
In order, the lizards are pointing to:
L O S T G O L D
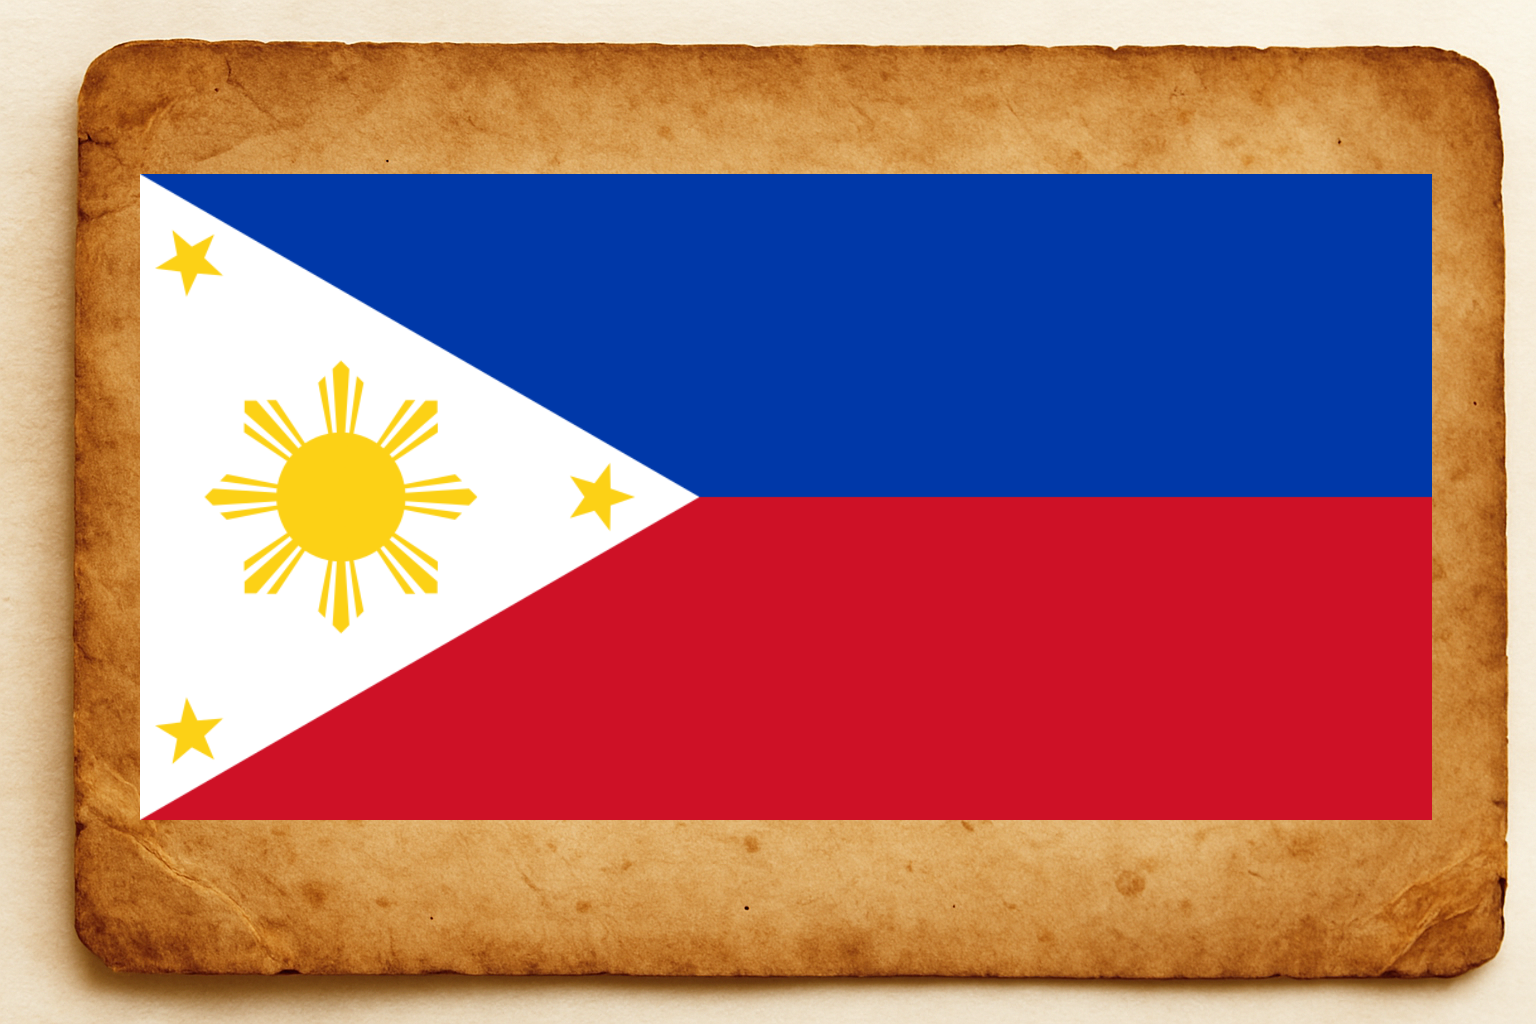
So, enter lostgold into the text field to receive the second clue.
Clue
- The actual clue is another image, this time an image of the flag of the Philippines (country).
- This moves the focus from a conintent level, to a country level, to show that this location is more useful than the previous one.
Bonus Clue
- The bonus clue for this puzzle is: " X marks the spot. Everyone knows that. But how is X defined?"
- Basically, it is hinting that you must use the clues provided to define (or construct) your own X on the map.
Notes
- The text around the image is a quote from the poem Sea Fever, by John Masefield. It's not an extra clue, just closely related to our overall theme.
- Did you notice the hidden bonus code in the image? Certain characters are underlined in the text. These characters spell out the reward code GTHSAS!
Puzzle 3
The third puzzle also requires the user to find a secret codeword inside the image:

The image shows Greenbeard's ship sailing across pleasant seas. There is also a text sentence around the edge of the image.
Obviously, the keyword is hidden in this text, and the letters to use are defined by a very subtly different colour. Here, for example, the W is a different colour.
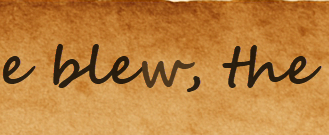
Here is the surrounding text, with the differently coloured characters in upper case:
THe fair breEze bleW, the white fOam flew, the furRow followeD free: we were the fIrSt That eveR bUrsT into tHose siLEnt SeaS.
So, the characters spell out the sentence:
THE WORD IS TRUTHLESS
So, enter TRUTHLESS into the text field to receive the third clue.
Clue
- The actual clue is another image, this time an image of the island of Cebu in the Philippines (province).
- This moves the focus from a country level, to a provincial level, to show that this location is more useful than the previous one.
Bonus Clue
- The bonus clue for this puzzle is: "Did you read Greenbeard’s story? Like, really read it closely?!"
- This clue hints that there is more to be found in the origin story than you might have first noticed! Look at the overall solutions page to find out what.
Notes
- The text around the image is a (slightly edited) quote from the poem The Rime of the Ancient Mariner, by Samuel Taylor Coleridge. It's not an extra clue, just closely related to our overall theme.
- Did you spot the lizard flag flying on Greenbeard's ship?
Puzzle 4
The fourth puzzle, once more, requires the user to find a secret codeword inside the image:
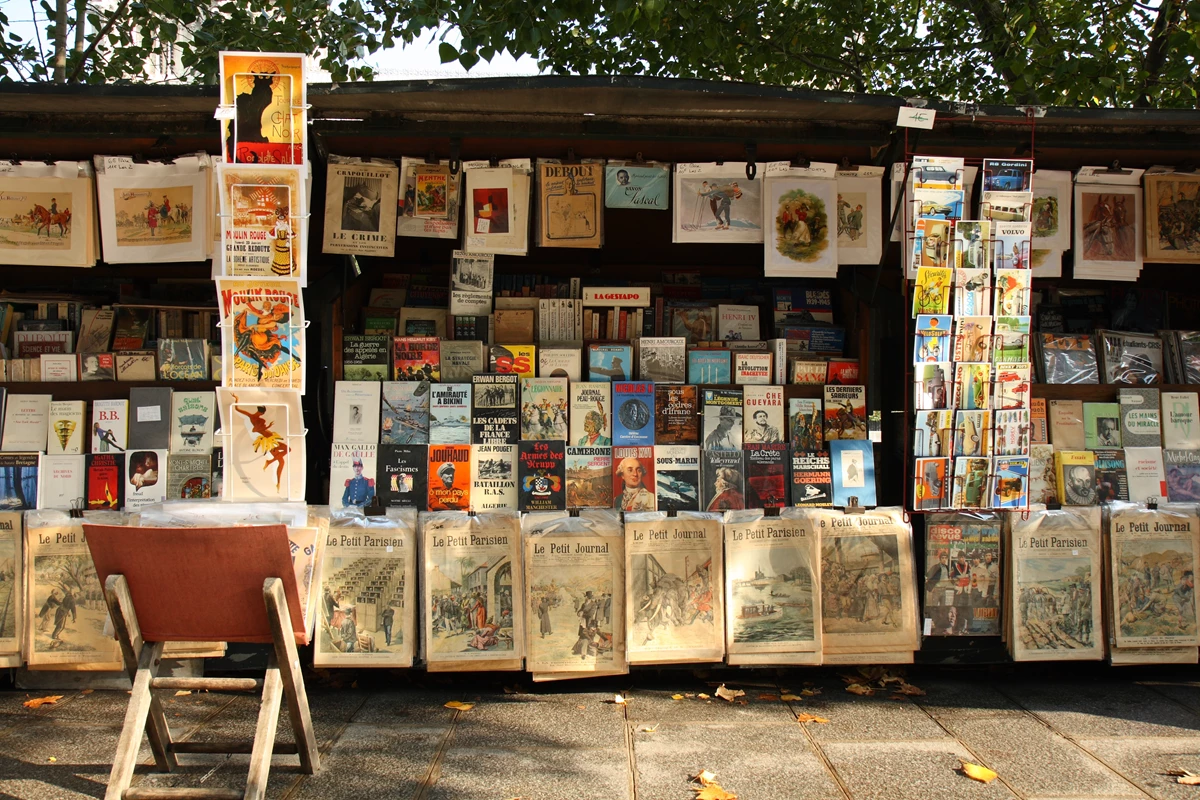
The image is a photograph of a second-hand book seller in Paris. It's likely that the characters to be seen in the image will form the keyword, but there are so many characters that it's hard to tell which ones to use.
Perhaps this secondary image will help?
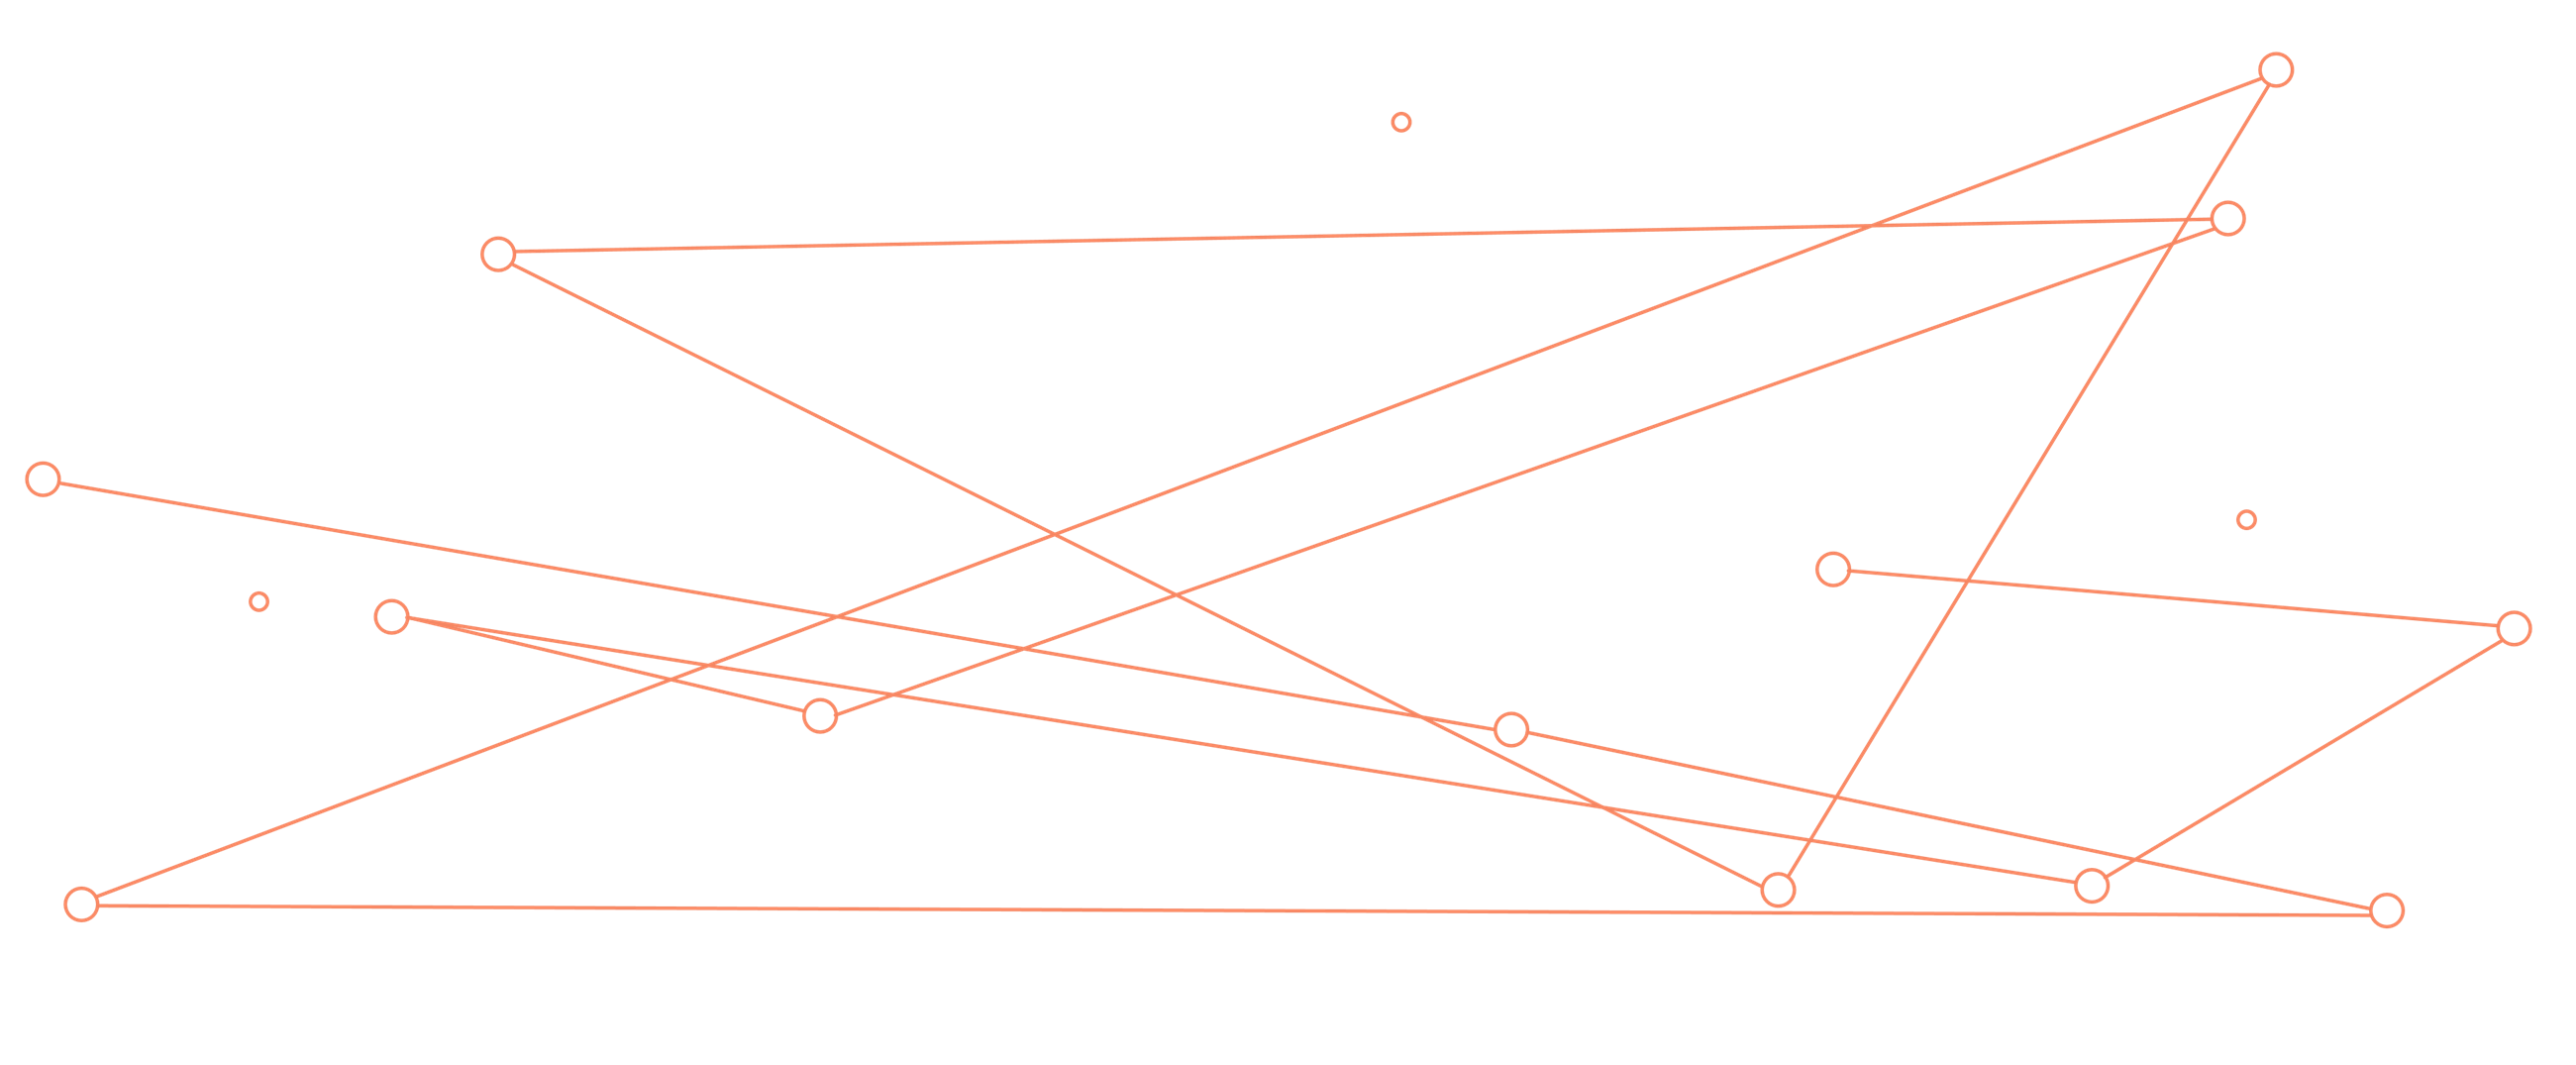
In short, the idea is to overlay the second image over the first. The overlay image shows a sequence of characters to use (the connected points) to find the hidden keyword. There are three unconnected points to act as reference points to properly align the image.
The metadata for this new image says:
- bardOt
- saVon
- dinkY
These are the characters that the alignment points should overlap in order to align the data.
Once you align the two images (the reference image only needs scaling, not rotating) it will look like this:
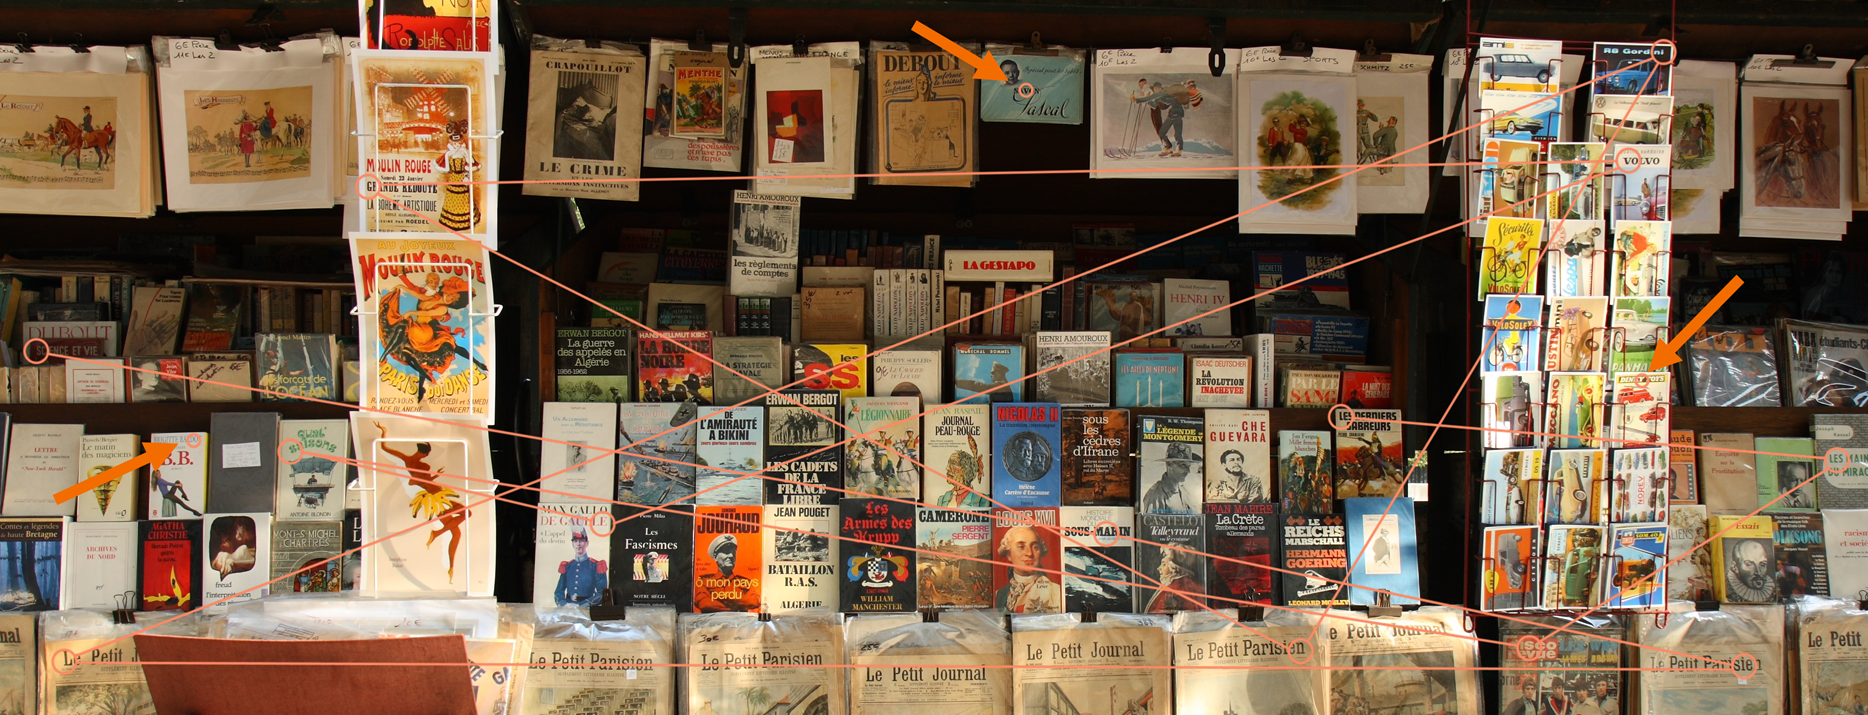
The text spelt out by the correct character sequence is:
sailingvessel
So, enter sailingvessel or sailing vessel into the text field to receive the fourth clue.
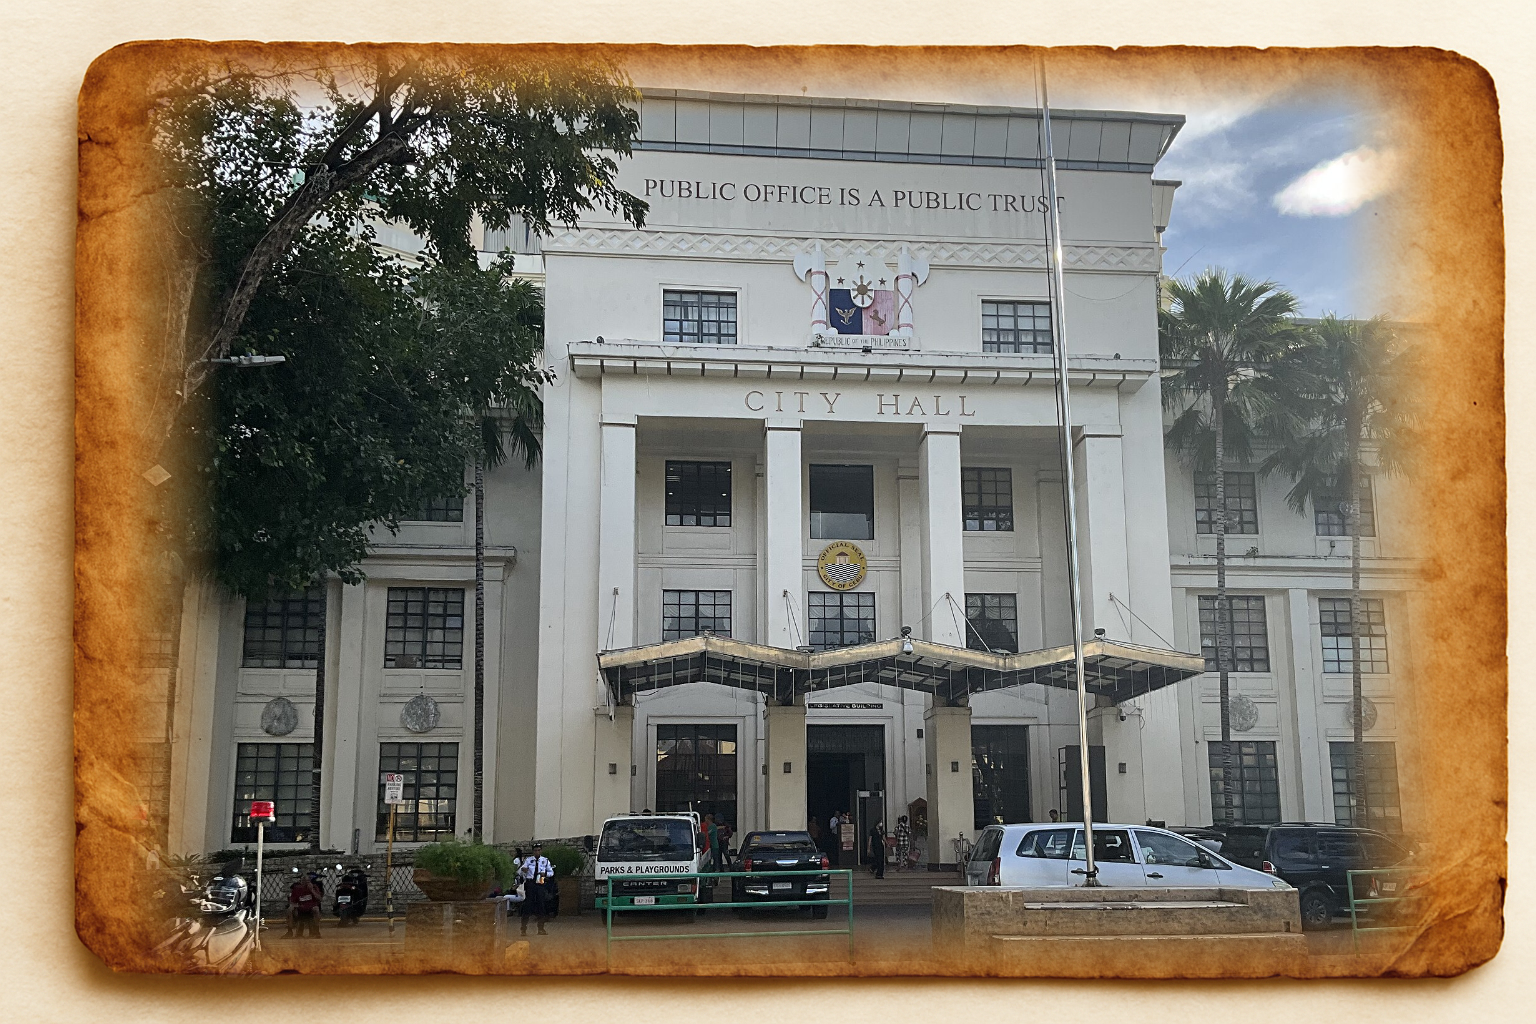
Clue
- The actual clue is another image, this time a photographic image of the Cebu City Hall building.
- This moves the focus from a provincial level, to a city level, to show that this location is more useful than the previous one.
Bonus Clue
- The bonus clue for this puzzle is: "You may find the LineExtender transformer helps with your X."
- This clue suggests that the four positions provided by the four sets of clues, don't actually cross as an X, and that one of the lines will need extending.
Notes
- A Parisian scene is another clue that the treasure lies buried within France.
- The hidden keyword (sailing vessel) is related to our theme but not a clue to anything else.
Puzzle 5
As with the other image puzzles, the final puzzle requires a keyword to be discovered in the image.
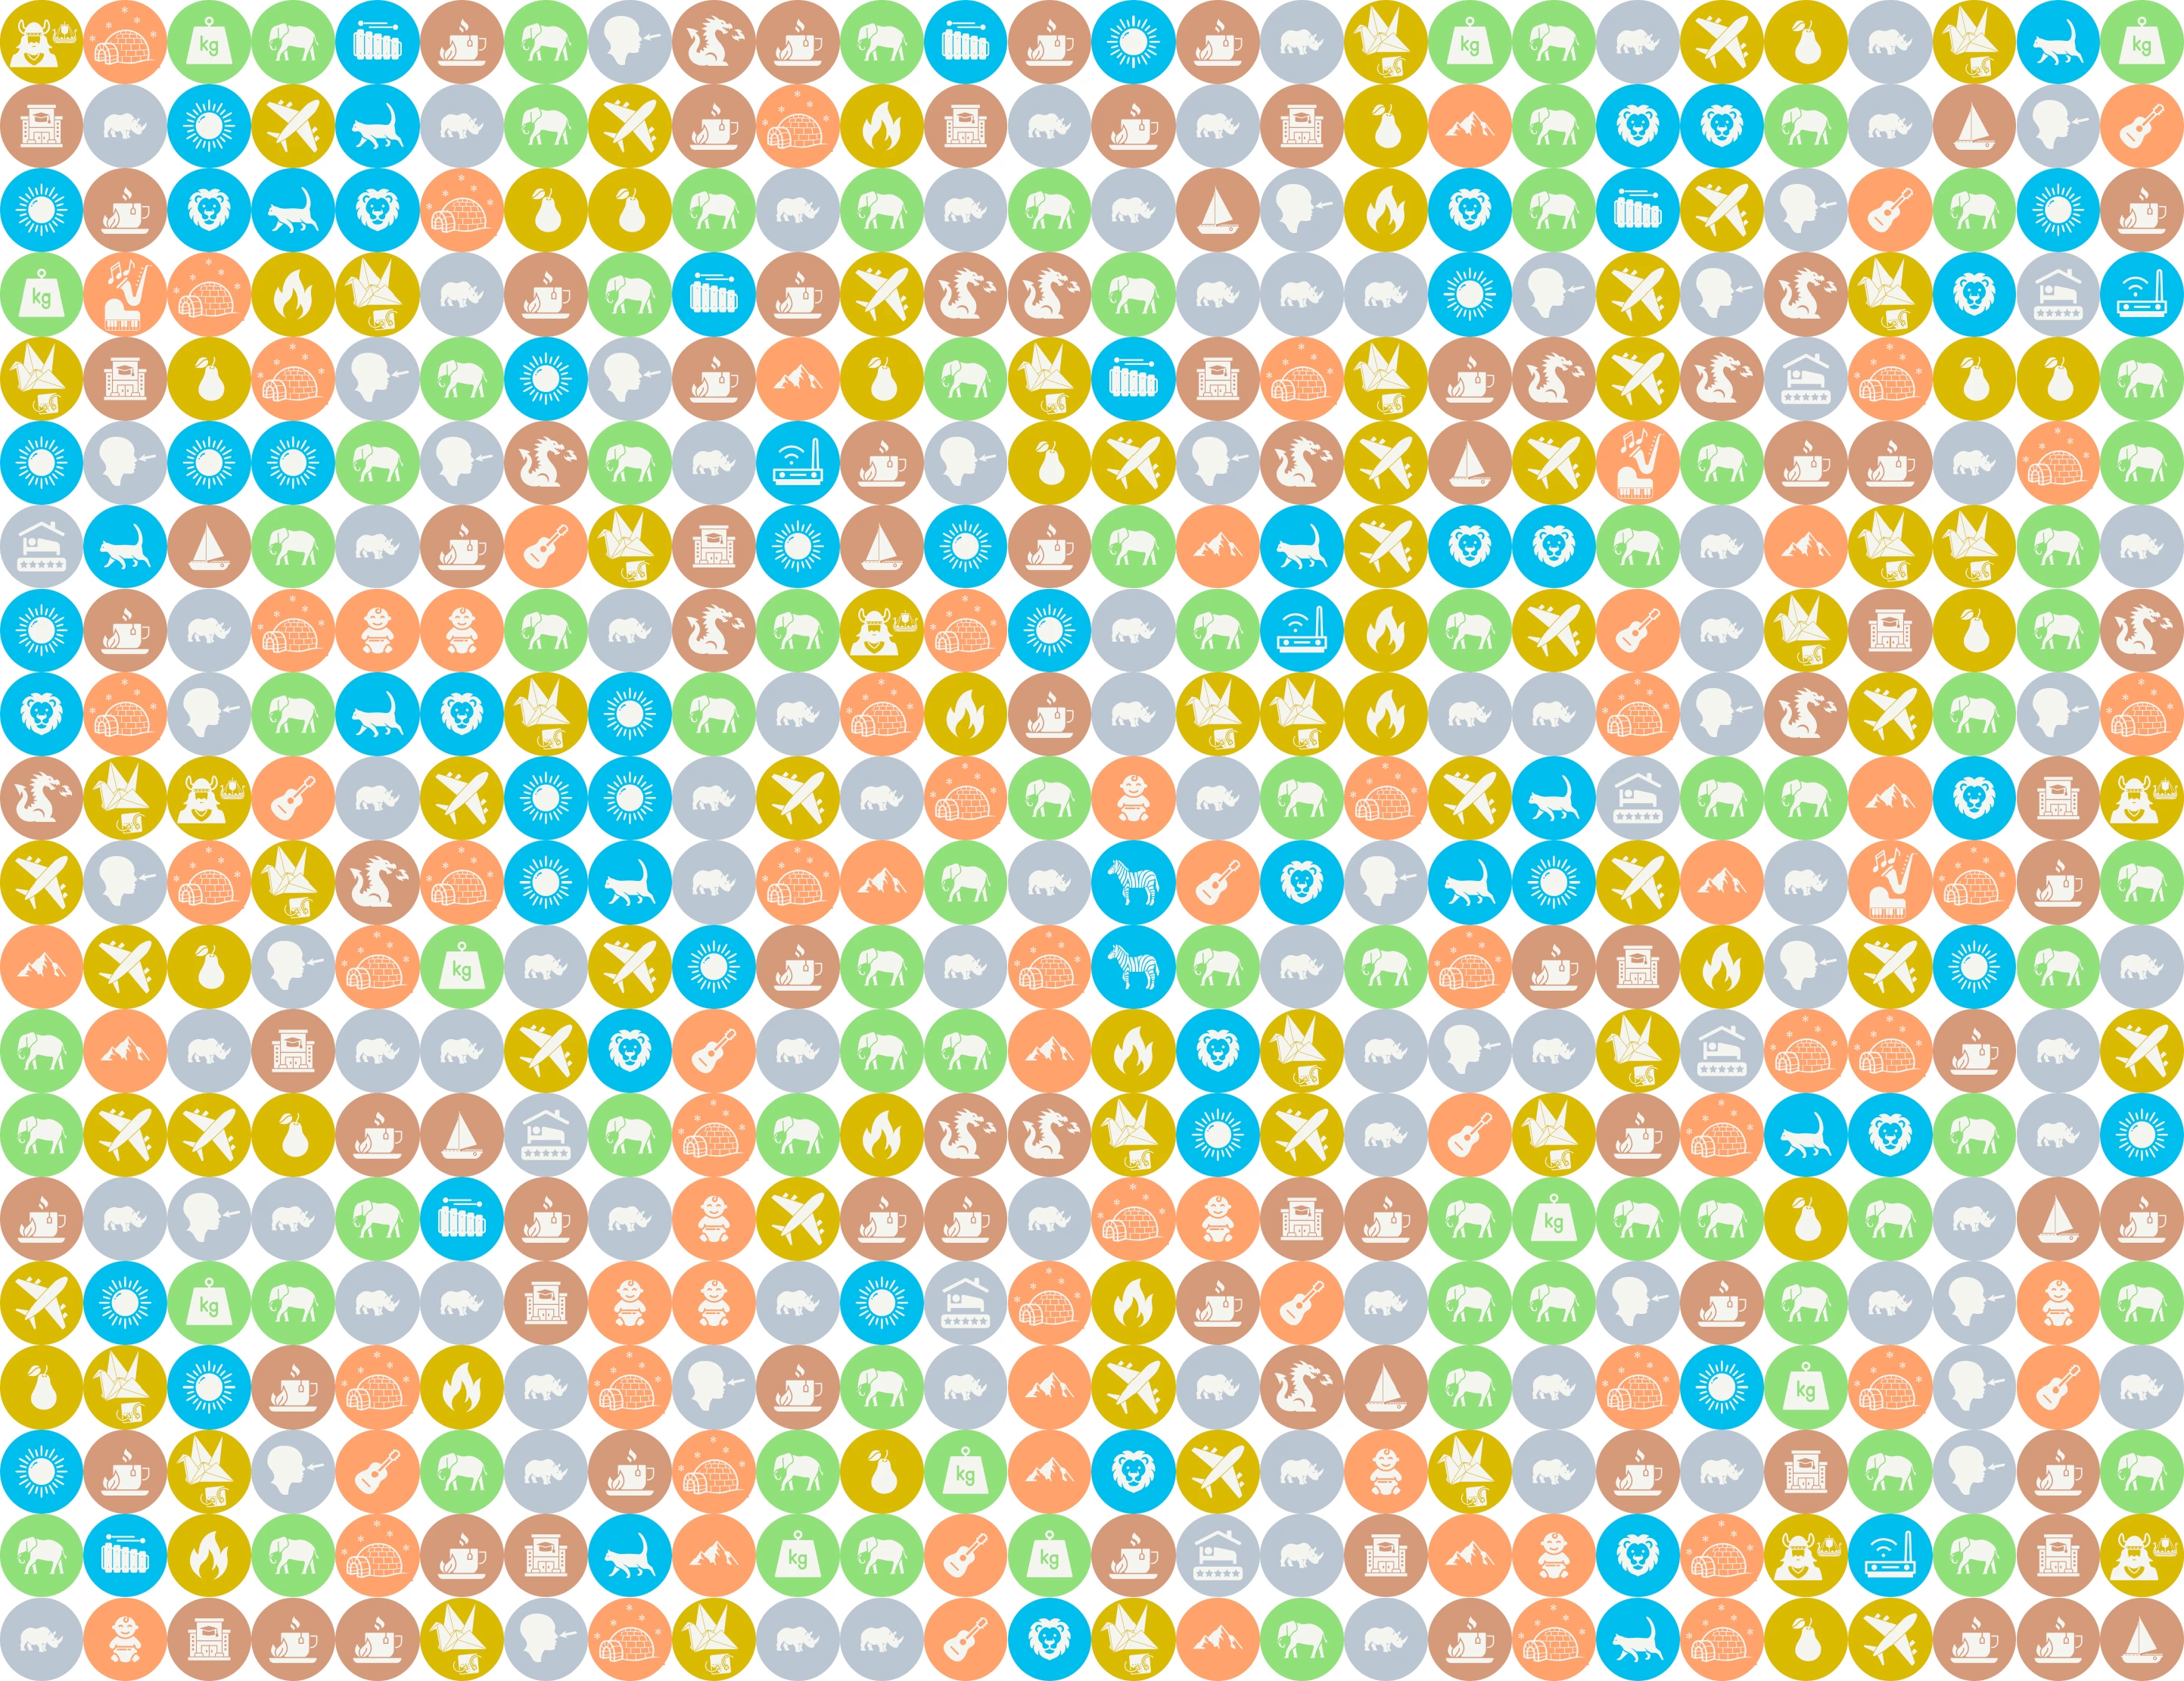
Let's look closely at the image. Hopefully, you can see that there are various icons. Each icon represents a letter of the alphabet:
I tried to pick words/characters that were common to most languages. For example, elephant in English is:
- elefant (German)
- elefante (Spanish)
- elefante (Italian)
- éléphant (French)
So, converting these icons into characters, we get a grid of letters, in which presumably there are hidden words. These hidden words are FME transformers:
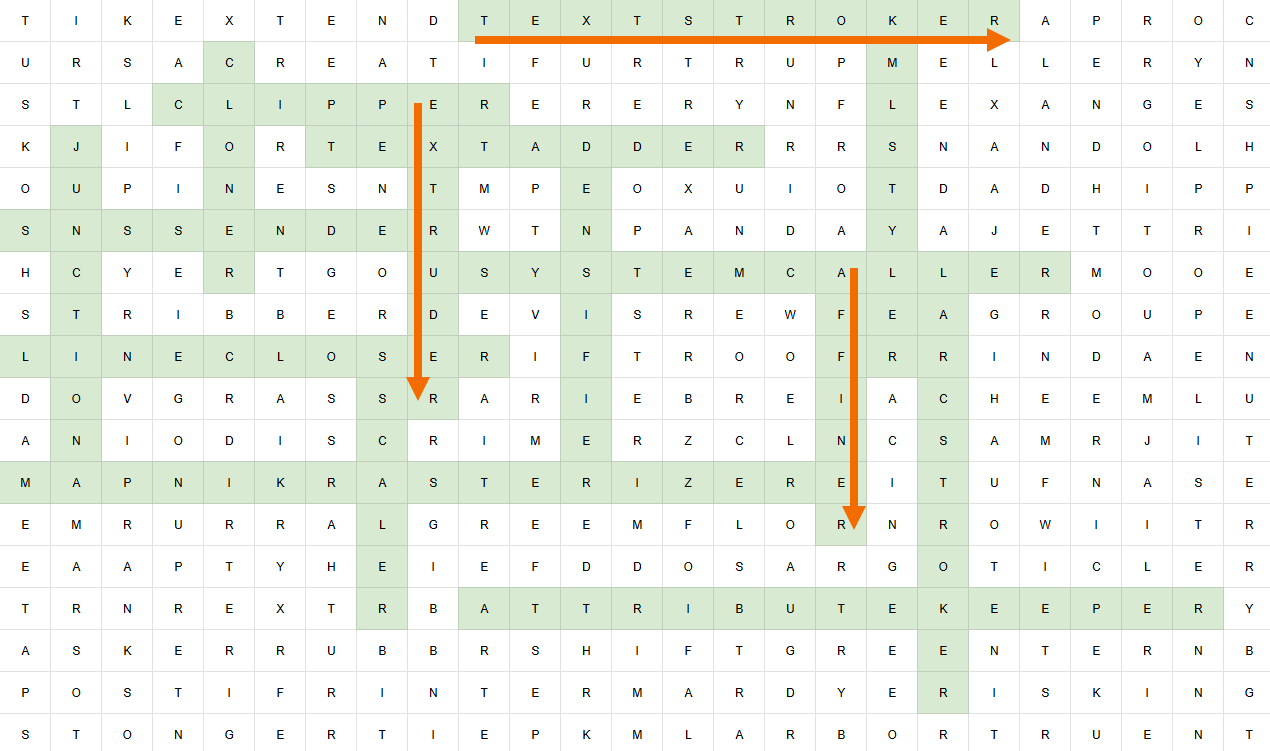
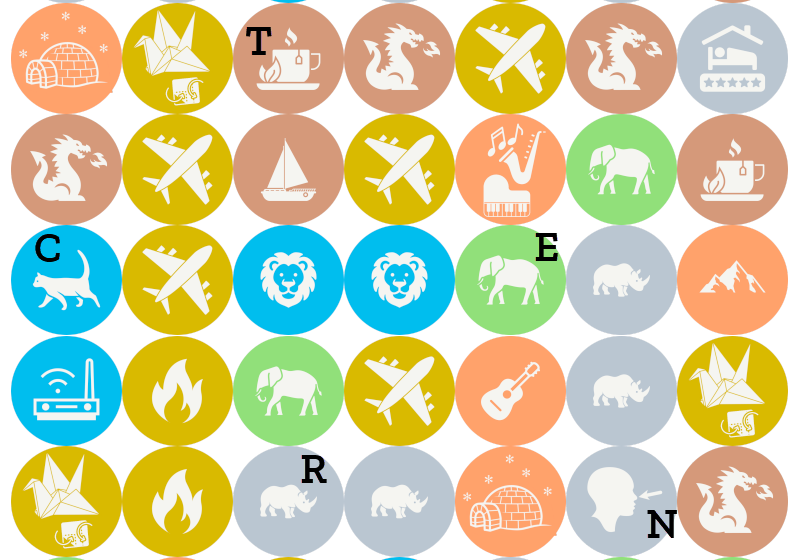
This is a level 5 puzzle, so there much be more steps, and there are. The puzzle description mentions "intersections", so let's find the intersections of transformer names:
So, these intersections denote the characters that make up the hidden keyword.
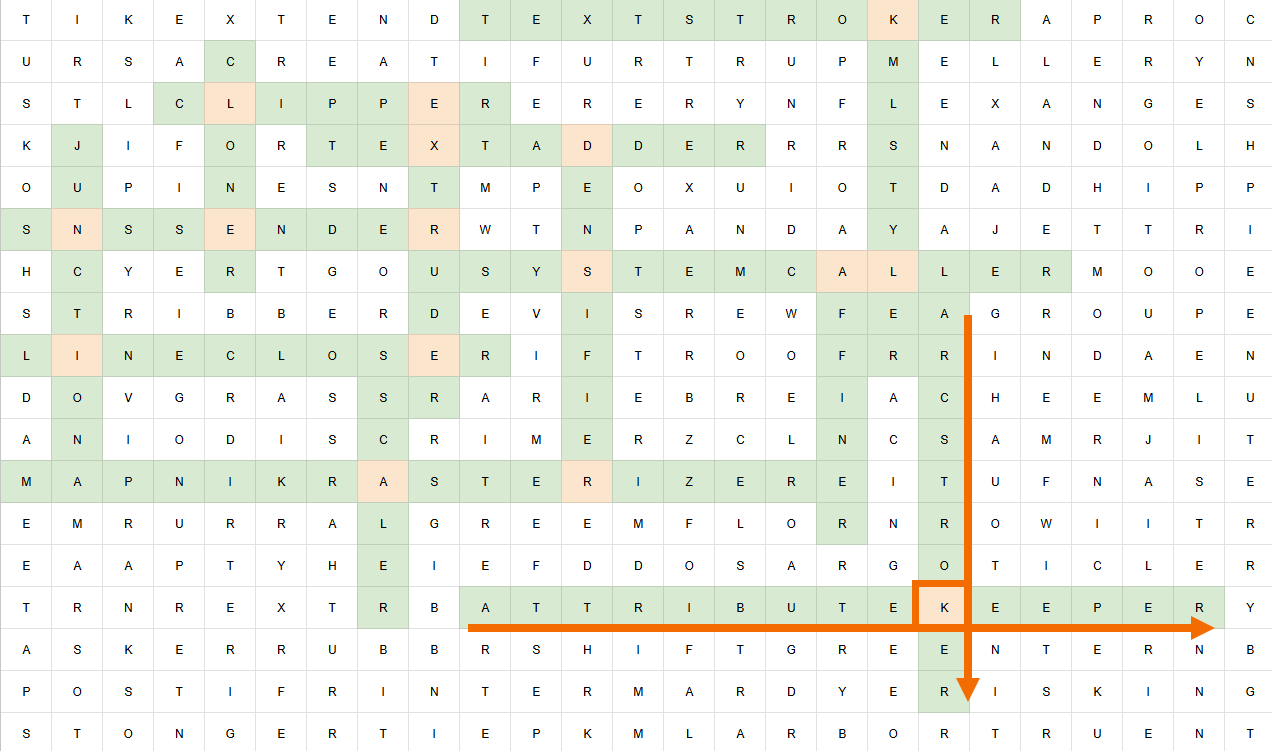
KLEXDNERSALIEARK
Obviously, that's not in the correct order. How do we find the correct order? By using this extra clue:
7 (1), 5 (3), 2 (2), 3 (1), 5 (2), 4 (1), 3 (2), 6 (2), 7 (2)
5 (1), 4 (2), 2 (2), 1 (1), 6 (1), 4 (3), 8 (1)
How does that work? Well, 7 (1) means the 1st intersection on the 7th row that has intersections, which is A.
So, 5 (3) means the 3rd intersection on the 5th row that has intersections, so L.
Put those together and you get:
ALEXANDERSELKIRK
So, enter alexanderselkirk or alexander selkirk into the text field to receive the final clue.
Clue
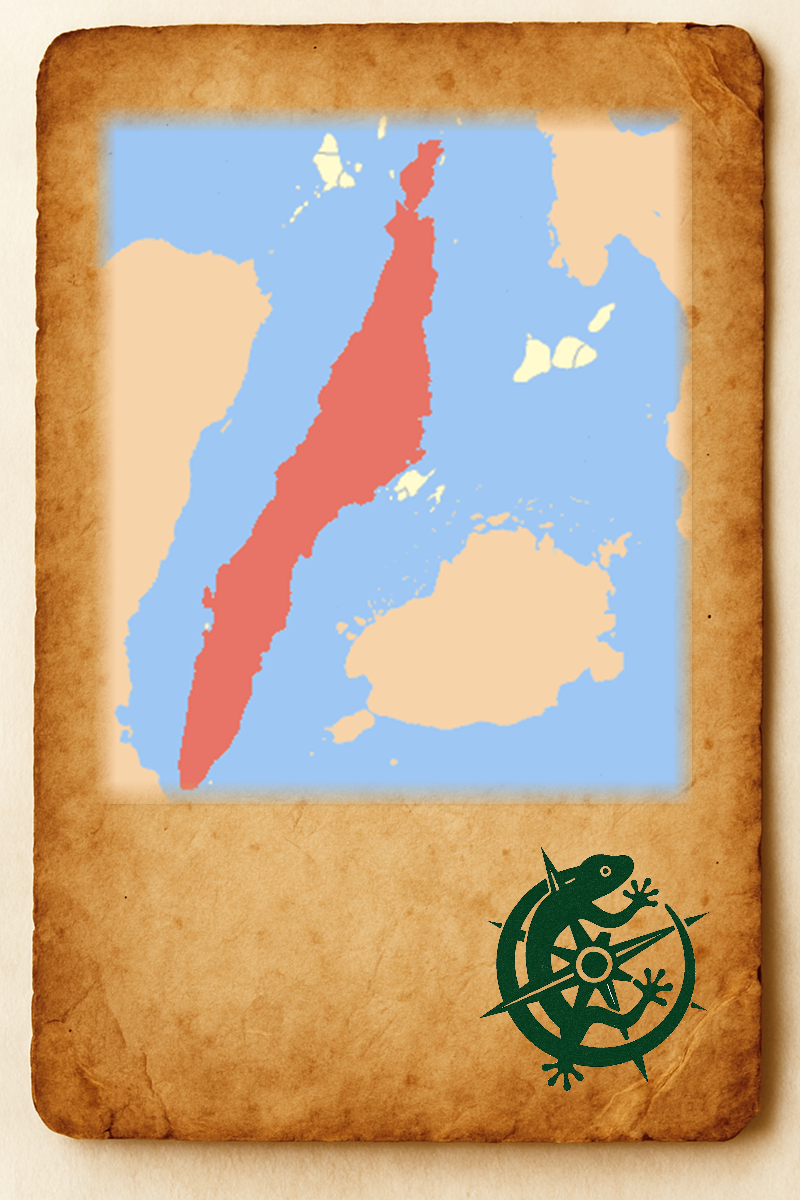
- The actual clue is another image. This time it's a map image pointing to the actual location for this set of puzzles.

Bonus Clue
- There is no bonus clue for this puzzle, because anyone who can solve a level 5 puzzle doesn't need bonus clues.
Notes
- Who is Alexander Selkirk? He was a Scottish sailor who was marooned on a tropical island. His story is allegedly the inspiration for the character of Robinson Crusoe.