Hellow. I just want to take a simple pointcloudxyz and transform it into a polygon. it will be 2D so the z value will always be zero. Has anyone got a simple example of tutorial I can follow?

Page 1 / 1
HullReplacer should do the trick.
@kowfoz1
I have uploaded a simple workspace that may help.
You simply add the Point Cloud dataset; filter the buildings using the 'PointCloudSplitter' transformer if that is the layer you require, in this case classification = 6; Convert the point cloud to points using the 'PointCloudCoercer' transformer; Buffer the points so that the points overlap the other point features. in this case I buffered the points creating squares; and lastly, I smoothed the polygons using the 'Generalizer' transformer.
HullReplacer should do the trick.
Thanks. WHat is the difference between HullReplacer and HullAccumulator exactly?
Thanks. WHat is the difference between HullReplacer and HullAccumulator exactly?
- The HullReplacer creates a hull (convex or Concave) for each individual feature.
- 5 lines/points = 5 polygons
- The HullAccumulator creates a hull (convex or Concave) for each feature set.
- 5 lines/points = 1 polygon
- Attributes can be gathered into a list
You may need to use the accumulator if you deaggregated the cloud into individual points. It should already be a single aggregate feature so you can use the HullReplacer.
Thanks.
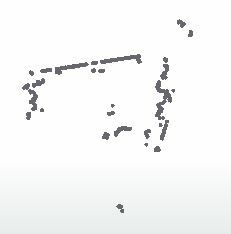
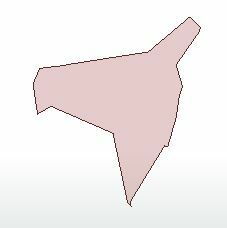
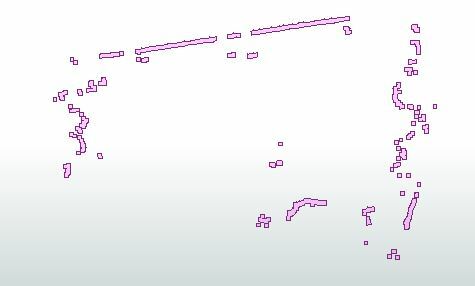
So would I be right in saying the bufferer actually gives the more accurate outline? As I actually want the more exact outline rather than a smoothed outline? See image attached
 at the moment I use Hullreplacer which actually gives too smooth a result
 Can you help?
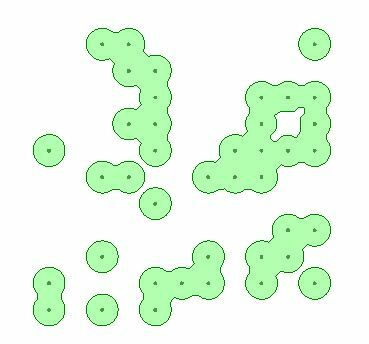
I see what you want to do. Buffers work but it looks terrible so you have to clean them up to look smoother. The attached workbench creates a randomized set of points to demo how this works. You will need to adjust the buffer sizes to match your units.
Workbench - Attached .fmwt
 Points with a buffer end up with ragged edges
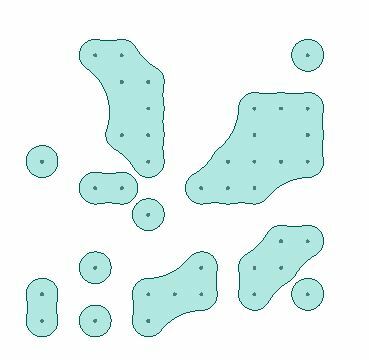
Stroking the arcs of the hulls and buffering creates a cleaner outline
I see what you want to do. Buffers work but it looks terrible so you have to clean them up to look smoother. The attached workbench creates a randomized set of points to demo how this works. You will need to adjust the buffer sizes to match your units.
Workbench - Attached .fmwt
Points with a buffer end up with ragged edges
Stroking the arcs of the hulls and buffering creates a cleaner outline
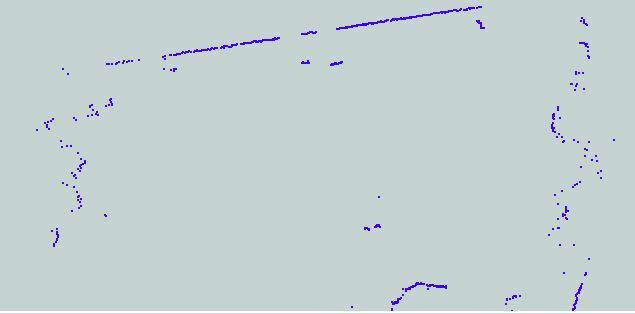
That is a great help. So now I have the image below:
 The buffer lines are quite thick though? How do I make them more like just lines connecting the dots of the original point cloud? Image below:
That is a great help. So now I have the image below:
The buffer lines are quite thick though? How do I make them more like just lines connecting the dots of the original point cloud? Image below:
Adjust the negative buffer amount on the last Bufferer until you get the desired result. For example, if you change the example to a -2.4 it will almost be on the nodes.
Play around with changing all three of the bufferers to get a better idea of what it's doing. There's going to be a combination between those three that should be very close to what you want.
That is a great help. So now I have the image below:
The buffer lines are quite thick though? How do I make them more like just lines connecting the dots of the original point cloud? Image below:
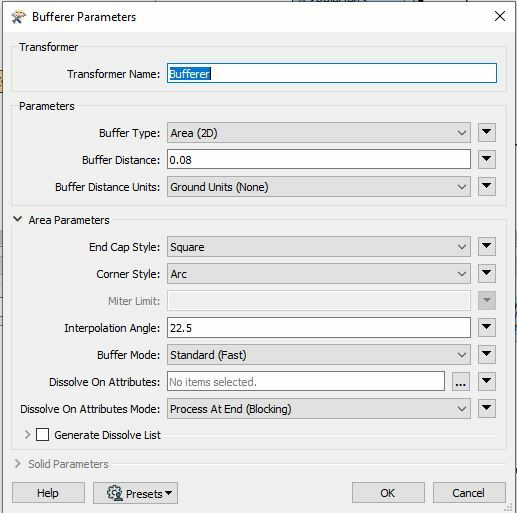
when you say negative buffer..... Which element below?
That is a great help. So now I have the image below:
The buffer lines are quite thick though? How do I make them more like just lines connecting the dots of the original point cloud? Image below:
I tried -0.08 instead of 0.08 but then there is view displayed?
That is a great help. So now I have the image below:
The buffer lines are quite thick though? How do I make them more like just lines connecting the dots of the original point cloud? Image below:
Buffer Distance can be positive or negative. A positive buffer will buffer outward and a negative will buffer inward.
In the example workbench, only 1 buffer should be negative. Marked below.
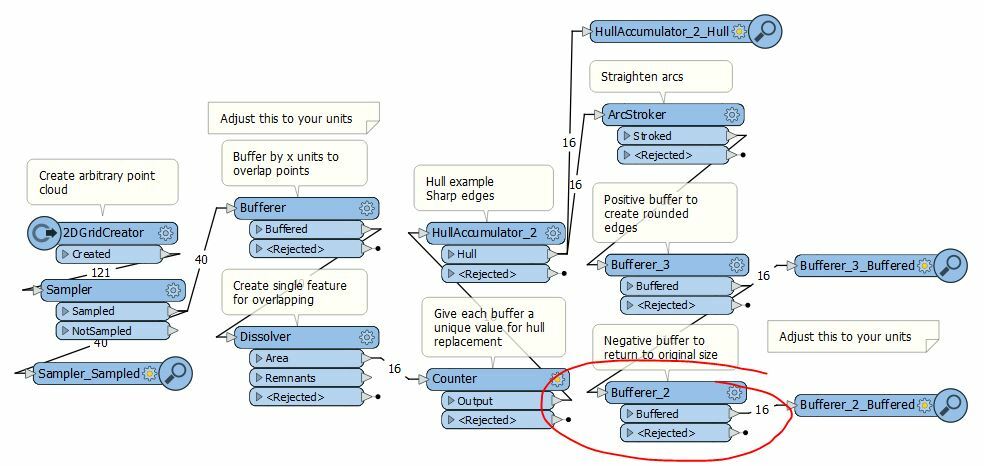
There are 3 bufferers in the example process I sent.
- Bufferer = Initial buffer of the points to create overlapping polygons for dissolve (positive)
- Bufferer_3 = Creates the rounded edges from the hulls (positive)
- Bufferer_2 = Shrinks the polygon back down to the original size (change this one to negative)
Bufferer_2 can't be less than the sum of Bufferer + Bufferer_3 or the polygon will disappear because you buffered it out of existence.
So, if I have;
Bufferer = .6
Bufferer_3 = 2
Bufferer_2 = can be any value up to -2.6 without losing any data. If you go beyond 2.6, it may or may not buffer polygons out of existence depending on how many polygons were dissolved together.