Okay, I've taken a look at it and I think you need to make a few little changes:
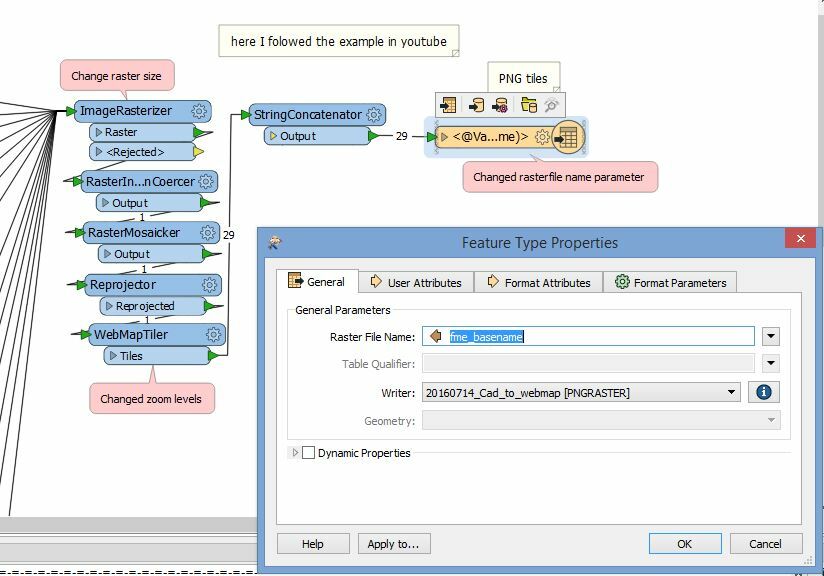
- The ImageRasterizer was set to produce a 1x1 pixel image, you'll need to change that and it's probably best to change from specifying a number of columns and rows to specifying pixel size (and set that to the most detailed of the zoom levels you want to produce)
- The WebMapTiler was set to create tiles for zoom levels 1 and 2, those would be two of the least detailed (global) ones. I think zoom level 0 is 1 tile for the entire earth, so 1 would be 4 tiles for the entire earth. You'll need to figure out which ones you want.
- The output feature type should be set to use the fme_basename attribute as output filename, that way the tiles get the proper naming scheme.
Here's a screenshot of my changes.
Now, in addition to that there's something else you may want to consider. Right now you're using FeatureColorSetters to add color to your map objects. If you replace those transformers and the ImageRasterizer with a single MapnikRasterizer you will get some more control over the styling (e.g. you can also set line widths. Also, I've found that in some of my projects the MapnikRasterizer was a lot faster than the ImageRasterizer, so it may give you a performance boost too.
Hope this helps.