


Happy Friday everyone! Welcome back to another edition of TGIF: Thank Goodness it’s FME! This week, we have Zoe, one of our FME Flow Technical Specialists, running us through how to perform email verification, using an automation, workspace, data virtualization API, and cleanup task within FME Flow. For a bit of background, email addresses can be assigned to user accounts in Flow to enable automated password reset, or for use in workspaces and automations. Flow does not contain native email verification however, requiring the use of a third-party authentication service or manual implementation.
With all that said, let’s get into the tutorial!
Note: The project file used for this tutorial is linked at the bottom of this post to download!
Overview
The method used in this post verifies new users’ emails with the role ToBeVerified, by emailing them a single-use link with a 24 hour expiry. Once verified, users are assigned the fmeauthor role.
The intended admin workflow is as follows:
- An admin creates a new user account with the ToBeVerified role, new user’s email, and a secure password. “Require Password Change on Next Login” should be checked.
- A verification link is automatically sent out to the user.
- The new user clicks the link to verify their account.
- The new user logs into Flow.
On the backend, four components are used in the verification workflow:
- An automation: DetectNewUser
- A workspace: InitializeVerification
- A data virtualization endpoint: /verify, which runs workspace PerformVerification
- A cleanup task DeleteTempCodes to delete expired codes.
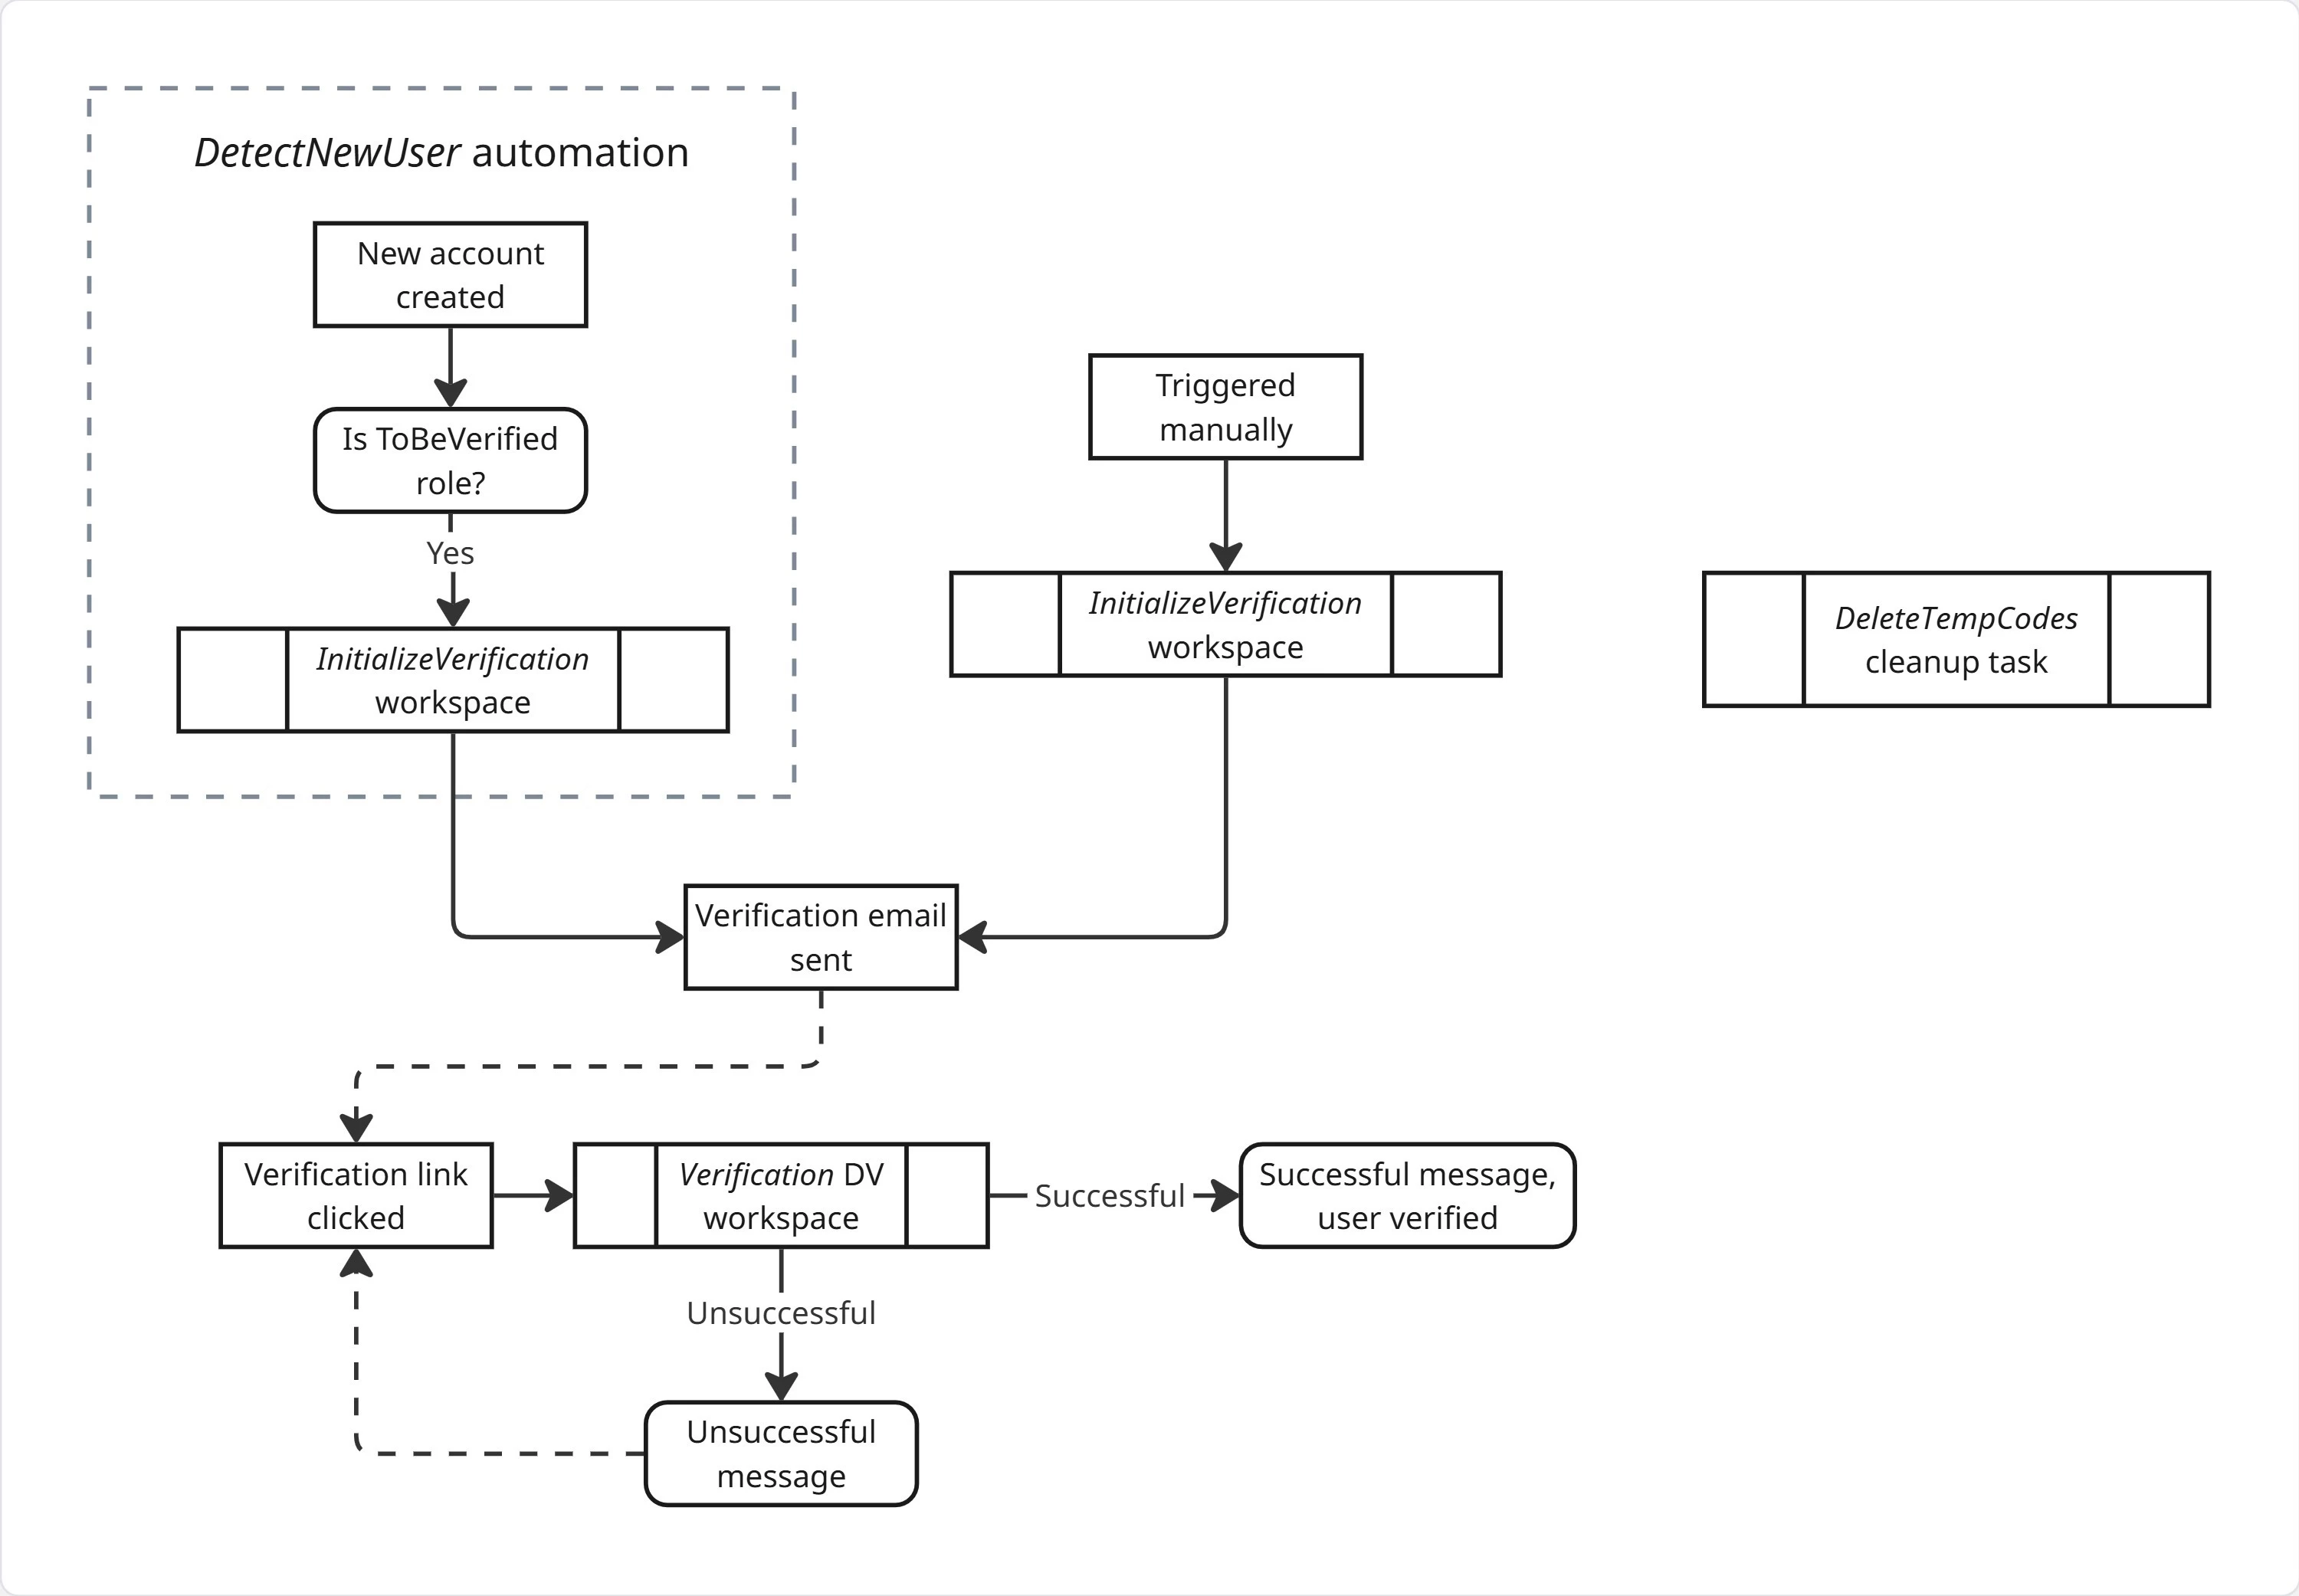
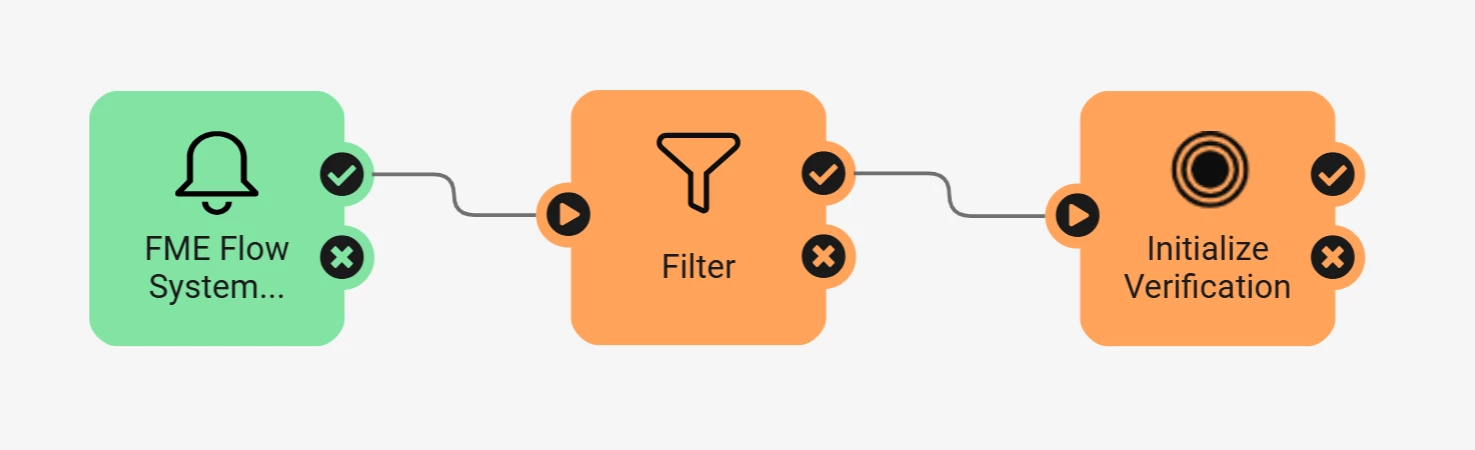
DetectNewUser Automation
This automation is triggered by a System Event Trigger set to the “User Created” event. It filters by users with the ToBeVerified role, and runs the InitializeVerification workspace to begin the verification process.
InitializeVerification Workspace
This workspace sends out the verification link, and sets up everything necessary for it to work. It does the following:
- Verifies the initialization request is valid.
- Generates a code required for verification.
- Stores the code in a file within Resources.
- Emails a verification link to the user, containing their ID and the code as query parameters.
Verification codes are stored within Resources/System/user_verification/, referenced by the temp_user_verification_folder deployment parameter. These should only be accessible to admins.
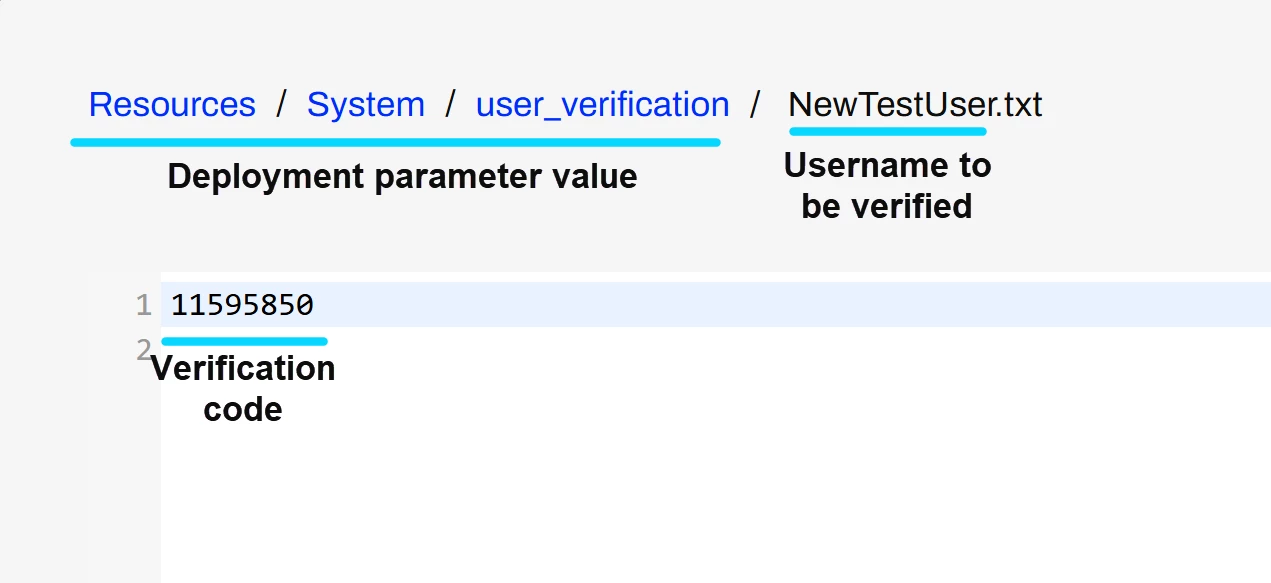
Note: storing verification codes in plaintext may not be sufficiently secure for your organization. This method is used here as a demo for simplicity.
The workspace can also be triggered manually, if an existing user needs to be verified or if the code expires.
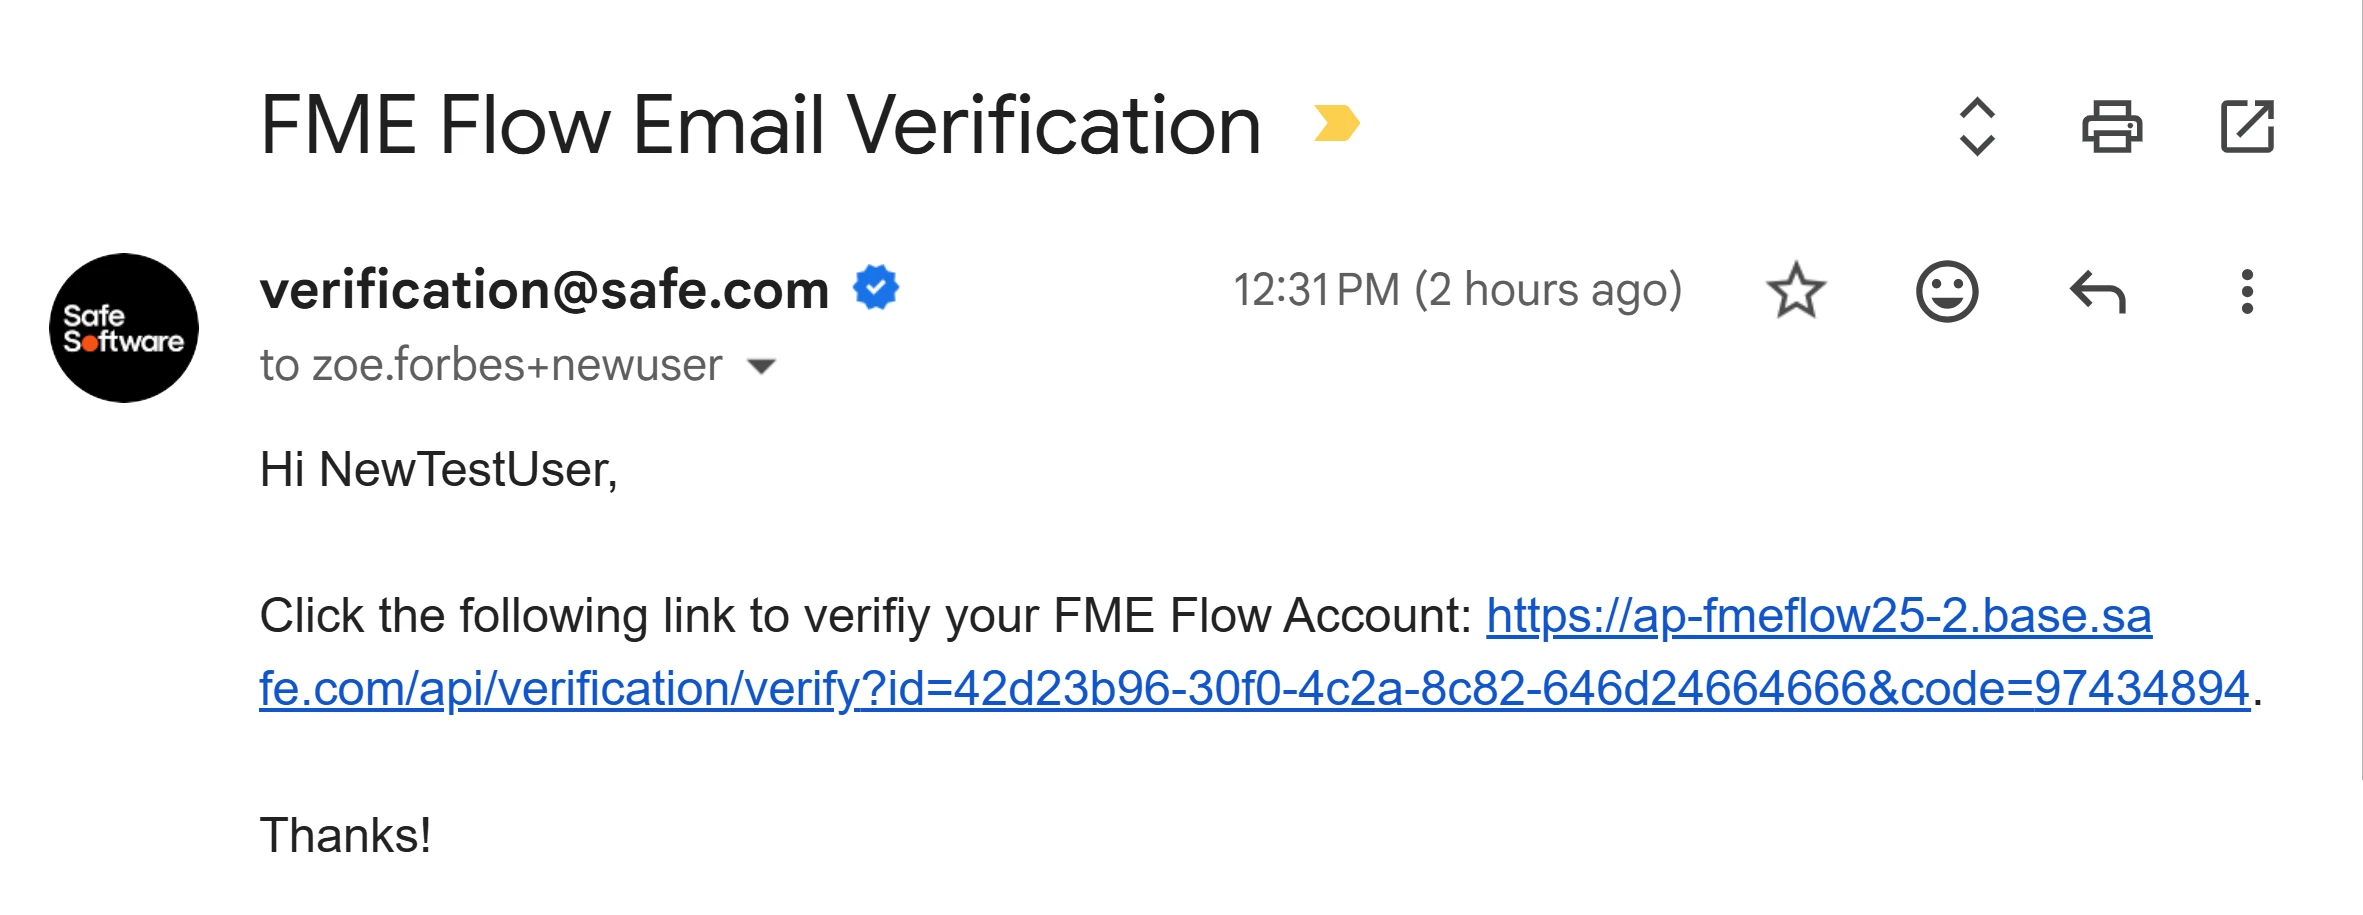
Data Virtualization /verify Endpoint
This endpoint verifies users based on a given user ID and code, as seen in this example verification email:
To perform the verification, it runs a workspace which does the following:
- Looks for a matching user ID within the temporary verification folder.
- Ensures the verification code matches.
- Assigns the user the post-verification role.
DeleteTempCodes Cleanup Task
This cleanup task deletes temporary verification codes created over a day ago, ensuring verification links expire. This task is configured as follows:
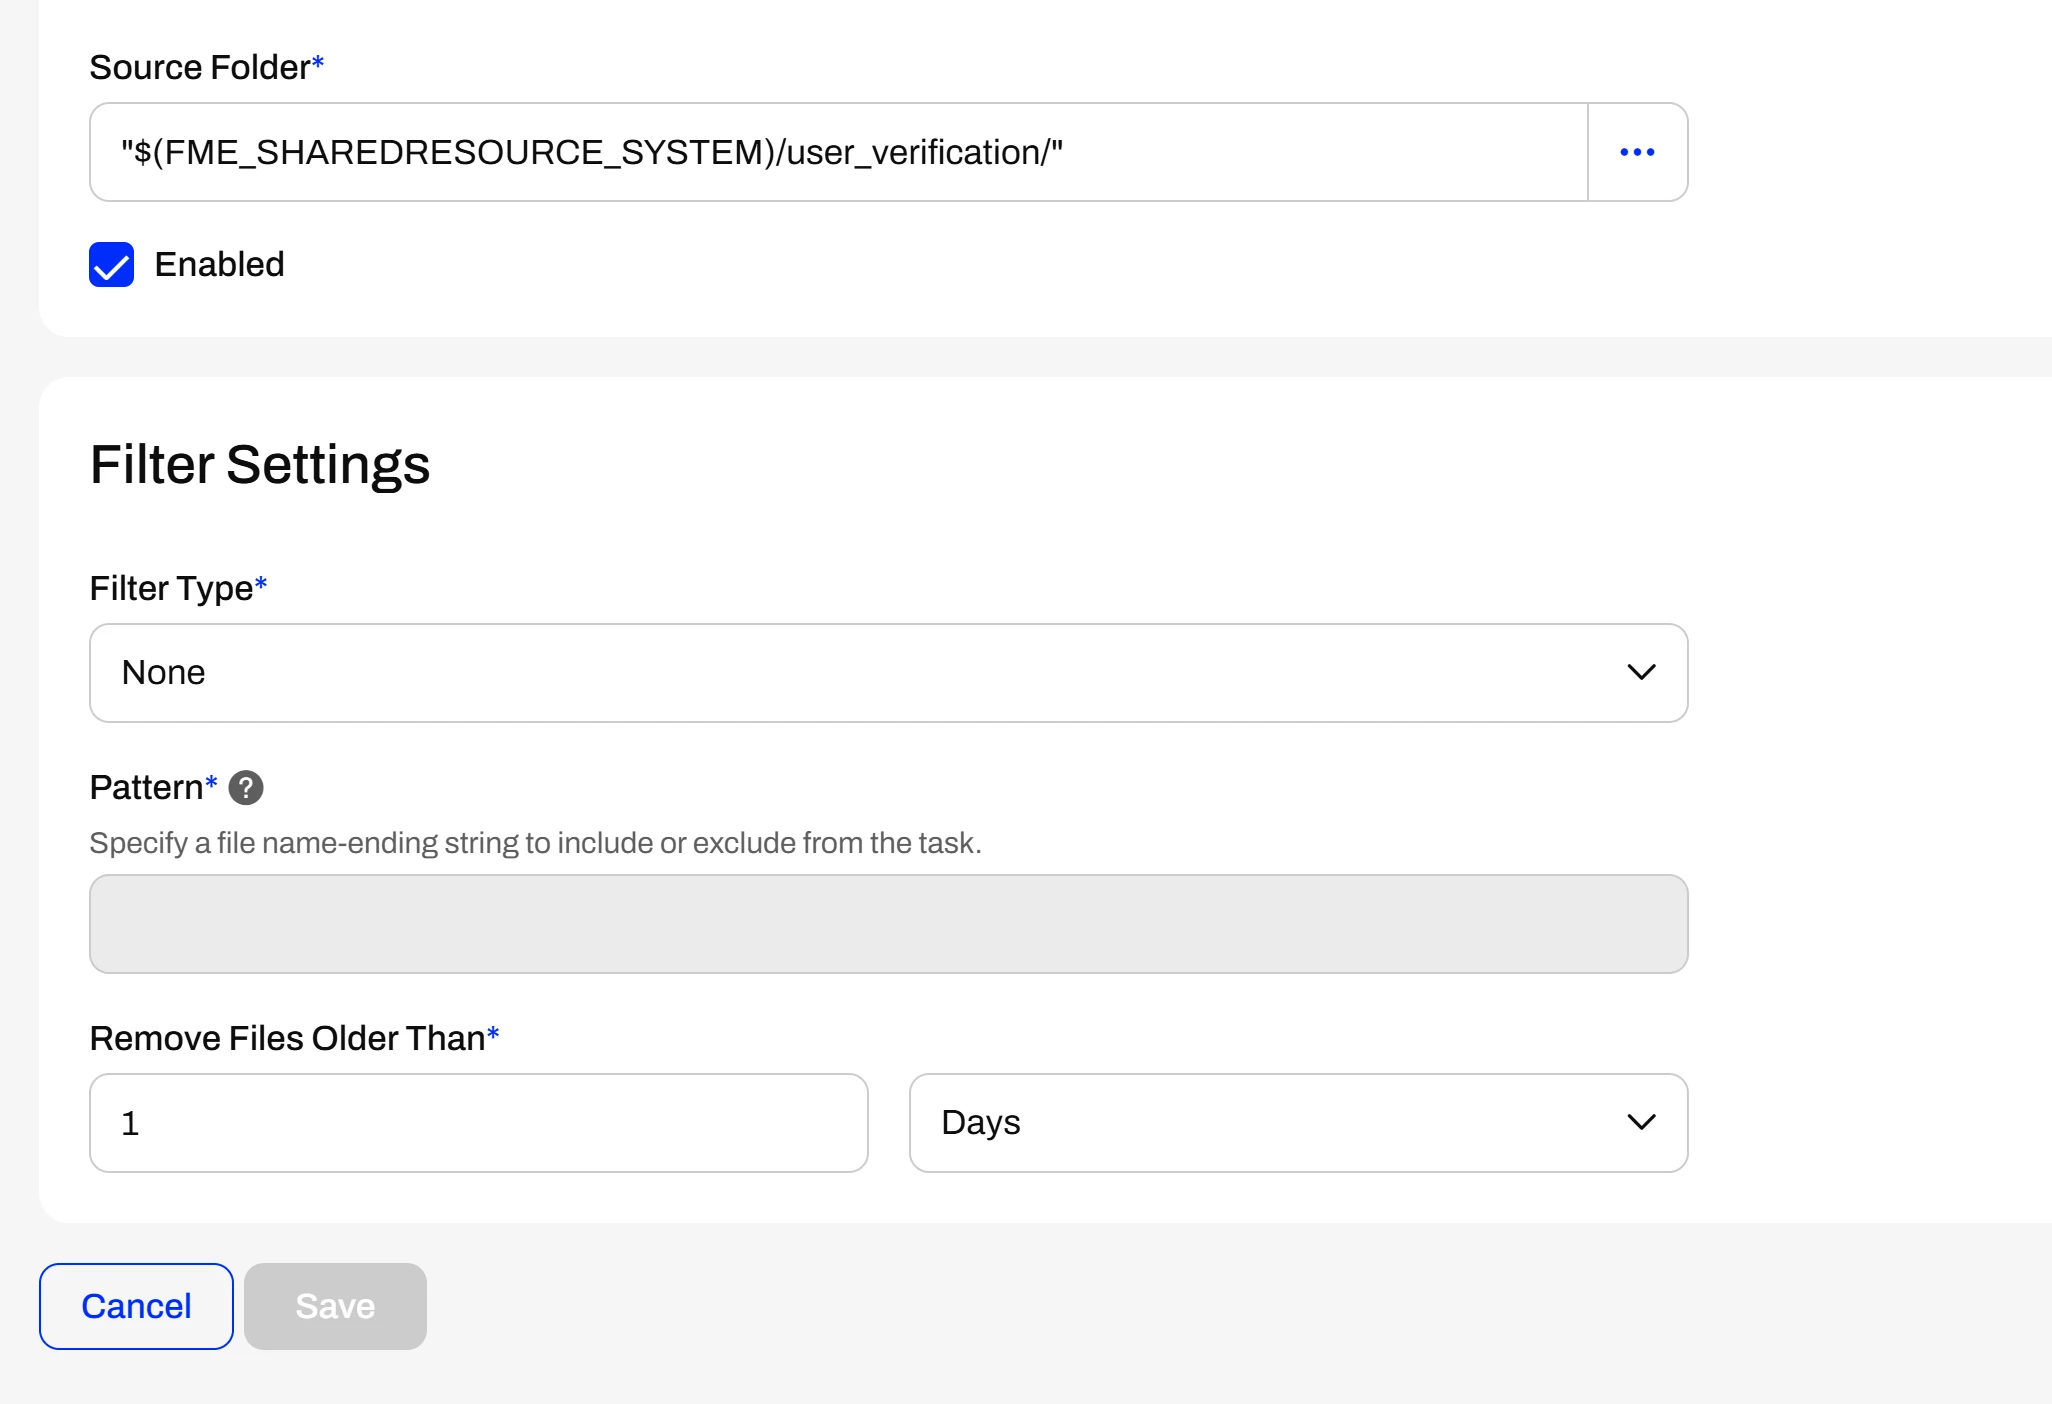
Note: Deployment parameters can’t be referenced in cleanup tasks.
Implementing the Workflow
- Import the attached project.
- Open the DetectNewUser automation
- Set the trigger’s event to “User Created”.
- Save and start the automation.
- Open the Verification/InitializeVerification workspace in Form.
- Configure the three user parameters in the group:
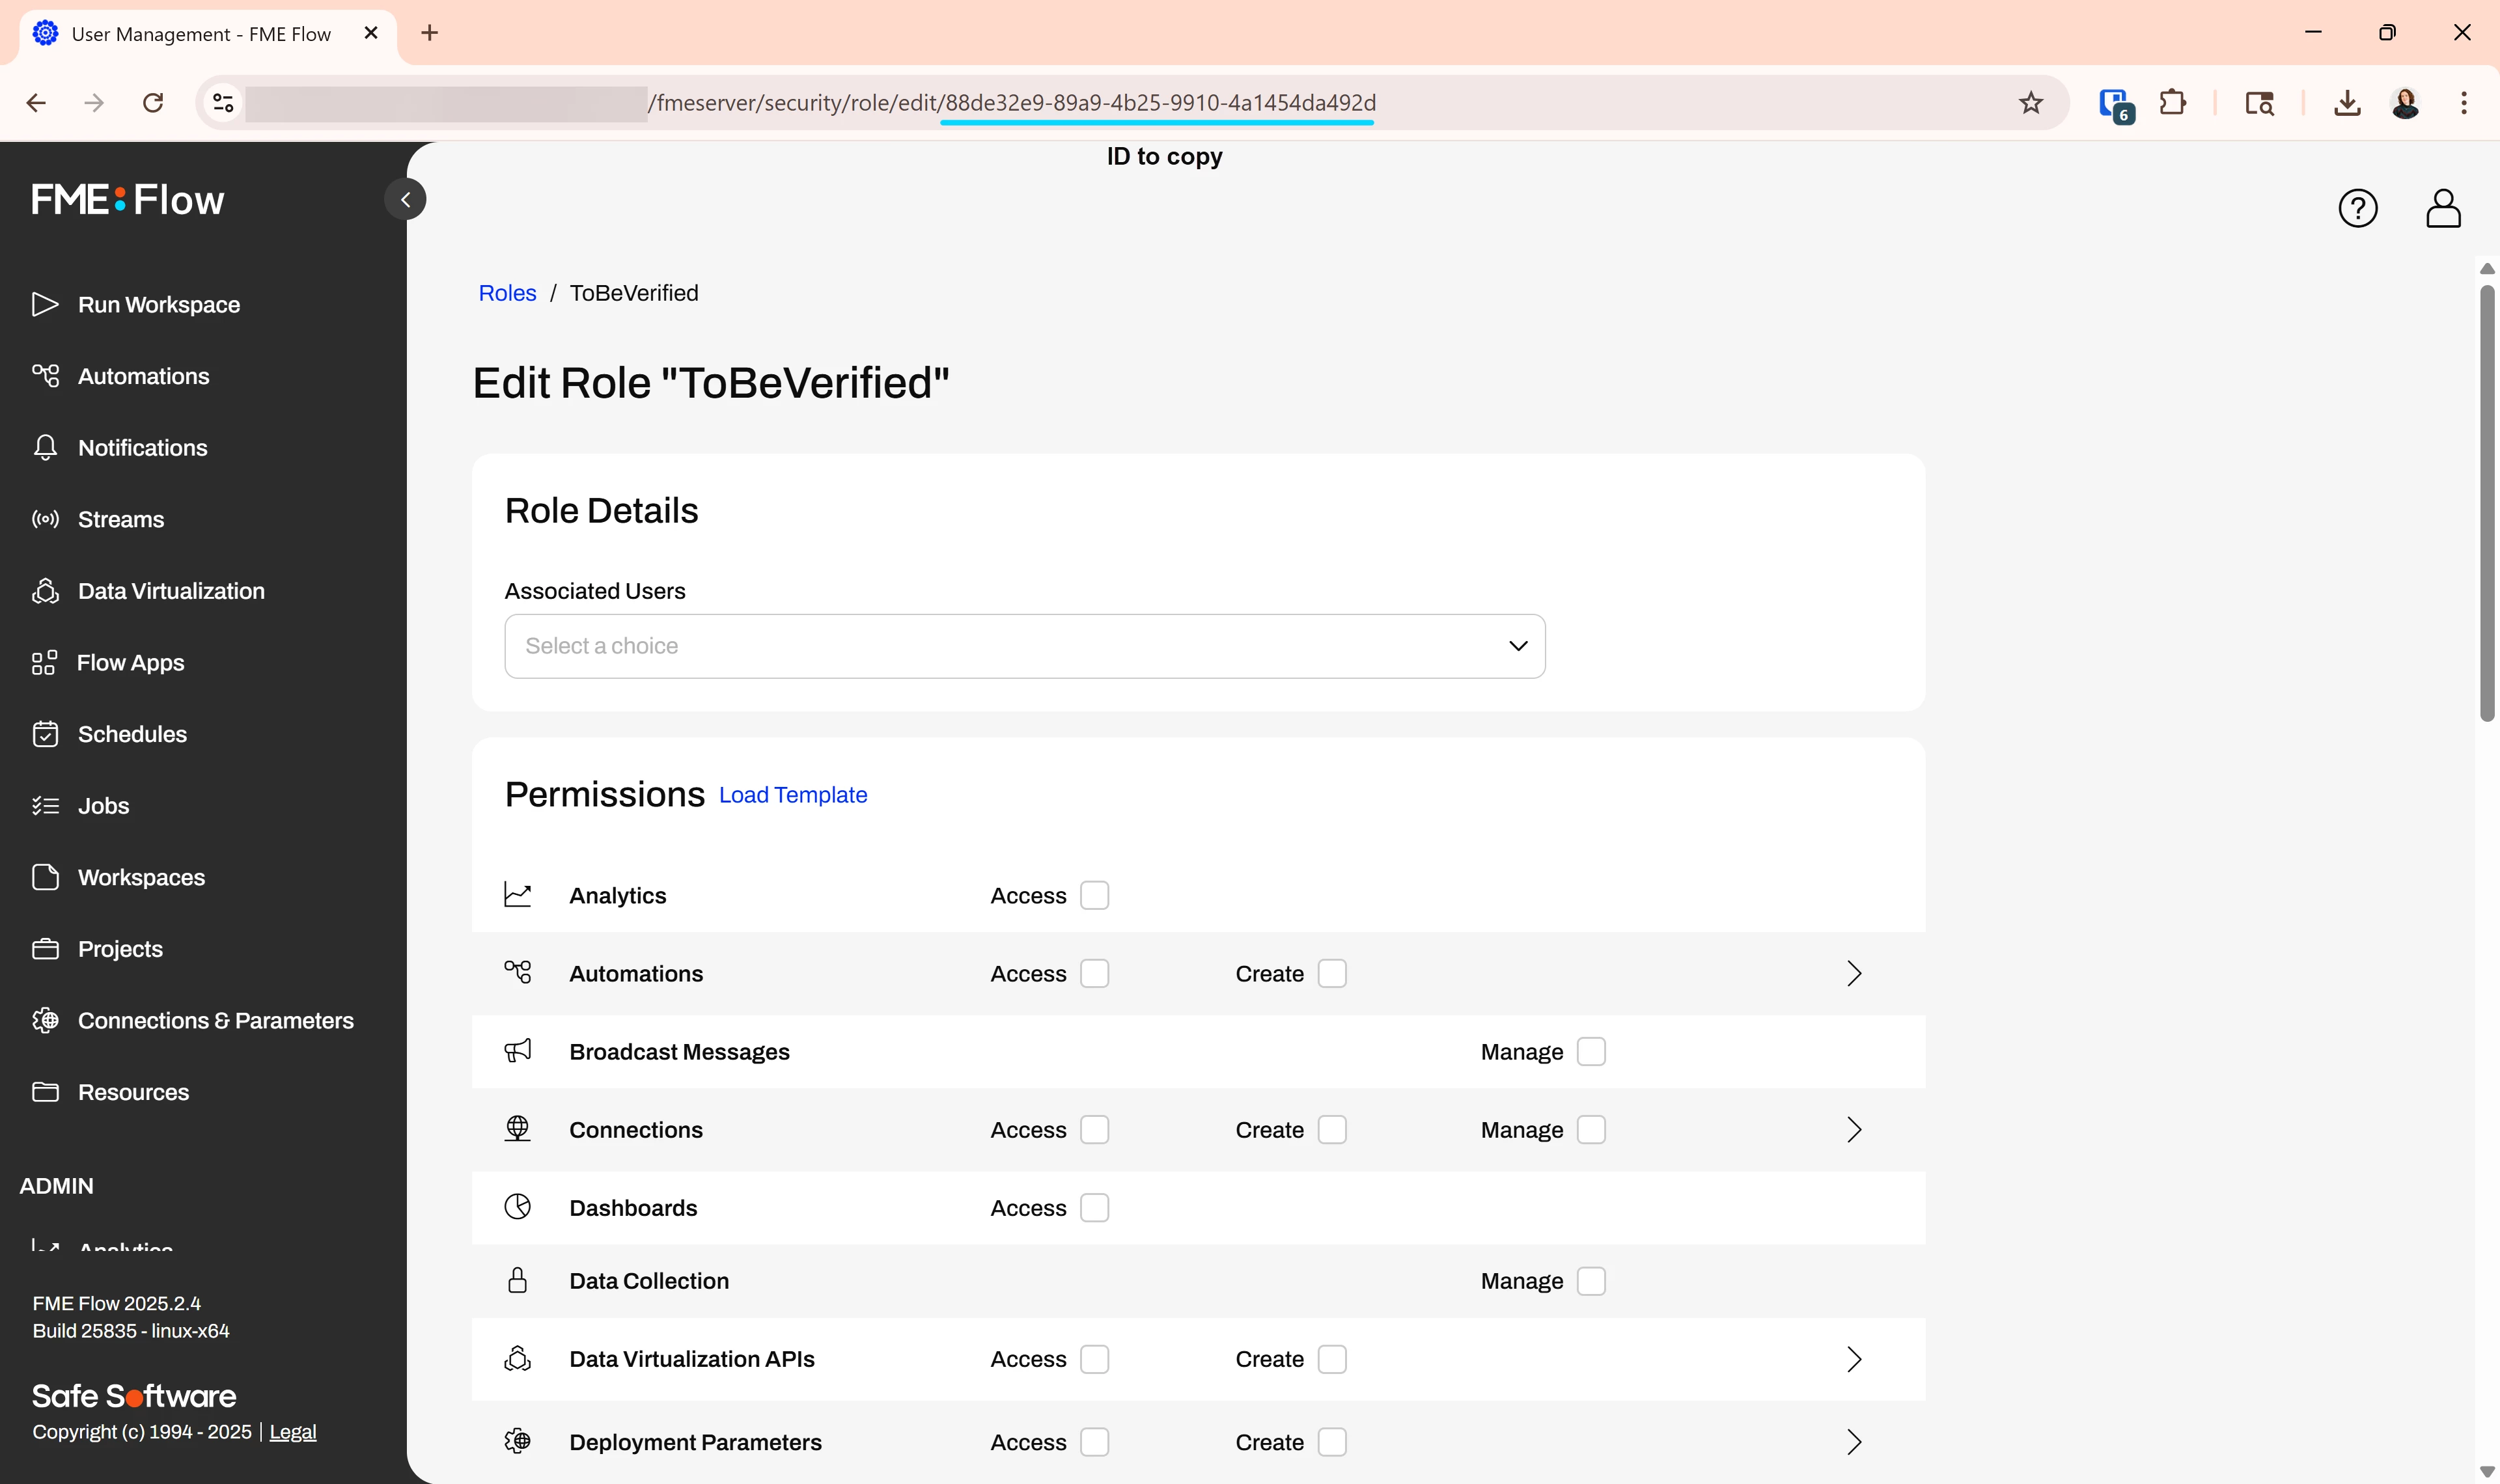
- “ID of Role to Verify” can be found in the URL of the imported ToBeVerified role:
- “FME Flow Web Connection” should be a Flow admin connection.
- “Verify HTTPS Certificates” depends on the configuration of your server.
- “ID of Role to Verify” can be found in the URL of the imported ToBeVerified role:
- Populate all required fields within the Emailer.
- Publish the workspace, overwriting the original.
- Configure the three user parameters in the group:
- Open the DV workspace:
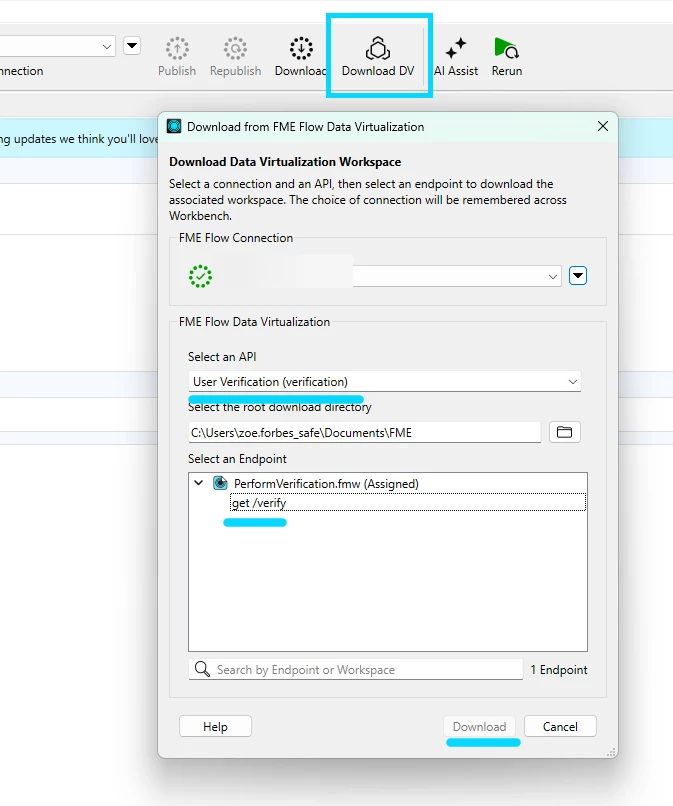
- Set the three user parameters:
- “FME Flow Web Connection” should be a Flow admin connection.
- “Verify HTTPS Certificates” depends on the configuration of your server.
- “Verified User Role” is the role users will be assigned once verified. This should be different from the previous ToBeVerified role. Choose a role and copy its ID from Flow as before.
- Set the three user parameters:
- Set the value of the temp_user_verification_folder deployment parameter. In this example, “$(FME_SHAREDRESOURCE_SYSTEM)/user_verification” has been used.
- Test! Create a new user and check if the verification workflow is successful
Final Thoughts
While one specific email verification method has been covered in this post, various modifications could be made:
- Codes could be stored in a database requiring authentication,
- An attempt limit could be introduced to prevent brute-force,
- Unverified users could be granted permission to run the verification workspace themselves,
- Users could be disabled upon creation, and enabled after.
FME Flow is flexible, and can be adapted on-the-fly to your needs!
We hope you all learned something new and interesting this week! Join us again next week, for more FME knowledge shared by our team! Have a great weekend!
Download the Project here: