


We have a large number of JPG images that cover the same area (flown with a drone in a criss-cross pattern). We need to split the set of images into smaller, workable groups. The idea is to, if possible, create an area of 2 rows by 2 columns that cover the same area where the images were taken. If an image falls within one of the four quadrants, it should be moved to a specific folder that representsthat quadrant. That way we can correctly subdivide the set of images into four, more manageable blocks.
The 2DGridAccumulator seems to be able to setup a grid, but is there now a way to compare each image to each cell of such a generated grid and then move that image to a folder as explained above? As the drone flew in a criss-cross pattern, the date modified for each file cannot be used to determine in what block it should be placed (ie by just using Windows File Explorer to categorise the images).
Apologies if there is a straight forward solution for this which I could not find.
Best answer by chrisatsafe
View original


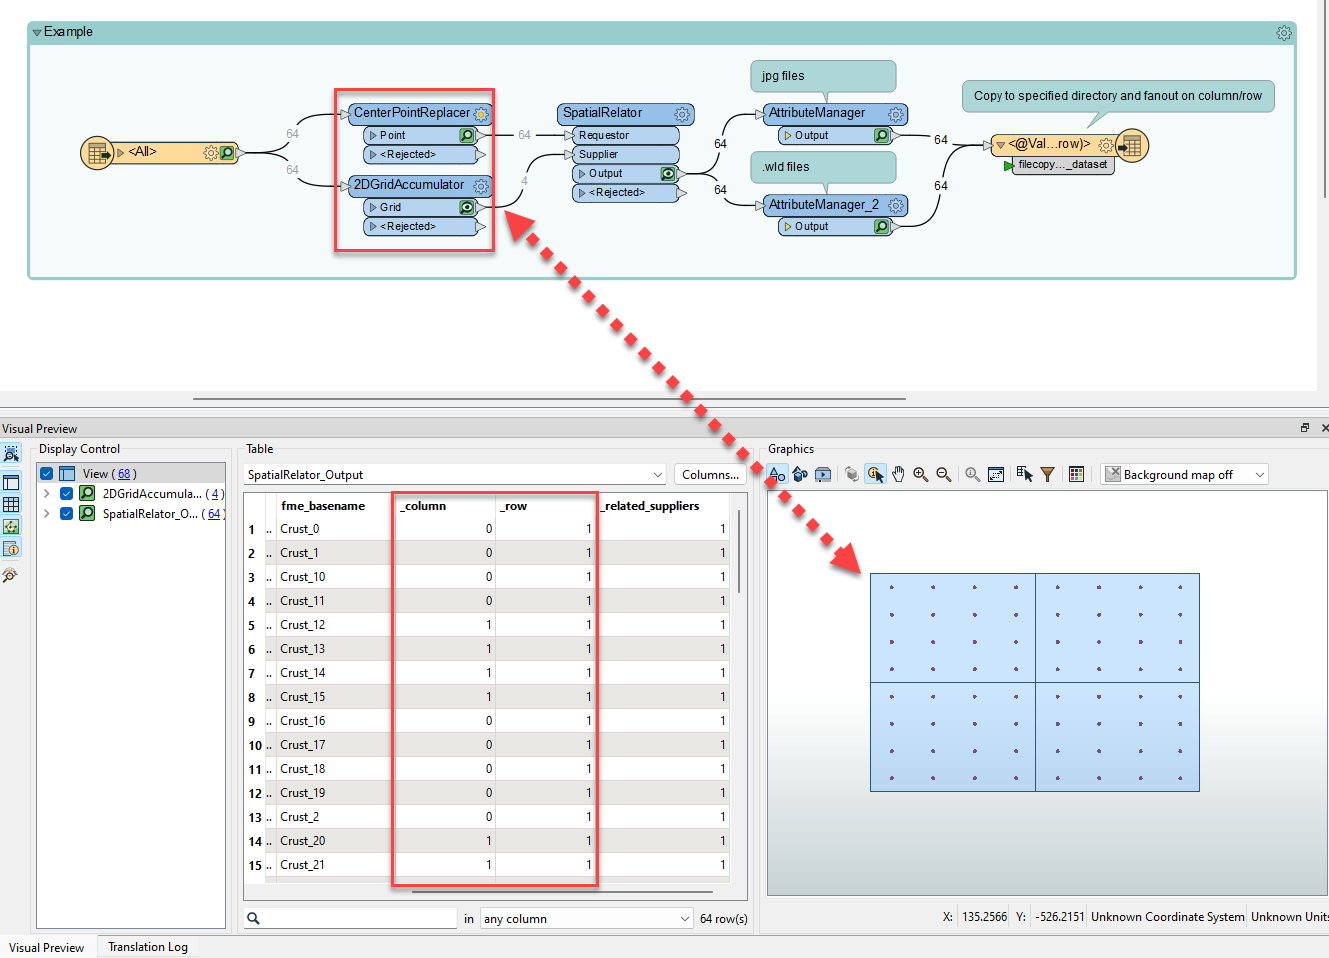 The file copy writer is pretty straight forward. You define the destination filename and source dataset (which is a format attribute called fme_dataset which you can expose in the reader feature type) and it will place those files in whatever folder structure you have defined in the subfolder name parameter of the writer feature type (using fanout to create a sub directory for each column and row in this example).
 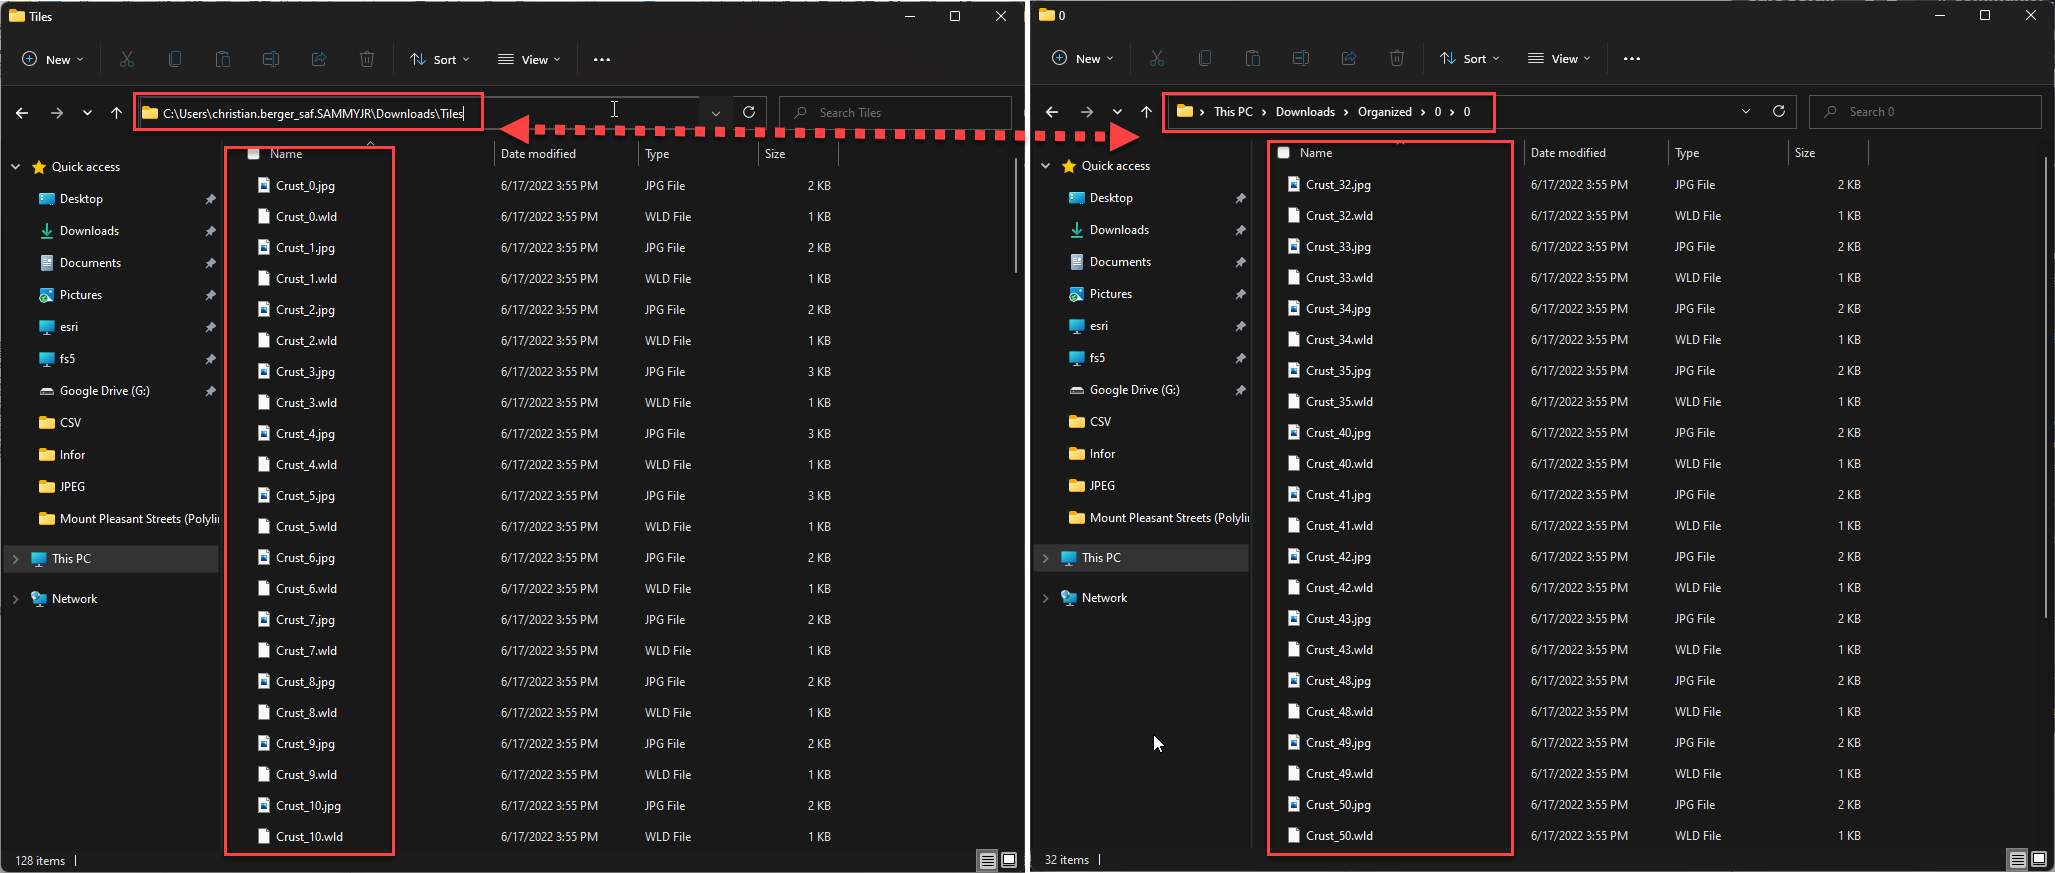 Hope that helps.