Question

Change colour in a tiff file


Badge

Hi,

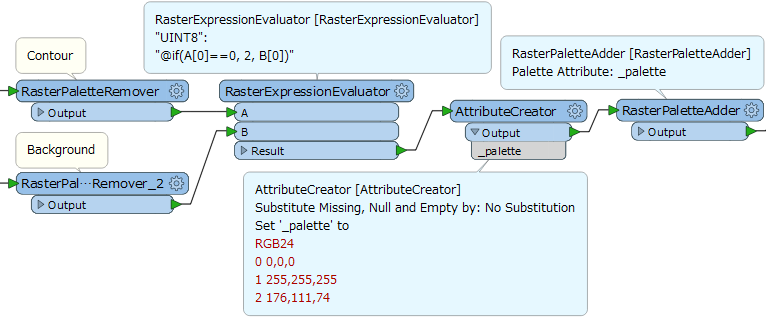
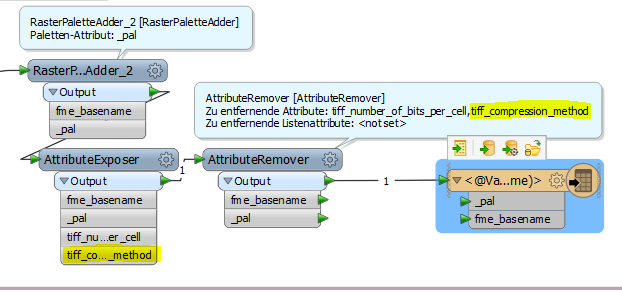
I need to change the colour from black to brown within a tif file. I am using the rasterexpressionevaluator to do that. In addition, everything which is not brown I would like to set to nodata. However, while the result looks nice in the inspector, the file size of tiff image itself is far to small. The following Image Shows my workbech so far:

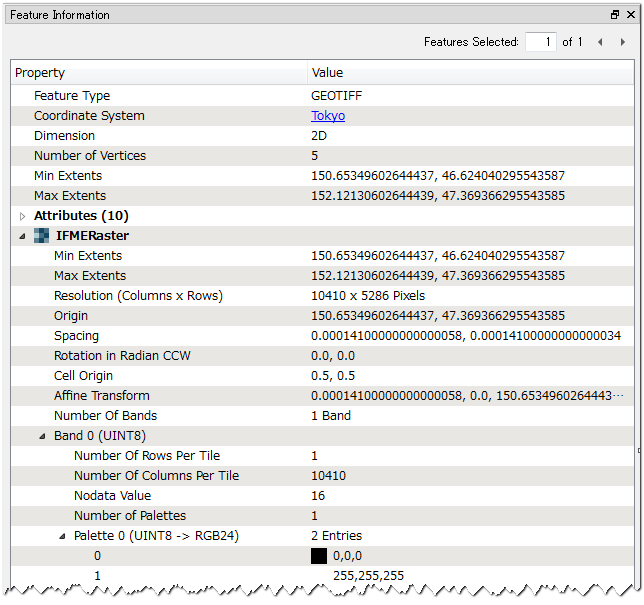
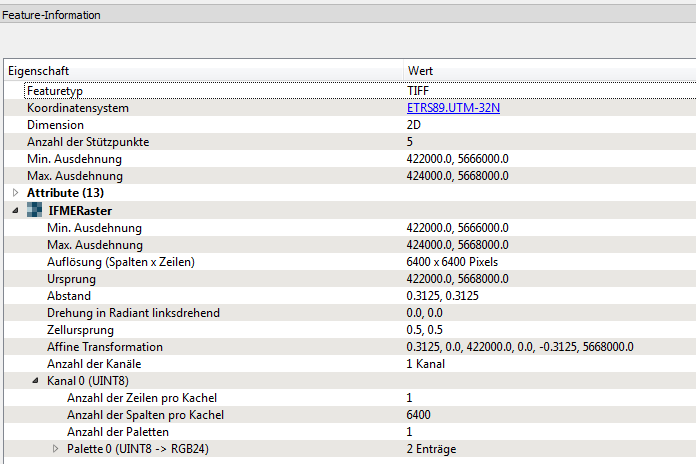
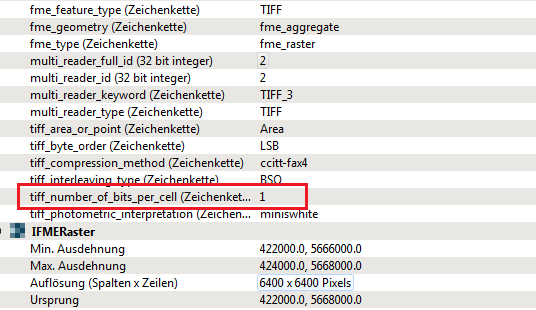
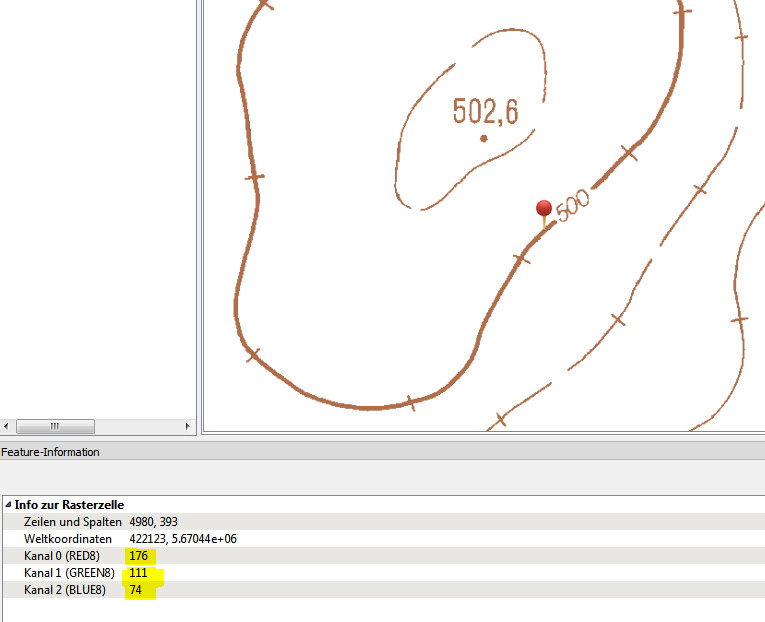
The next one shows a portion from the inspector:

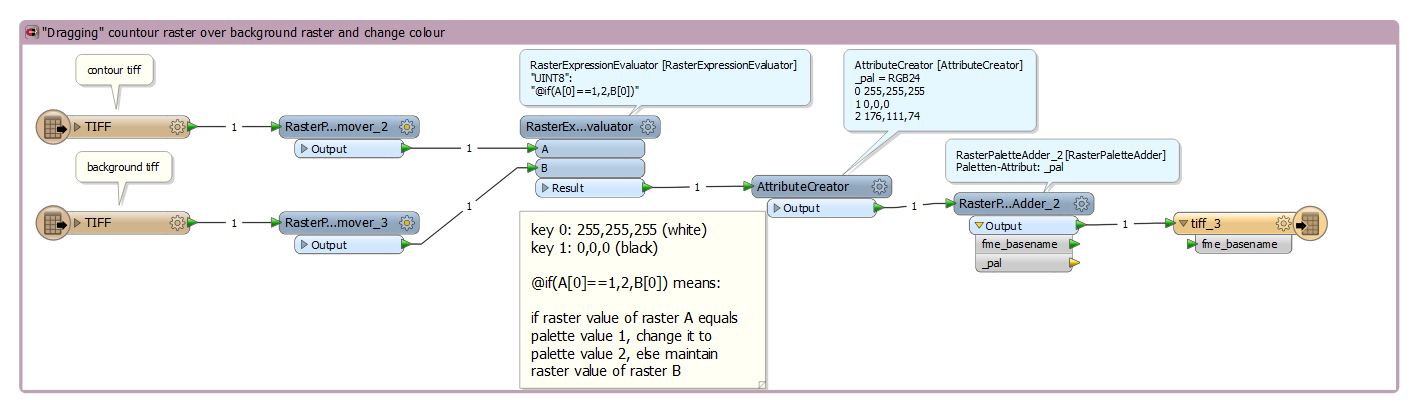
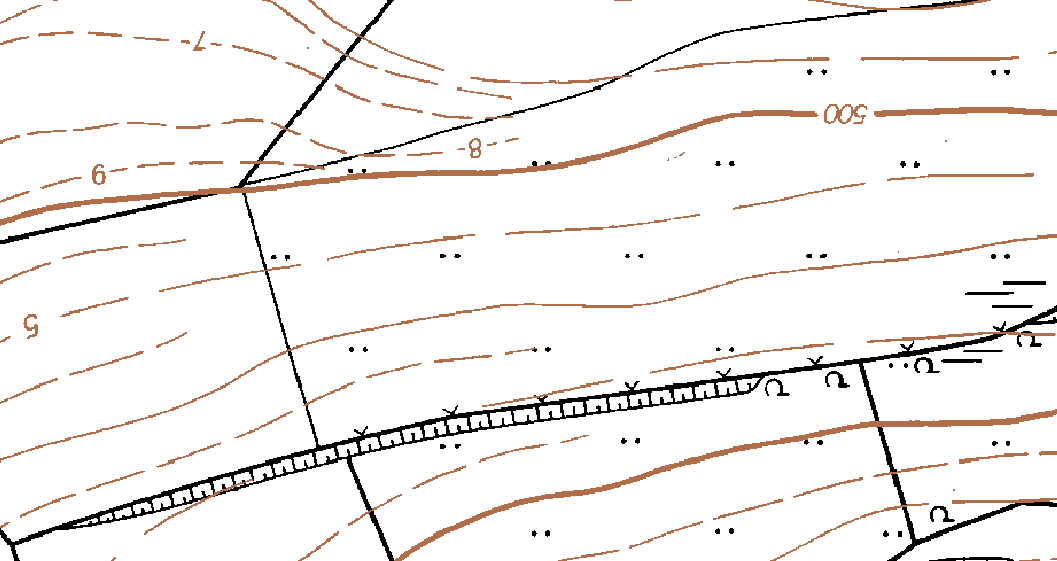
Finally I would like to overlay my resulting contour tif with other raster data as illustrated here:

Any ideas how I can achieve it?


13 replies

Badge +22

RasterExpressionEvaluator if(A[0]==0, 176,255) etc. This sets everything that is not originally black to white. If your input has brown values as well that you would like to keep, you can modify the conditional.


NoDataSetter 255. This sets the white pixels (aka "everything else" to no data).


RasterMosaicker with your other data arriving first and the contour data arriving last. Reader order or a sorter can be used to control this.
Userlevel 2
Badge +17

Hi @femo, if the original contour raster and the background raster have the same extents and resolution, and also they both are 1-band raster with palette, there might be an efficient way to change color, perform overlay, and also resolve file size issue at once. Can you show us the properties of the two rasters displayed on the Feature Information window of Data Inspector? like this.

Example:

Badge

Hi @takashi,

attached you find the feature information of the countour raster.

Userlevel 2
Badge +17

Hi @takashi,

attached you find the feature information of the countour raster.

@femo, thanks for posting the screenshot. I can see a Palette definition containing 2 entries. I'd like to know its concrete contents. i.e. the pairs of key value and RGB value.

The properties (extents, resolution, and palette definition) of another raster (background) is the same as this contour raster?

Userlevel 2
Badge +17

@femo, assuming that the extents and resolution of the background raster are the same as the contour raster and the palette definition is 'key=0 : RGB=0,0,0; key=1 : RGB=255,255,255', this workflow performs overlay and changes color simultaneously, and also the destination file size won't be so larger. If the extents and/or resolution are different, consider modifying one of them beforehand, so that the two rasters will have the same extents and resolution.

Userlevel 2
Badge +17

Hi @takashi,

attached you find the feature information of the countour raster.

@femo, assuming that the extents and resolution of the background raster are the same as the contour raster and the palette definition is 'key=0 : RGB=0,0,0; key=1 : RGB=255,255,255', this workflow performs overlay and changes color simultaneously, and also the destination file size won't be so larger. If the extents and/or resolution are different, consider modifying one of them beforehand, so that the two rasters will have the same extents and resolution.

Badge

Hi @takashi,

thanks a lot for your support! It helped me a lot.

It works fine as long as the overlay of the two raster is concerned. However, I expected the new palette to contain 3 entries instead of only 2 entries as in the old palette. This is not the case in the new tiff file. The new palette only consists of two entries. As a result, in the new tiff, both, background and contours are black. However, in the inspector before writing the file, the result looks perfect, the Palette contains three values.

What am i doing/thinking wrong?

Userlevel 2
Badge +17

Hi @takashi,

thanks a lot for your support! It helped me a lot.

It works fine as long as the overlay of the two raster is concerned. However, I expected the new palette to contain 3 entries instead of only 2 entries as in the old palette. This is not the case in the new tiff file. The new palette only consists of two entries. As a result, in the new tiff, both, background and contours are black. However, in the inspector before writing the file, the result looks perfect, the Palette contains three values.

What am i doing/thinking wrong?

Hi @femo, have you modified some writer parameters?

Userlevel 2
Badge +17

Hi @takashi,

thanks a lot for your support! It helped me a lot.

It works fine as long as the overlay of the two raster is concerned. However, I expected the new palette to contain 3 entries instead of only 2 entries as in the old palette. This is not the case in the new tiff file. The new palette only consists of two entries. As a result, in the new tiff, both, background and contours are black. However, in the inspector before writing the file, the result looks perfect, the Palette contains three values.

What am i doing/thinking wrong?

If you have set 1 to the 'Number of Bits per Cell' parameter in the writer feature type (Format Parameters tab), the number of palette entries (i.e. possible cell values) will be limited to 2 (= 2^1). Since the raster requires at least 3 entries, the parameter value should be 2 or more. (2^2 = 4 > 3)

Badge

Hi @takashi,

attached you find the feature info before writing to a file (3 palette entries as expected):

I followed your advice and set the value for

“Number of Bits Per Cell” to 2.

However, the resulting tiff still contains only two palette entries, one for black, one for white.

Do you have any other idea/advice?

Userlevel 2
Badge +17

Hi @takashi,

attached you find the feature info before writing to a file (3 palette entries as expected):

I followed your advice and set the value for

“Number of Bits Per Cell” to 2.

However, the resulting tiff still contains only two palette entries, one for black, one for white.

Do you have any other idea/advice?

I guess that the 'tiff_number_of_bits_per_cell' attribute has been propagated from the source tiff data and it causes the unexpected result. Try exposing and then removing this (AttributeExposer and AttributeRemover).

Badge

Hello @takashi,

thumb up, your guess was absolutely right! The same was true for the compression method, which I also had to expose and remove. What a tricky issue!

Well, I am glad. Thanks a lot for your pacience.

Userlevel 2
Badge +17

Hello @takashi,

thumb up, your guess was absolutely right! The same was true for the compression method, which I also had to expose and remove. What a tricky issue!

Well, I am glad. Thanks a lot for your pacience.

@femo, good to hear that you have accomplished the goal. In this case, the BulkAttributeRemover may also be helpful to remove all attributes prefixed by 'tiff_'. You don't need to expose the attributes. FYI

Reply