Question

AppearanceSetter, Geotiffs and ESRI multipatches: stop tiling texture when using 'Top Down Georeferenced'?


Badge

I've been trying to apply an image as a texture to a vertical wall (from CAD 3D solid to Geodatabase multipatch format). As a brief summary my current workflow is:

1. de-aggregate CAD 3D solid and select vertical wall of interest to apply texture to

2. swap coordinates Y<>Z so that the vertical wall has a top-down view

3. use the AppearanceSetter transformer to apply a GeoTiff using the 'texture coordinate generation parameters' settings: 'Use Existing Texture Coordinates = Yes and 'Texture Mapping Type = Top Down Georeferenced'

4. swap coordinates Y<>Z again so that the wall moves back to its vertical position

5. write to an ESRI geodatabase as a multipatch

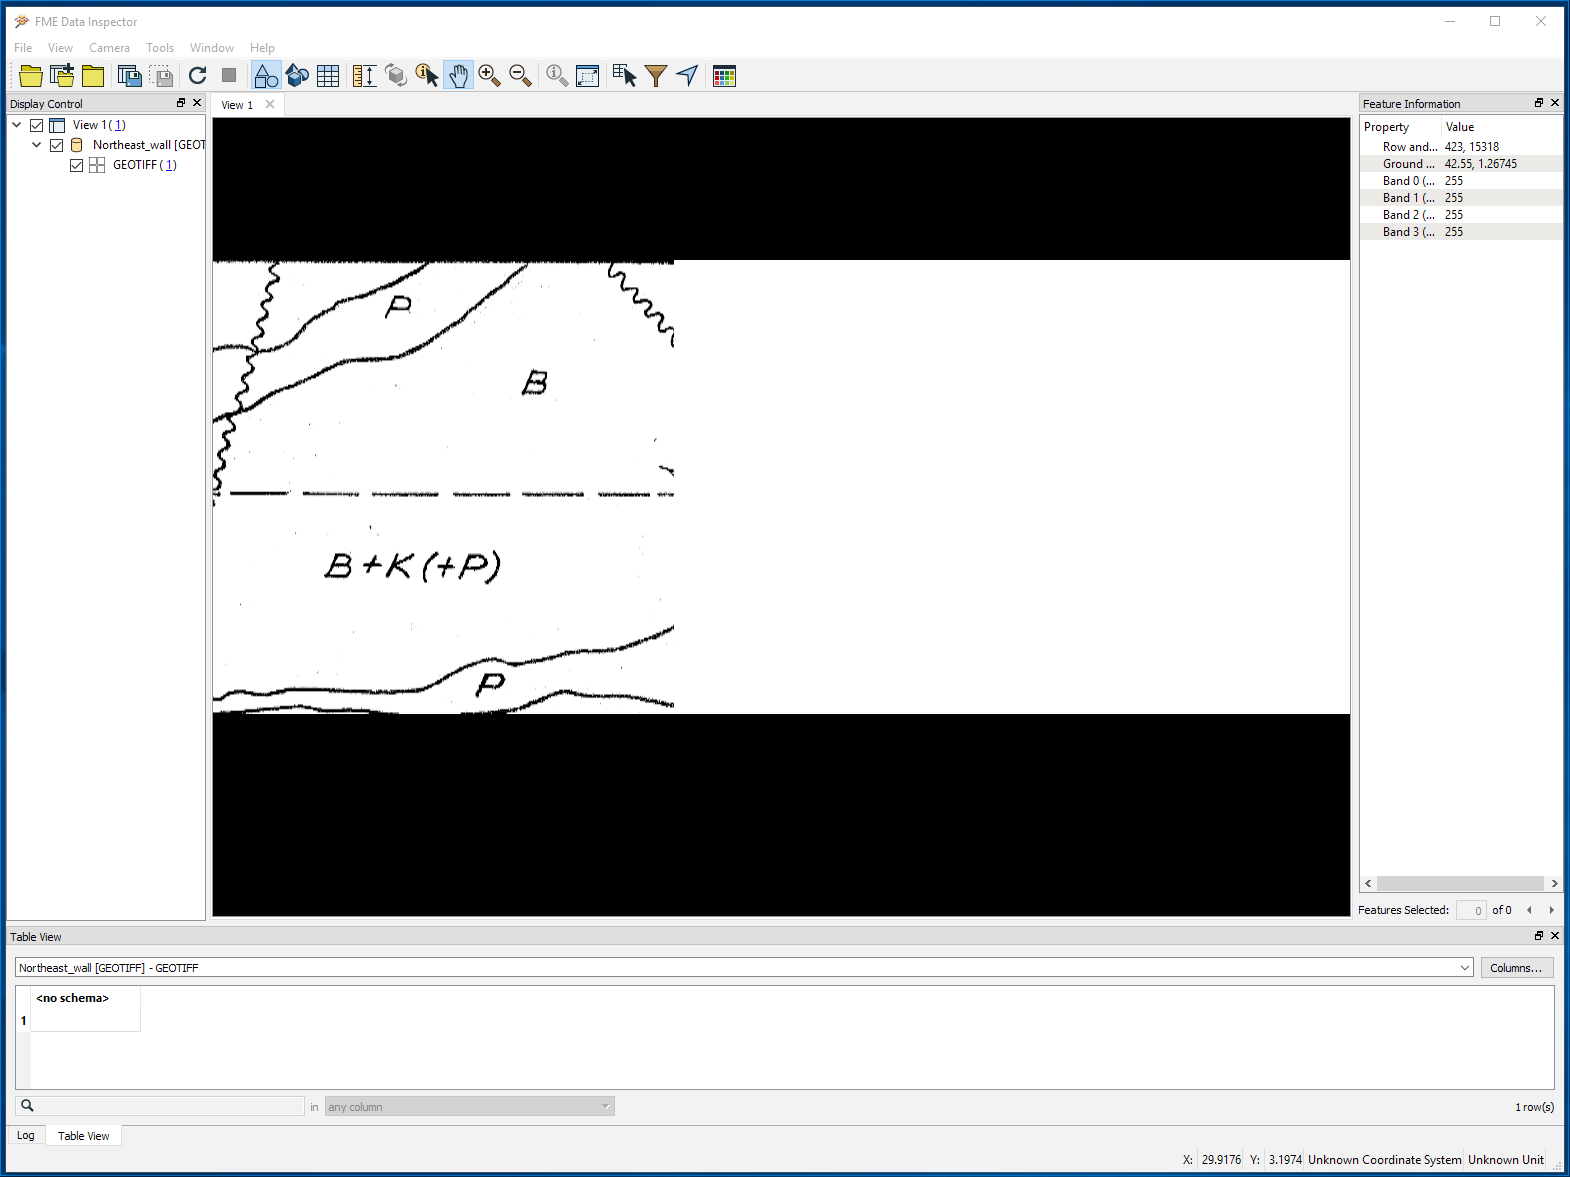
The result is that the geotiff is applied at the correct location as a texture BUT then areas of nothing (ie. area where the background colour can't be modified, but the multipatch is still there) are tiled alternately with the image across the rest of the mulitpatch.

I've tried changing various settings in the 'Texture Parameters' for the AppearanceSetter, but without any luck.

I tried editing the geotiff so that the image covers the entire multipatch, but then no texture is applied, or it's being applied incorrectly. Note: I can modify the image (extend the background) to cover some of the multipatch but it seems like as soon as I get half way across the multipatch the texture no longer applies correctly or it's not applying at all.

I'm using FME Desktio 2018.0.1.0 Build 18310 and ArcGIS 10.4


14 replies

Userlevel 2
Badge +17

Hi @afischer,

Please try setting the Texture Mapping Type to 'Surface Normal in Ground Units' instead. With this setting, you no longer need to do the coordinate swap.

The texture should wrap if is not large enough to cover the entire multipatch.

Badge

Hi @DaveAtSafe,

I just tried this (after disabling the coordinate swap), but it doesn't work. The image is applied, but not correctly.

It looks like this:

2018-06-08-15-25-27-untitled-arcscene.png

When it should look something like this (except the area circled in red which is where the image and blank areas are wrapping/tiling):

2018-06-08-15-18-54-untitled-arcscene.png

Userlevel 2
Badge +17

Hi @DaveAtSafe,

I just tried this (after disabling the coordinate swap), but it doesn't work. The image is applied, but not correctly.

It looks like this:

2018-06-08-15-25-27-untitled-arcscene.png

When it should look something like this (except the area circled in red which is where the image and blank areas are wrapping/tiling):

2018-06-08-15-18-54-untitled-arcscene.png

Hi @afischer,


Are you able to share the texture image with me? If you don't want to make it public, you can send directly to me at dave.campanas@safe.com.


Badge
Hi @afischer,


Are you able to share the texture image with me? If you don't want to make it public, you can send directly to me at dave.campanas@safe.com.


I'll send it to you directly, thank you


Badge
Hi @afischer,


Are you able to share the texture image with me? If you don't want to make it public, you can send directly to me at dave.campanas@safe.com.


The image is too big to send to you via email, can I send it in a different way?


Userlevel 2
Badge +17
The image is too big to send to you via email, can I send it in a different way?


Sure, you can send me a download link (ie. Google Drive, Dropbox), or upload it to ftp.safe.com/incoming.


Userlevel 2
Badge +17

Hi @DaveAtSafe,

I just tried this (after disabling the coordinate swap), but it doesn't work. The image is applied, but not correctly.

It looks like this:

2018-06-08-15-25-27-untitled-arcscene.png

When it should look something like this (except the area circled in red which is where the image and blank areas are wrapping/tiling):

2018-06-08-15-18-54-untitled-arcscene.png

Hi @afischer,


After examining the image you sent, the blank area seems to be part of it. I took a screen shot of the transition from image to blank:


The blank area takes up about half the image on the right, starting at column 10747. You could use a Clipper to clip the image before using it as an appearance.
Badge
Hi @afischer,


After examining the image you sent, the blank area seems to be part of it. I took a screen shot of the transition from image to blank:


The blank area takes up about half the image on the right, starting at column 10747. You could use a Clipper to clip the image before using it as an appearance.
Hi @DaveAtSafe


I added the blank part to try to cover the rest of the multipatch vertical wall. But when I extend that blank area to more than half the multipatch then the texture doesn't apply at all. When a smaller blank area is used, the image wraps alternately with an empty area. I either want to 1) stop the wrapping or 2) be able to extend the blank area to cover the entire multipatch area correctly (right now when I extend the image to cover the whole multipatch, the texture doesn't apply at all).


I'll send you the CAD file so that you can re-create the multipatch


Userlevel 2
Badge +17
Hi @DaveAtSafe


I added the blank part to try to cover the rest of the multipatch vertical wall. But when I extend that blank area to more than half the multipatch then the texture doesn't apply at all. When a smaller blank area is used, the image wraps alternately with an empty area. I either want to 1) stop the wrapping or 2) be able to extend the blank area to cover the entire multipatch area correctly (right now when I extend the image to cover the whole multipatch, the texture doesn't apply at all).


I'll send you the CAD file so that you can re-create the multipatch


Hi @afischer,


The AppearanceSetter likes to align the images along the standard axes, and the surface is a little tilted.


I modified the workspace to use the GCPs to align the surface with the image, then revert back to the original alignment after apply the appearance. This seems to produce good results whether the image is tiled or not.


Please try it out and let me know if you get the results you want.


m-cad3d2gdb-with-texture.fmw
Badge
Hi @afischer,


The AppearanceSetter likes to align the images along the standard axes, and the surface is a little tilted.


I modified the workspace to use the GCPs to align the surface with the image, then revert back to the original alignment after apply the appearance. This seems to produce good results whether the image is tiled or not.


Please try it out and let me know if you get the results you want.


m-cad3d2gdb-with-texture.fmw
Hi @DaveAtSafe,


Thank you for this. It works with the shorter image (except for the wrapping), but as soon as I expand the image (extend the white area) to cover the whole multipatch, and re-georeference the image, the texture is distorted. I also tested using just a CSV file with control coordinates instead of the xml file, but this resulted in a similar image distortion.


I don't want the image to wrap because the purpose of this exercise is to apply geology on a vertical tunnel wall only where it should be showing.


If I send you the extended image, are you able to test it at your end again?


Userlevel 2
Badge +17
Hi @DaveAtSafe,


Thank you for this. It works with the shorter image (except for the wrapping), but as soon as I expand the image (extend the white area) to cover the whole multipatch, and re-georeference the image, the texture is distorted. I also tested using just a CSV file with control coordinates instead of the xml file, but this resulted in a similar image distortion.


I don't want the image to wrap because the purpose of this exercise is to apply geology on a vertical tunnel wall only where it should be showing.


If I send you the extended image, are you able to test it at your end again?


I'd be happy to test the new image.


Userlevel 2
Badge +17
Hi @DaveAtSafe,


Thank you for this. It works with the shorter image (except for the wrapping), but as soon as I expand the image (extend the white area) to cover the whole multipatch, and re-georeference the image, the texture is distorted. I also tested using just a CSV file with control coordinates instead of the xml file, but this resulted in a similar image distortion.


I don't want the image to wrap because the purpose of this exercise is to apply geology on a vertical tunnel wall only where it should be showing.


If I send you the extended image, are you able to test it at your end again?


Hi @afischer,


I did some experimentation, and the maximum width or height for an ArcGIS compatible texture seems to be 32767. Images larger than that are replaced with a color texture, up to a width of 65534. After that, a smaller random texture image seems to be used, which is what we get from your extended geotiff.


I also noticed that when FME writes a texture whose wrap mode is set to None (which is what you want), the resulting multipatch feature in ArcGIS has its texture wrap mode set to Repeat. I have created a problem report for our development team, and will notify you as soon as it is fixed in beta.


I'm sorry, but I don't have a workaround for this issue, except to recommend breaking the walls into smaller parts in AutoCAD, so that they are suitable for use with smaller texture images.


Badge
Hi @afischer,


I did some experimentation, and the maximum width or height for an ArcGIS compatible texture seems to be 32767. Images larger than that are replaced with a color texture, up to a width of 65534. After that, a smaller random texture image seems to be used, which is what we get from your extended geotiff.


I also noticed that when FME writes a texture whose wrap mode is set to None (which is what you want), the resulting multipatch feature in ArcGIS has its texture wrap mode set to Repeat. I have created a problem report for our development team, and will notify you as soon as it is fixed in beta.


I'm sorry, but I don't have a workaround for this issue, except to recommend breaking the walls into smaller parts in AutoCAD, so that they are suitable for use with smaller texture images.


Hi @DaveAtSafe,


Thank you for looking further into this. It's good to know that there may be a solution at some point.


Also, I did try clipping the tunnel wall in FME, but was never able to reconstruct it properly (there were always spikes in the data at the edges); I didn't go very far down this path though because I would rather not change the geometry of the original data too much if it's not necessary.


Please keep me posted as to when there is a fix to the wrapping issue in beta.


Cheers,


Badge
Hi @DaveAtSafe,


Thank you for looking further into this. It's good to know that there may be a solution at some point.


Also, I did try clipping the tunnel wall in FME, but was never able to reconstruct it properly (there were always spikes in the data at the edges); I didn't go very far down this path though because I would rather not change the geometry of the original data too much if it's not necessary.


Please keep me posted as to when there is a fix to the wrapping issue in beta.


Cheers,


Hi @DaveAtSafe,


Just to follow up. This is working really well now. I even have the image going around corners. The solution was to reduce the size of the image. I had it set to 360ppi in an image editor; reducing this to 100ppi made all the difference.


Thank you for the insight about the max width for ESRI textures!


Reply